Rocky Mountain Element Conversion

  • Thread starter Deleted member 4366
  • Start date
D

Deleted member 4366

Guest
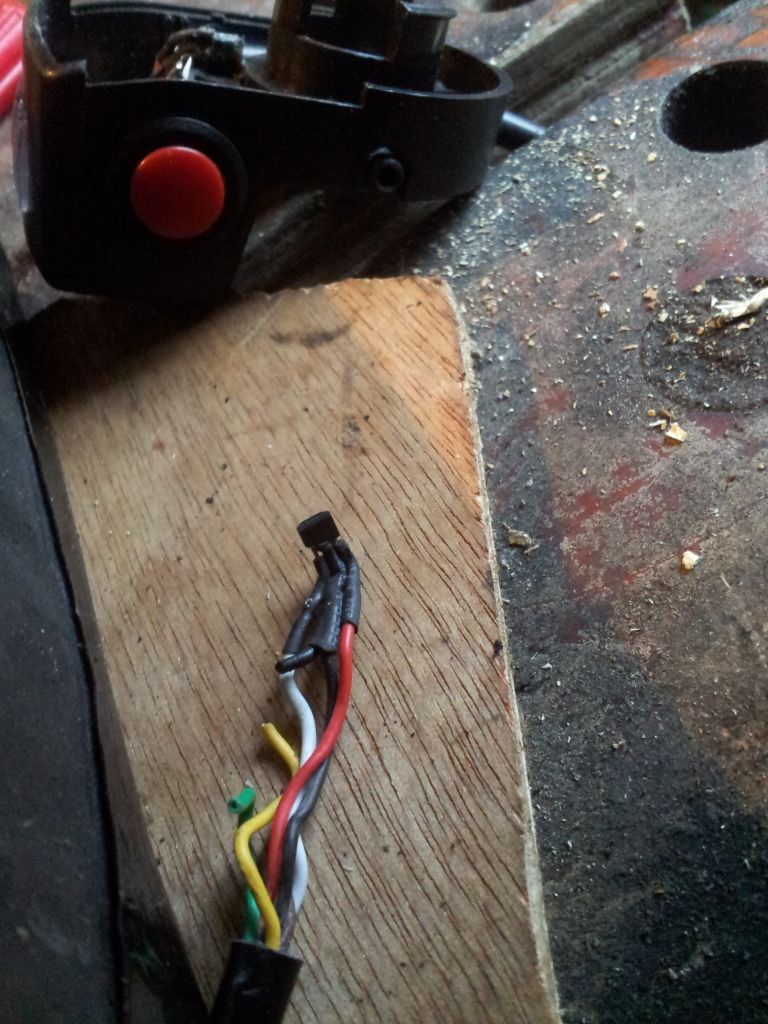
I started the conversion today. This one will have one or more novel features. which I'm still trying to work out, so might be a bit slower than what I normally do. I snagged the bike for £380 and the kit cost about £500 including batteries, so I'm hoping to keep the total to less than £1000.

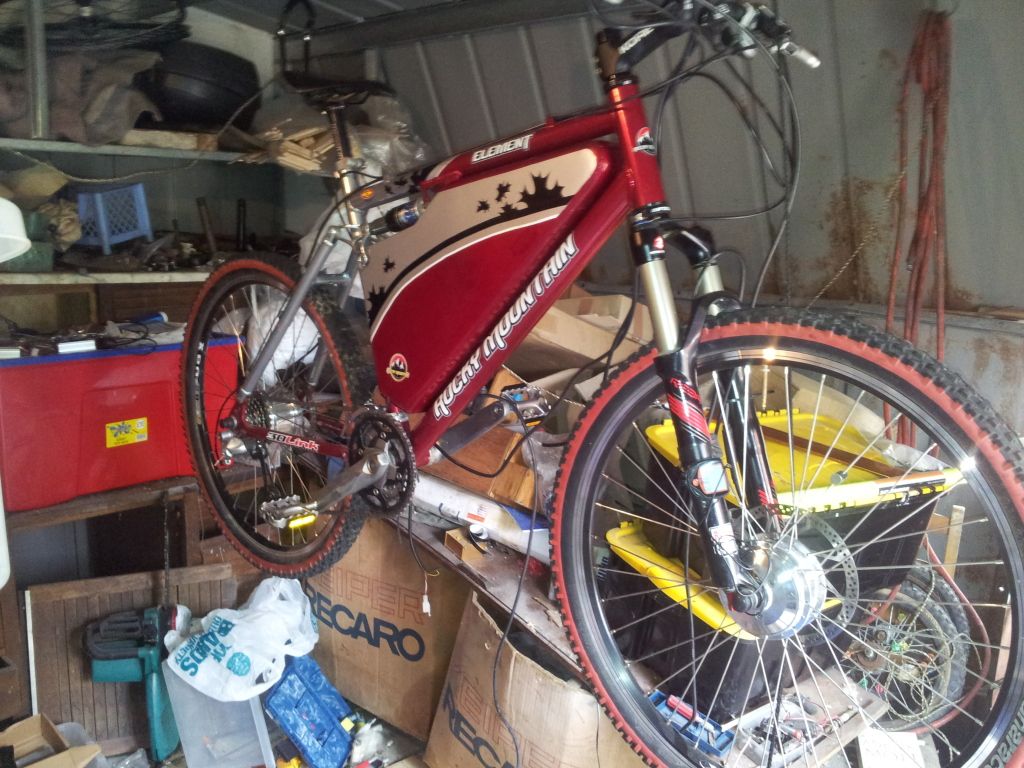
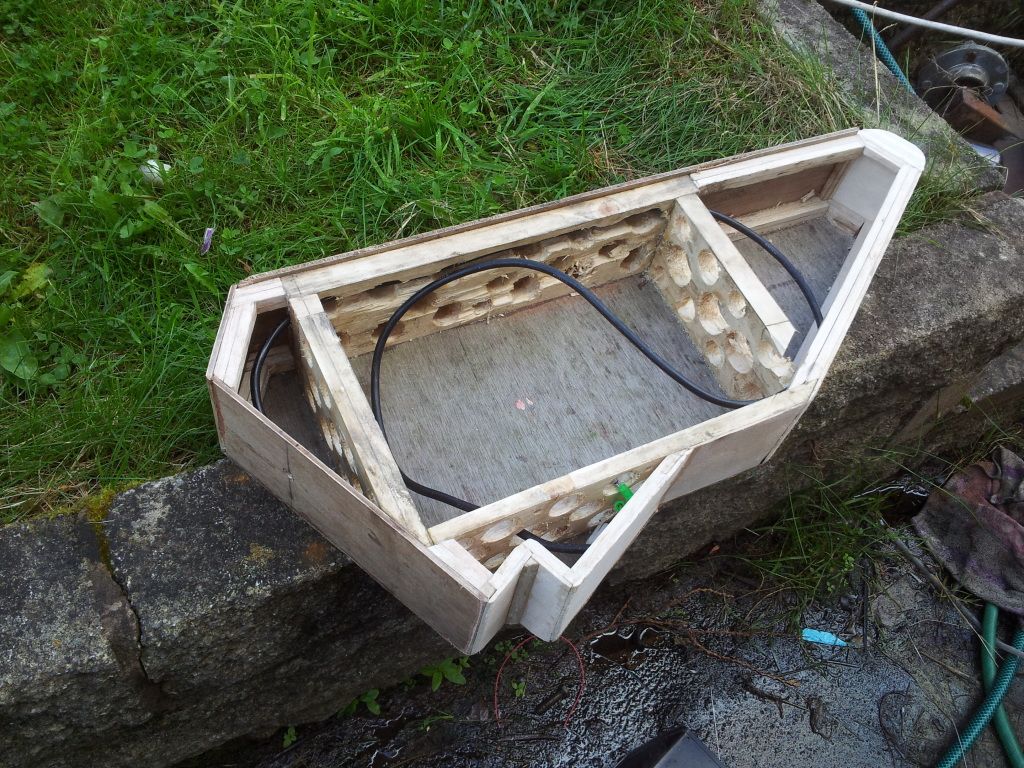
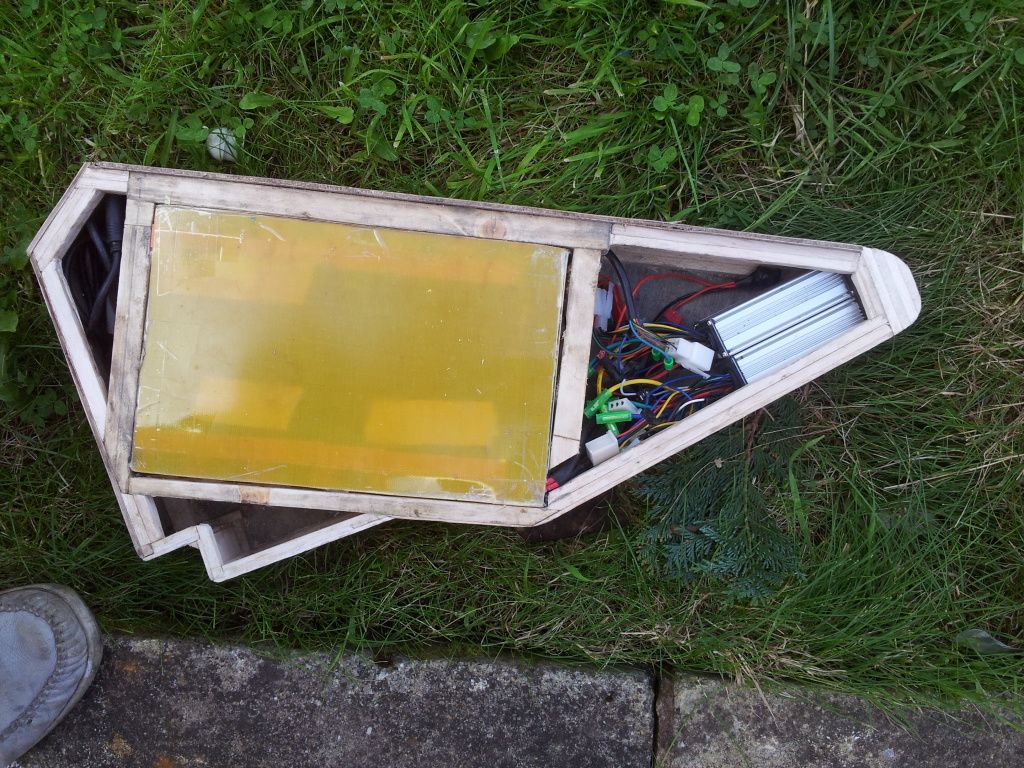
I bought this one because it's one of the few full-suspension bikes that can accommodate the 12aH LiFePO4 Headway battery in the frame triangle.


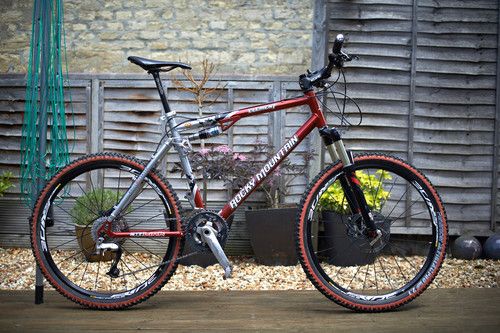
It's almost a shame to butcher this bike because it's so nice as it is. Everything about it is real quality, but I bought it for my project so here goes.

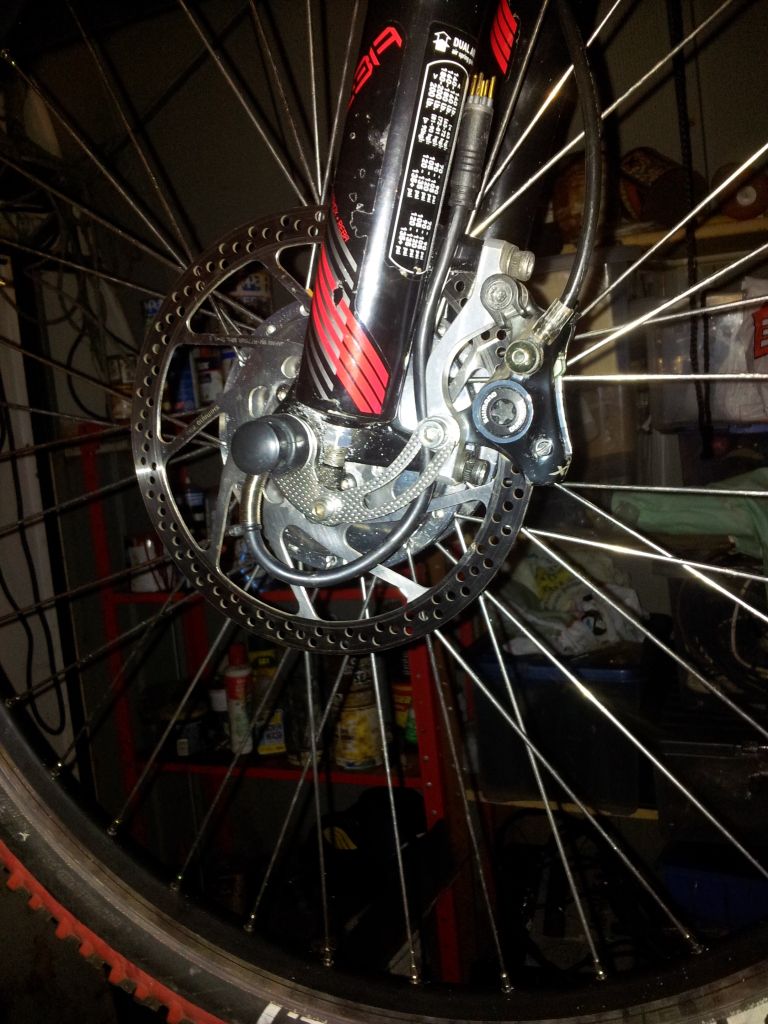
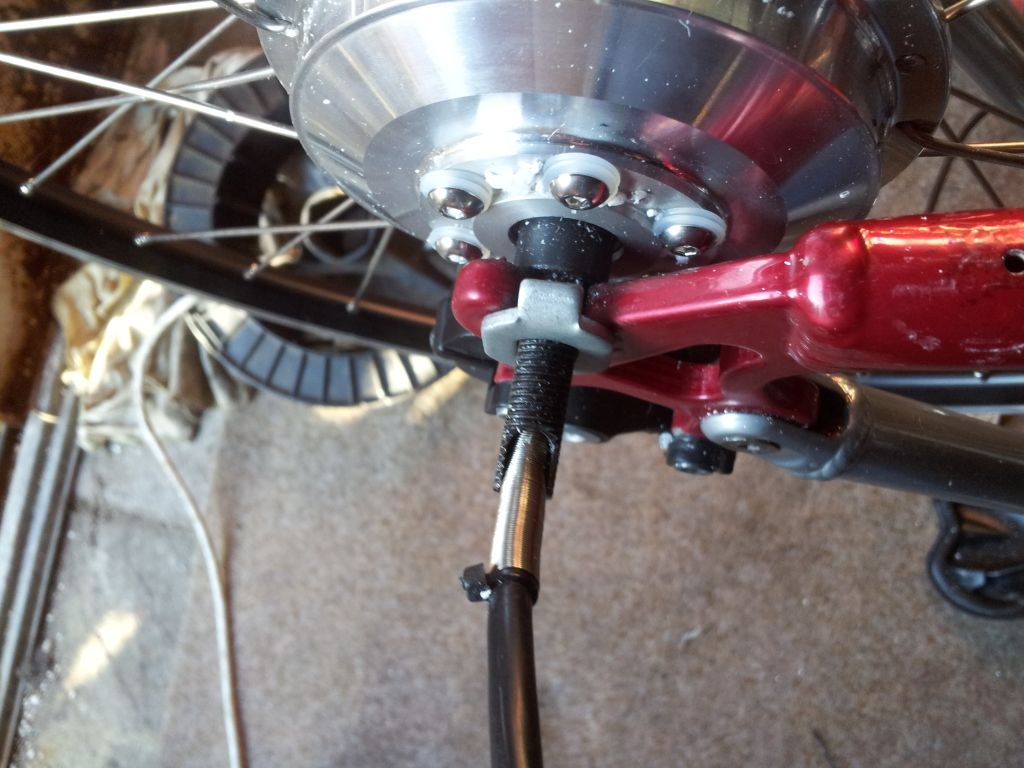
First I tried the Q100 36v 201 rpm motors in the wheels. The rear went in, but the 10mm axle wouldn't fit in the 9mm drop-outs on the Rockshox Reba forks, so out with the dremmel to widen the front dropouts, and I deepened front and rear by 1mm to centralise the axles.

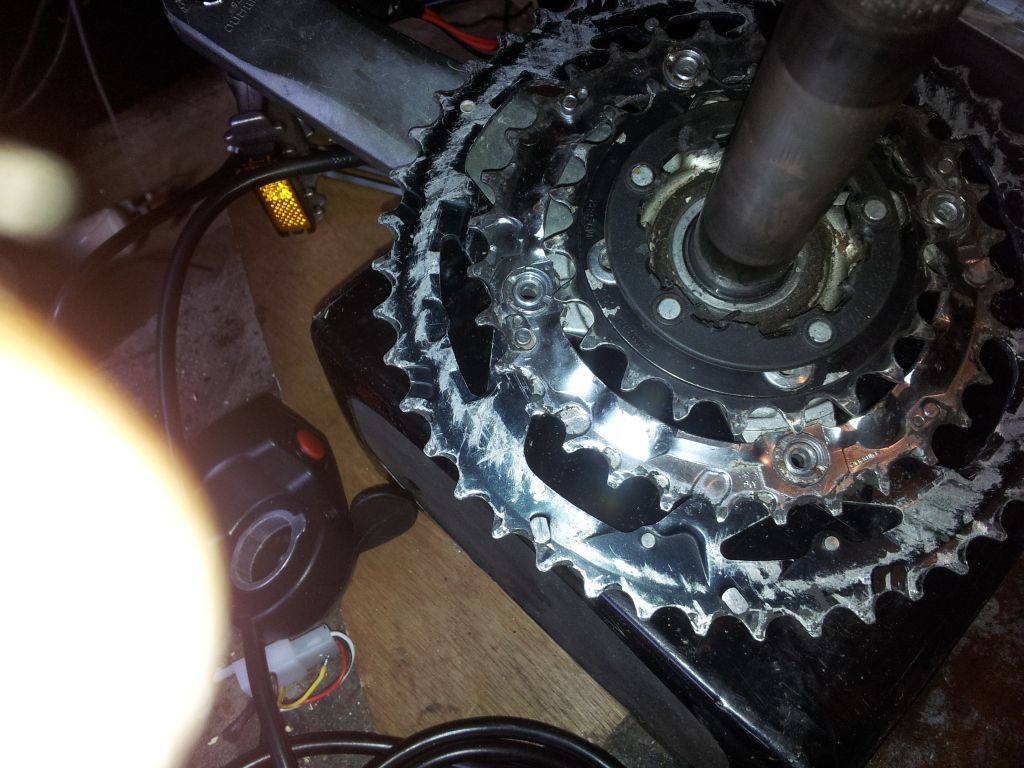
The front wheel was central, but the rear was off-set

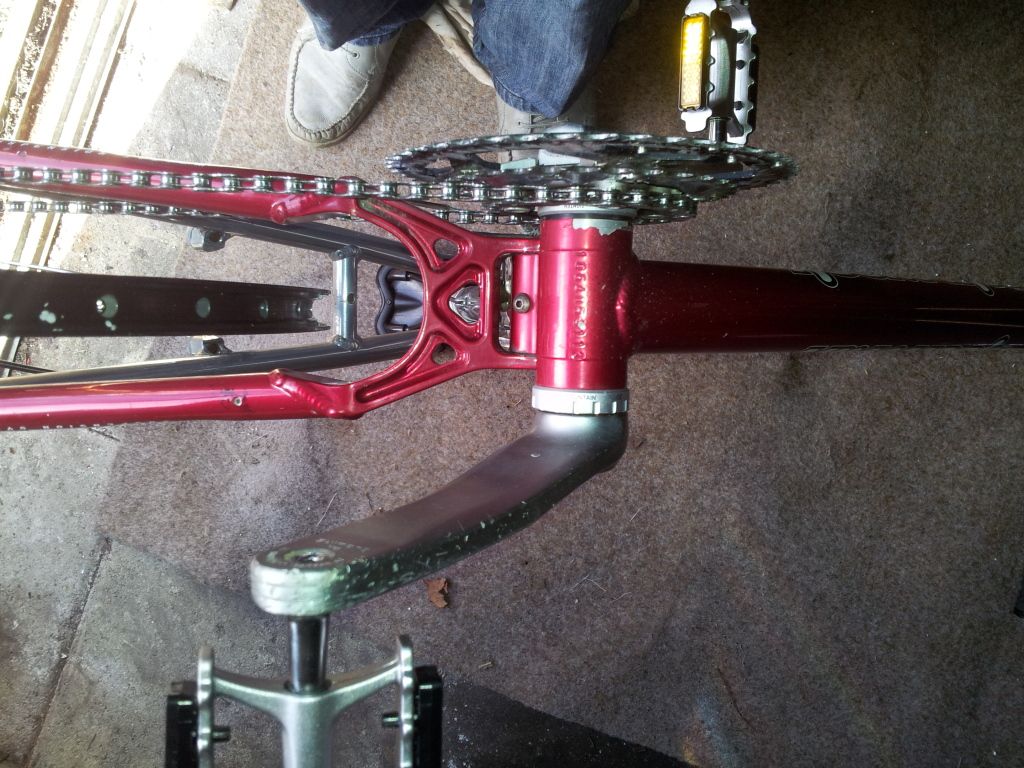
so out with my spoke key and after half-hour it was central.

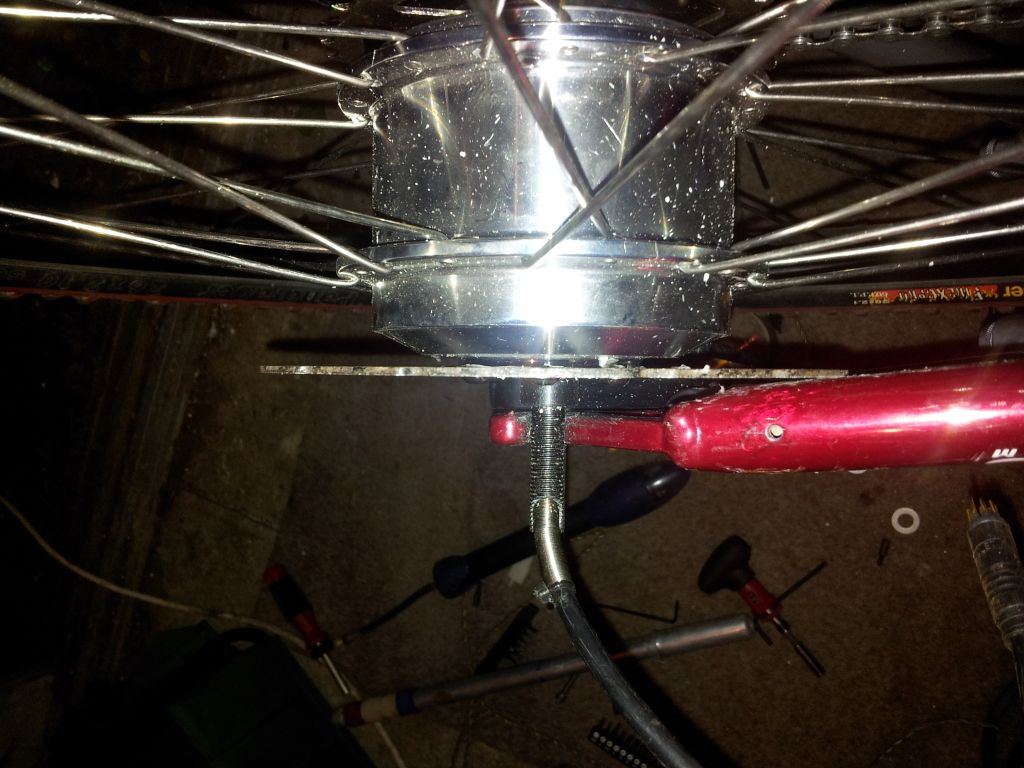
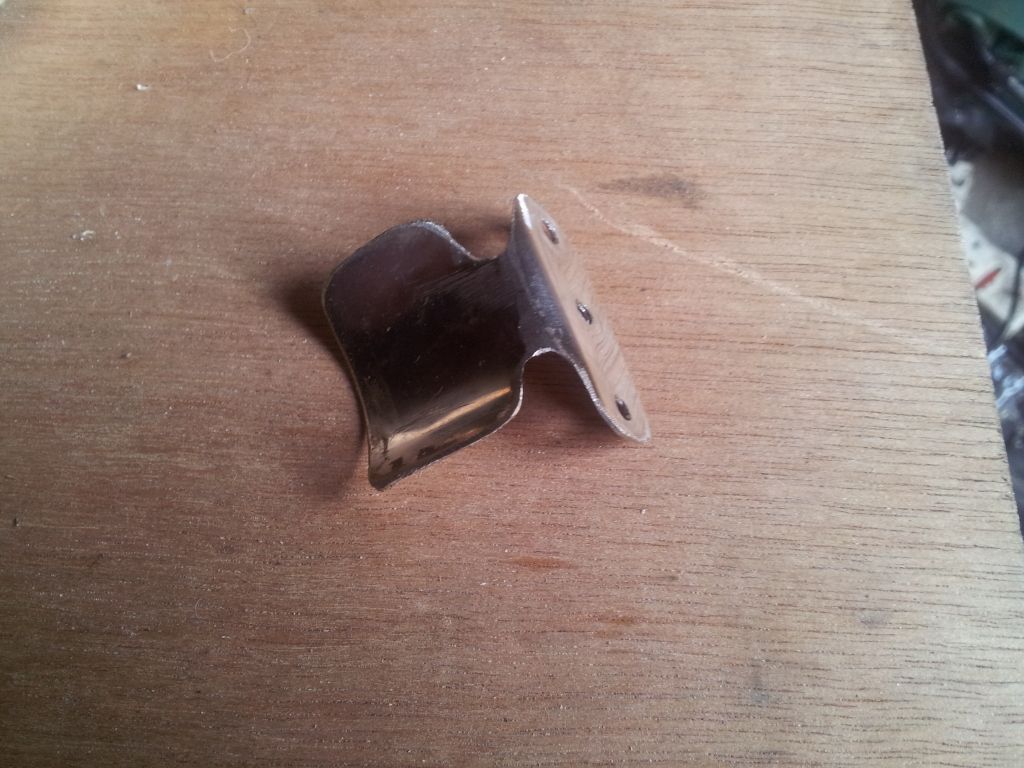
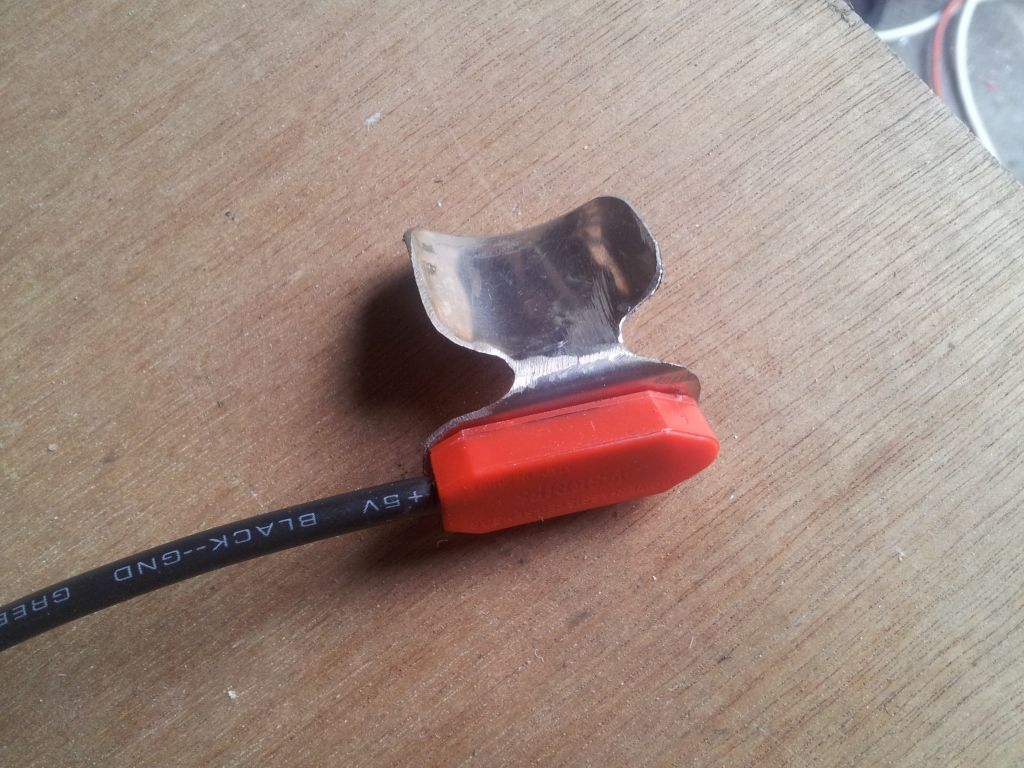
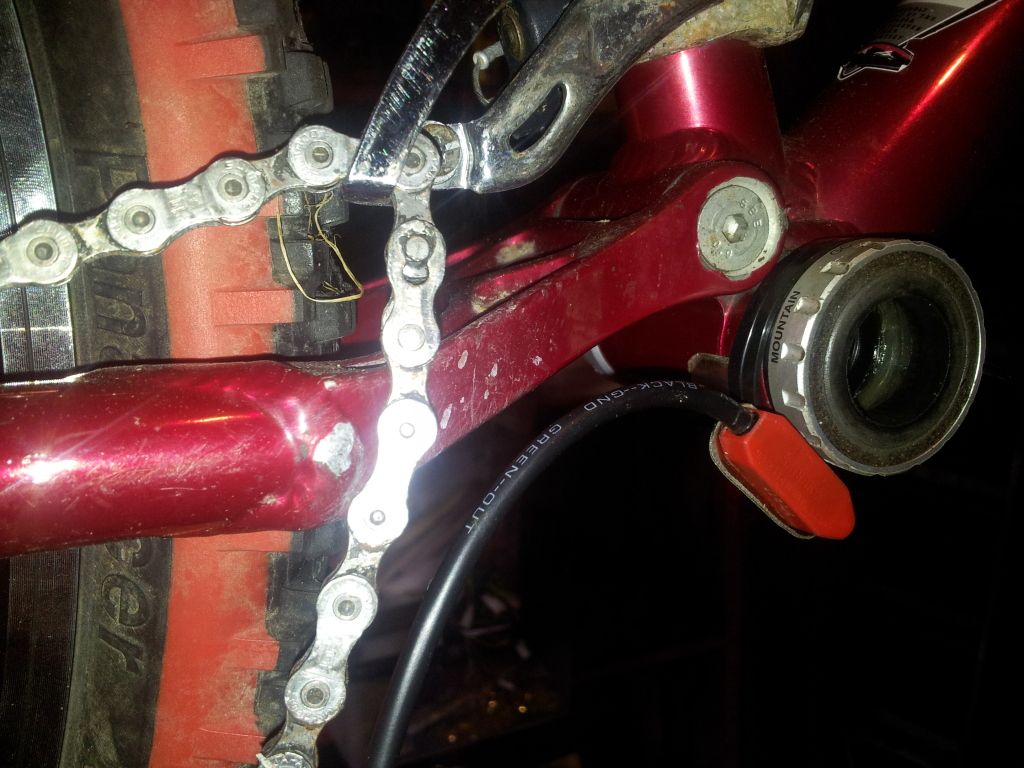
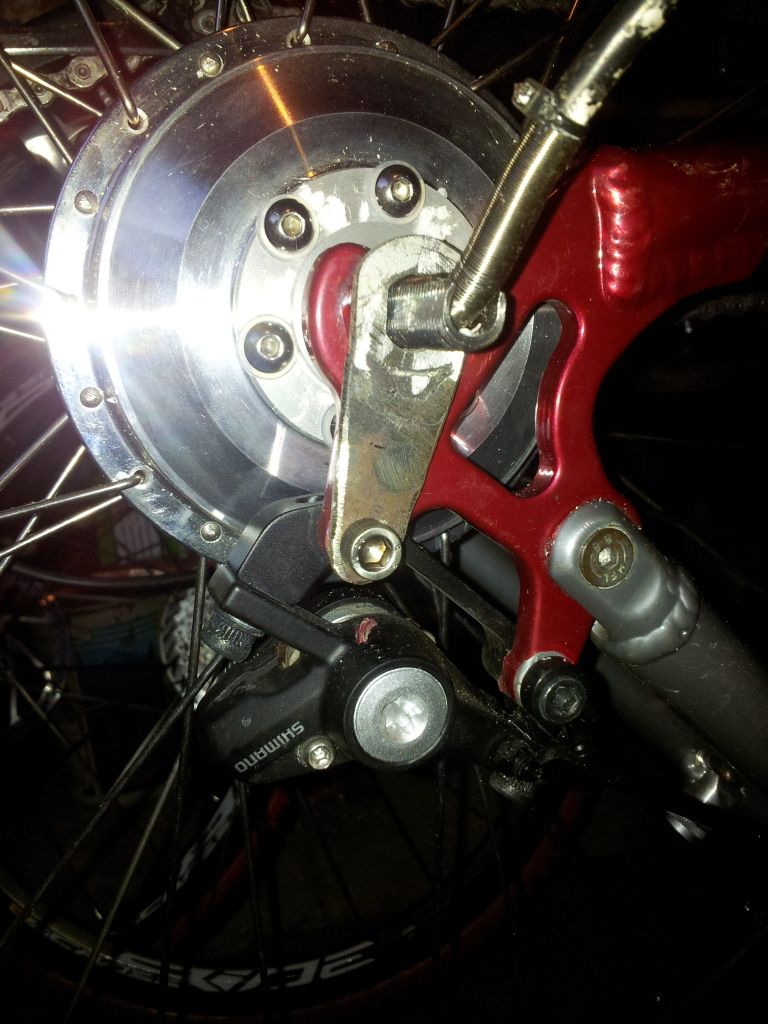
The ant-rotation washers are as good as useless. the tabs just float in mid air, so I smashed one flat and then cut a piece of steel an exact fit and welded it on to make an extension as a torque arm.

 
D

Deleted member 4366

Guest
continued because you can only have 4 photos in one thread......

I had a bit of trouble with the disk, which just touched the frame, so I added a couple of washers on the axle to lift it clear.


The rear motor/wheel is now nicely and securely installed centrally. Tomorrow I'll do the front one.

I used a DNP 11T 7 speed free-wheel, which I got from Germany because Cyclezee was out of stock. They cost about £25 and are necessary unless you like to pedal like Shanaze Reade. I'll be losing two gears therefore, but the shifters don't seem to mind that. I don't know yet whether I'll have problems with intermediate gears. The shifters seem to run up and down OK, but I haven't put it under any load yet.
 
Last edited by a moderator:
D

Deleted member 4366

Guest
I installed the front motor today with no major issues. I had to widen the drop-outs by 1mm and deepen then byabout 2mm using a dremmel with 2mm milling cutter. Everything lined up perfectly and I didn't even need to adjust the brake caliper. Again the anti-rotation washers were floating in air, so I chucked them and instead used a Cylezee torque arm which nearly fitted directly to the caliper, but was short by about 1mm, so I lengthened the slot just enough so that the caliper screw is tight against the end. That means that it's more or less in tension before any torque from the motor, which I wanted because the slot for the axle is a little bit of a loose fit. Also, there's no chance for the screw to slip in the slot.

The bike now weighs only 16kg with two motors but without the battery. I reckon about another 6kg to add, so the final weight will be about 22kg, which is less than I had was expecting.
 
Last edited by a moderator:
  • Like
Reactions: LeighPing
D

Deleted member 4366

Guest
A bit more work today. I want a pedal sensor for the rear motor, but it's not possible to fit one to a hollow-tech chainset in the normal way so I cut the centre out of the magnet ring and epoxied what was left to the inner chain-wheel.

Next to make my double throttle, I took the hall sensor out of one thumb throttle and piggy-backed it to the other. Now I have two wires coming out the throttle.
Inside the throttle

hall sensor removed
 
D

Deleted member 4366

Guest
A c couple more photos in case someone else wants to do it.
The second hall sensor epoxied in place:

The finished item:
 
  • Like
Reactions: LeighPing
D

Deleted member 4366

Guest
I connected it all up and it's running now. It was great to see both motors running with one throttle. I've got to find out how these LED panels work now. No matter what modes I selected the back wheel does 20.5mph and the front 16.5mph. I used a seperate throttle on the front and it too went up to 20.5mph. I mounted the halls one on top of the other in the double throttle, so one is 2mm further from the full throttle magnet than the other. I didn't think it would make that much difference; however, I've got some ideas to improve it. I'll try the front motor with a KU93 tomorrow to see if the three speed switch will boost the speed.
 
C

Cyclezee

Guest
An interesting and creative project d8veh, I look forward to seeing the completed bike;)
 
D

Deleted member 4366

Guest
Thank you. Not quite so creative though because I stole a lot of the ideas from Endless Sphere, where there's some very clever guys. It shows the value of forums. I'm now working on installing the battery, controllers and other stuff. I think it'll take a while - probably more than a week- because I want it to look nice. It'll probably take a couple of iterations to get it right. The battery installation ideas are all mine.
 
C

Cyclezee

Guest
I agree d8veh, Endless Sphere is a great place for inspiration and some innovative ideas, but you obviously have the ability to put them into practice.
 

shemozzle999

Esteemed Pedelecer
Sep 28, 2009
2,826
686
Hi d8veh,

The one behind will give a lower output voltage.

I think it is important to have both sensors the same distance away from the magnet to obtain matching output voltages.

If you glue them to a separate plastic backing plate, one upsidedown to the other, with the cases touching.
Deepen the retaining slot in the throttle body and glue the plate so that joining point of the hall devices sits mid magnet you might get a better result.

It is important to ensure both faces with the device code marks are directly facing the magnet.

Data sheet for hall device (SS49E) used in throttles see fig 1 and 2 for operation characteristics:

http://sensing.honeywell.com/index.php/ci_id/50359/la_id/1/document/1/re_id/0

I think the bar magnet is made up with two magnets joined end to end thus (NS-NS or NS-SN don't know for sure) with the mid point junction giving zero Gauss, you can check this with a metal object :
 
Last edited:

wurly

Esteemed Pedelecer
Aug 2, 2008
501
9
Yeovil, Somerset
Nice to see you back here posting again D8veh, what is the advantage of twin motors? aren't you going to double the drag effect of hub motors by using two? (I know it's a small amount, but nevertheless it's there). And how do you increase speed with the speed switch settings? when i connect mine they reduce speed.
 
D

Deleted member 4366

Guest
Hi d8veh,

The one behind will give a lower output voltage.

I think it is important to have both sensors the same distance away from the magnet to obtain matching output voltages.
Yes, you're right. Unfortunately I can't see room to put them end to end in this throttle. I might give it another go later, but I've run out of thumb throttles now because they sent normal throttles with my last two kits. Anyway, I managed to improve it a bit by removing all plastic from around the halls, so that the magnet comes even closer. The front motor speed is now up to 18.5mph, so I can live with that.
 
D

Deleted member 4366

Guest
Nice to see you back here posting again D8veh, what is the advantage of twin motors? aren't you going to double the drag effect of hub motors by using two? (I know it's a small amount, but nevertheless it's there). And how do you increase speed with the speed switch settings? when i connect mine they reduce speed.
I'm not sure what the advantages are. That's why I want to try it. It sure does look nice though. These motors are very small and light, but still pack a punch. I'm trying to make a better balanced bike with the battery in the middle and a motor at each end. I don't think drag will be a problem. These motors have ver little - probably comparable with one big motor.
I did a bit more experimenting today with the three-speed switches and a KU93 controller, but I couldn't get any increase. Strange, because on my BPMs with KU93, the green and black wires joined gave a significant boost above nothing connected, but this one gave me nothing, likewise my Dahon with KU63 increased by 2mph when I connected blue and black, but nothing on this one. I'm confused!
 
D

Deleted member 4366

Guest
Did a bit more work on the pedal sensor today. I removed the sensor from its circular bracket and made my own out of a bit of SS sheet I had so that I could get it in the correct position. It took about 10 minutes with an angle grinder and drill. At first I held it with a couple of cable-ties like in the photo, but it needed to go further back. Now there is a sigle cable-tie which goes right around the BB, but it looks a bit ugly, so I think I might epoxy it in place.

I have it connected to the controller for the rear motor so that only the rear motor works with PAS. This is important because PAS doesn't really work with powerful bikes because you accelerate too quickly to keep up pedalling. It's much better on lower powered bikes.

It all works perfectly now, so only remaining tasks are to make the main switch, battery box and install everything in the box.

Pas bracket photos:


  • Like
Reactions: LeighPing
D

Deleted member 4366

Guest
Did a bit more today. I need brake cut-offs, but have nice hydraulic brakes. The back one is a Shimano Deore XT and had a rather convenient plate on the back held on with two screws - perfect to mount a bracket to hold the switch that I removed from a kit ebrake. I have a Tektro front hydraulic brake with inbuilt switch, so that'll do for the front.


Next was to make a switch for the battery so I don't have to unplug it. I used Jeremy Harris's design with inrush control. It uses 4 IRFB4110 FETs to do the switching operated by a low current toggle switch. I connected it to a Speedict and made a little panel with USB socket to dowload data, and charge socket.
 
  • Like
Reactions: LeighPing
D

Deleted member 4366

Guest
Nearly finished now. Just got final wiring to do and I should be riding tomorrow.


Battery box condtrucion from softwood, plywood and lots of balsa to keep the weight down. It weighs 1kg.


  • Like
Reactions: LeighPing

Kenny

Esteemed Pedelecer
Jun 13, 2007
383
111
West of Scotland
Lookin Good....... Always enjoy your build posts and this one is a real beaut.
Your in frame battery/controller housing is soo neat!

You really should go into business :), I'm sure there would be a big demand for your excellent bikes.
 

saneagle

Esteemed Pedelecer
Oct 10, 2010
4,137
2,056
Telford
This is an absolute perfect E-Bike.I am privelledged to live near D8veh and I must say seeing his creations is always an absolute treat for me.

I really cannot wait to have a go on this one! It looks great in the photo's, but even better when you are standing next to it.

I am also lucky to not only have him as a best friend, but he also helps me with my bike all the time.

Lets hope the sun comes out soon, happy cycling.
 
  • Like
Reactions: LeighPing
C

Cyclezee

Guest
That is one wicked creation D8veh, so many skills, from carpentry and engineering to e-bike electrics:D
 
  • Like
Reactions: LeighPing