Taking a Tongxin motor apart.

jerrysimon

Esteemed Pedelecer
Aug 27, 2009
3,292
112
Cambridge, UK
This post is part of a set of posts following my project to "E" my Brompton :

A. Wheel Building - Tongxin in Brompton wheel

B. Building a small A123 Battery Pack

C. E-Brompton First Ride/Tweaks

D. Taking a Tongxin motor apart

You may also like to check out daniel.weck's post here which covers the simlar use of Tongxin & Bafang motors and inpired me to give this a go.

A couple of related links as I was building

Throttle Controls


Connectors

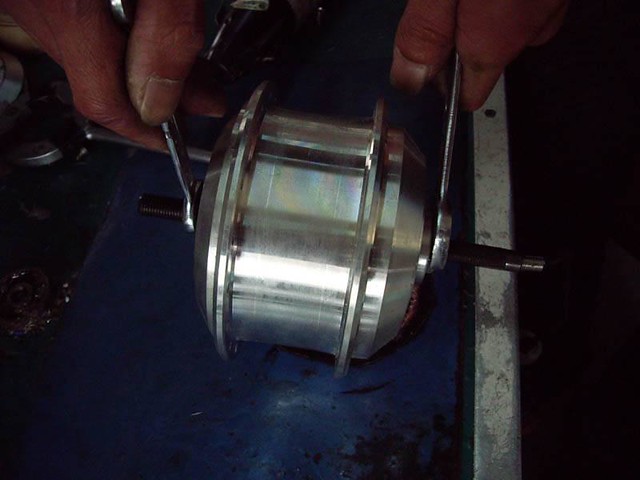
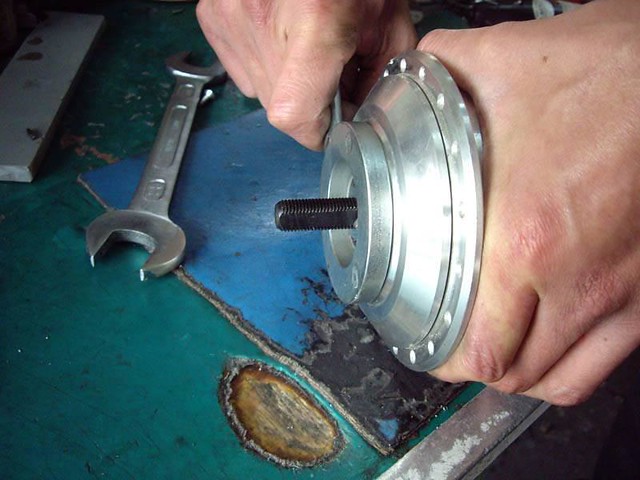
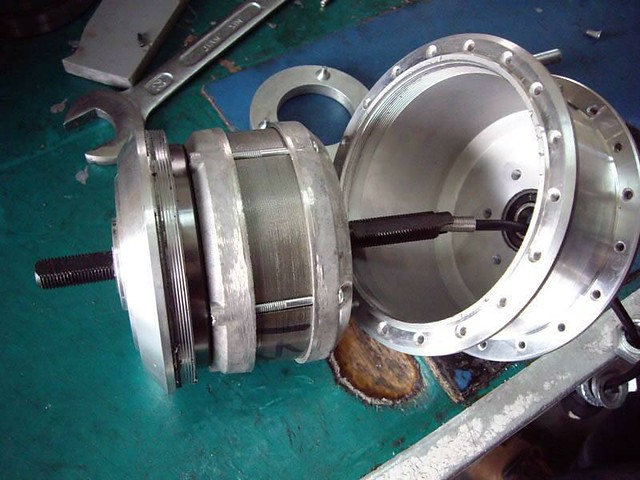
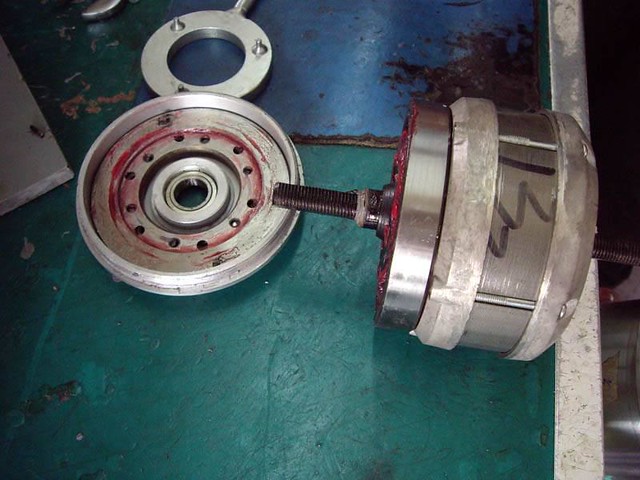
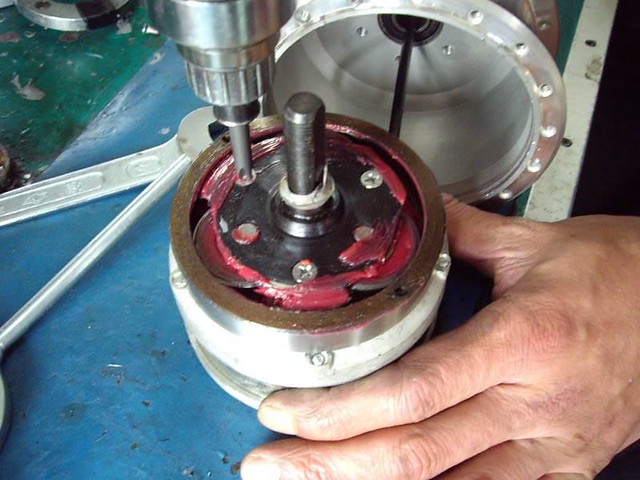
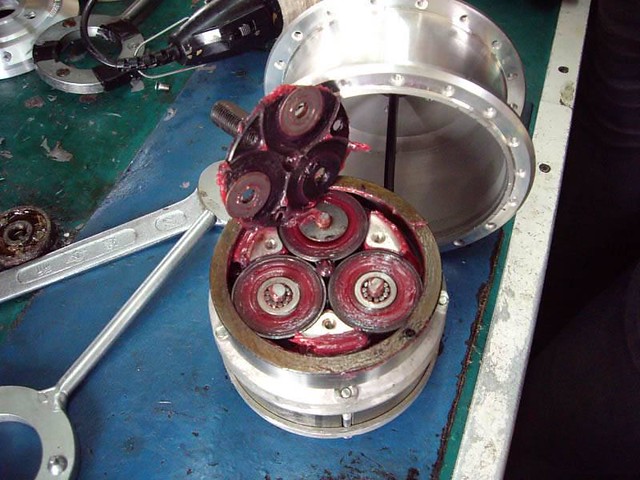
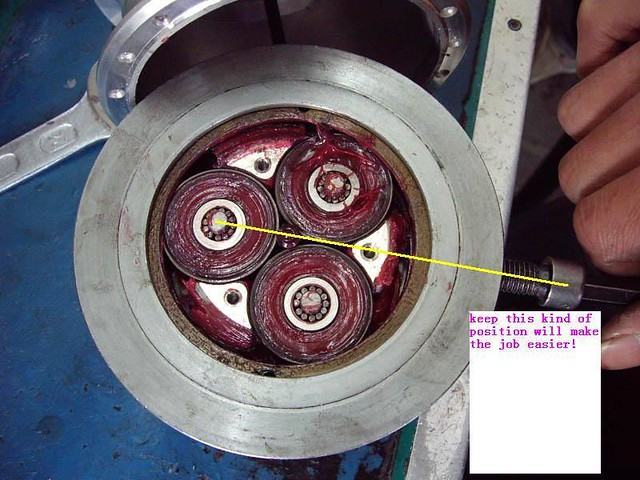
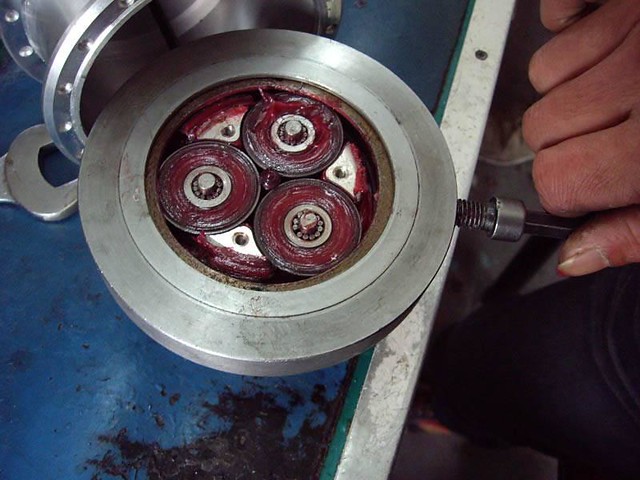
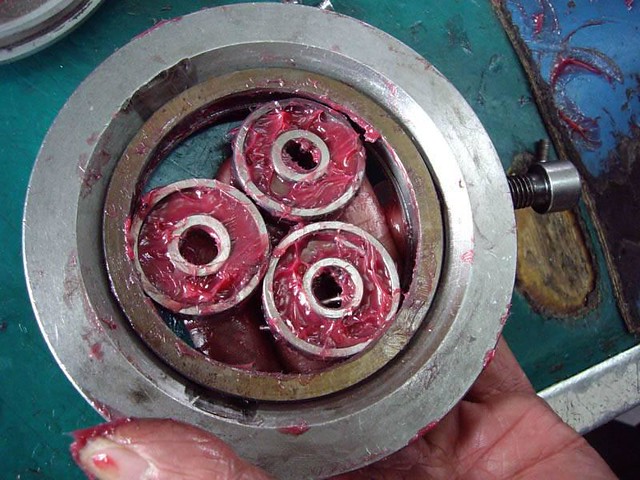
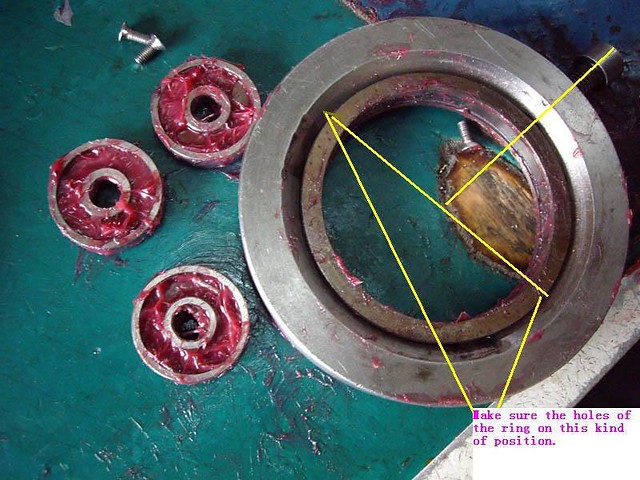
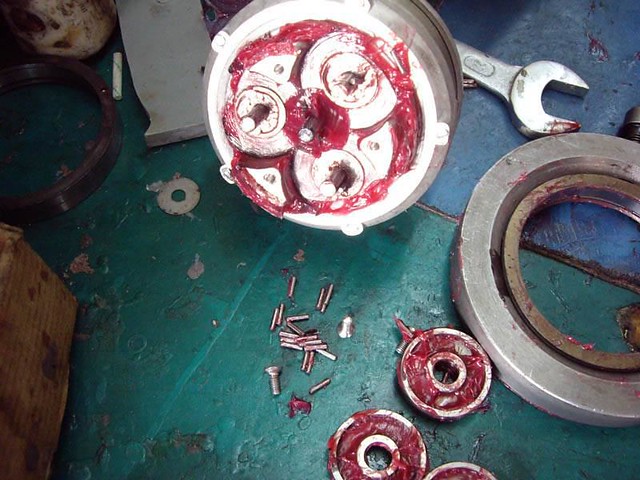
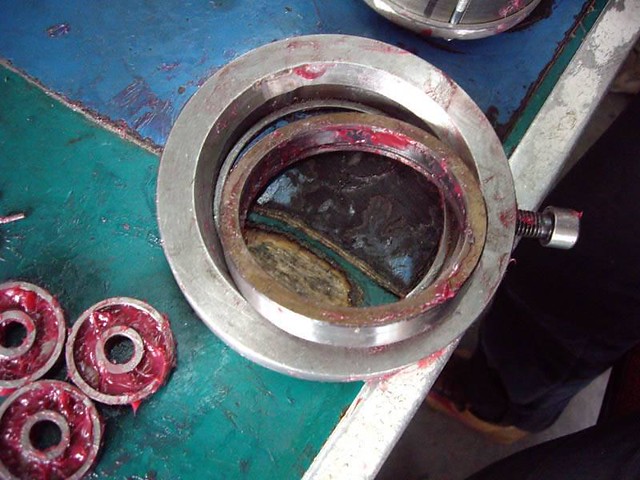
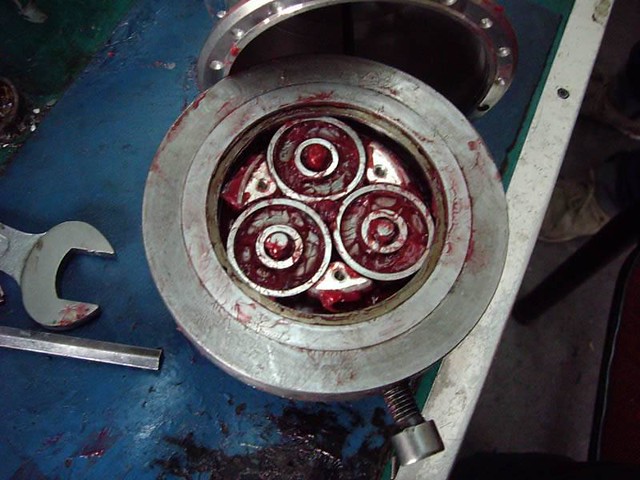
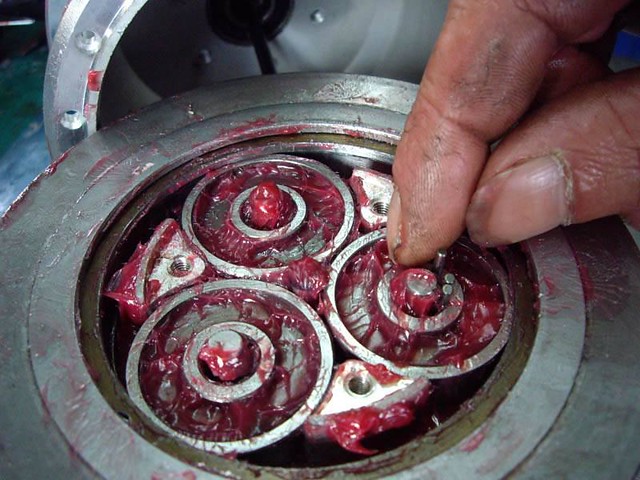
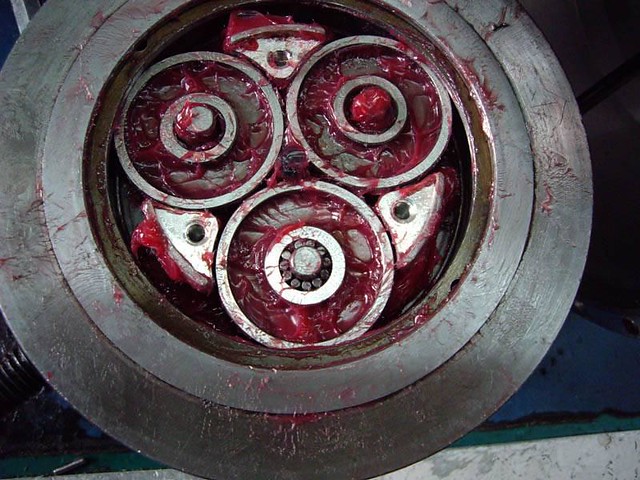
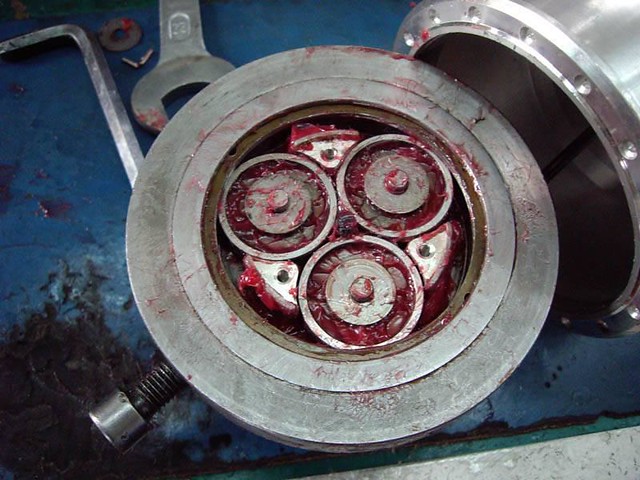
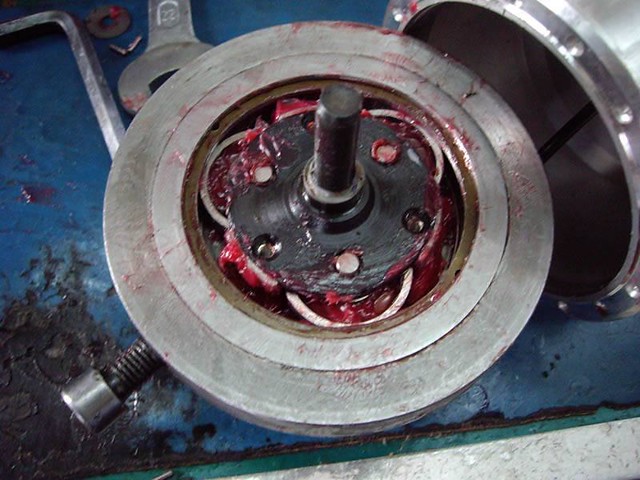
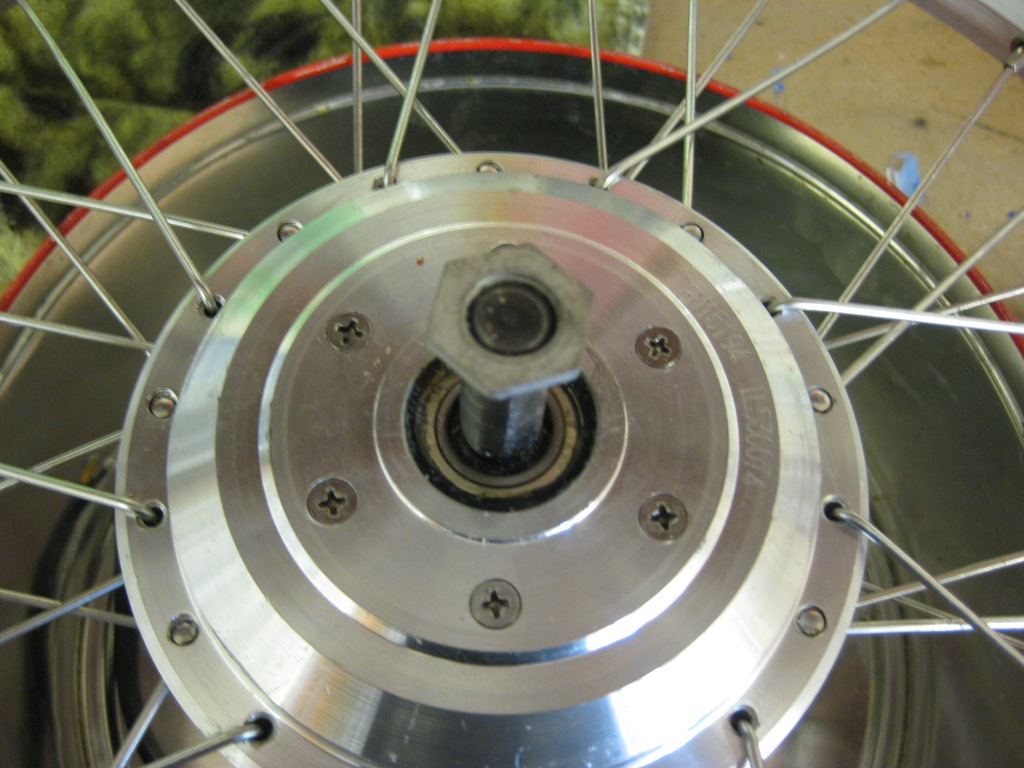
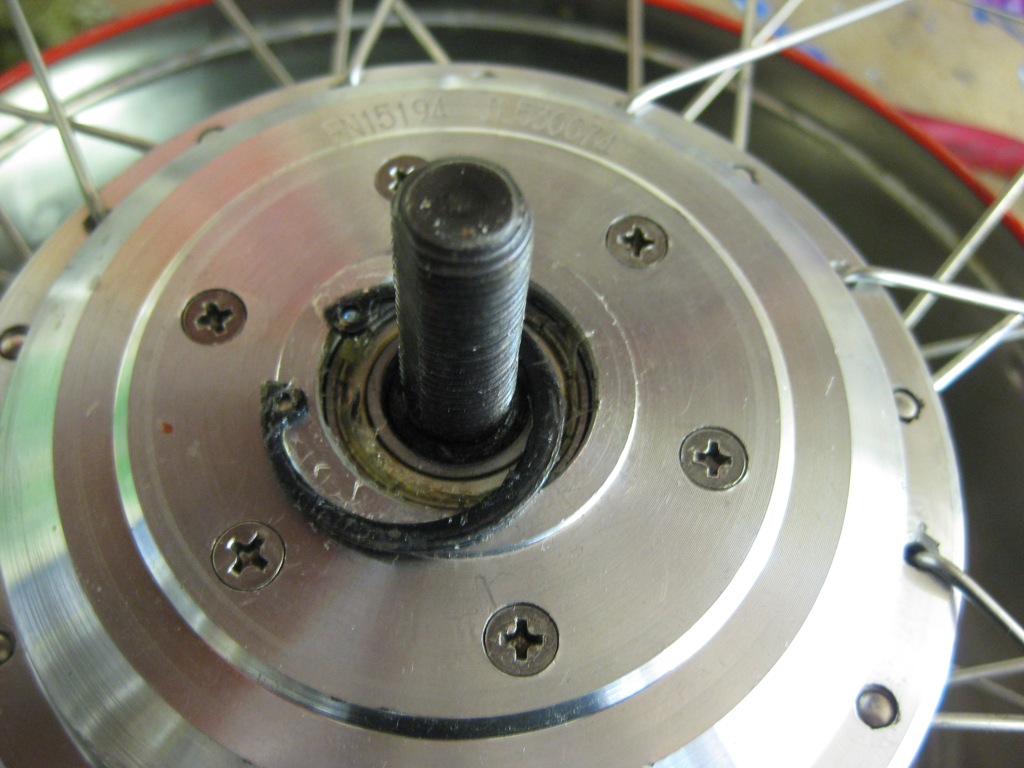
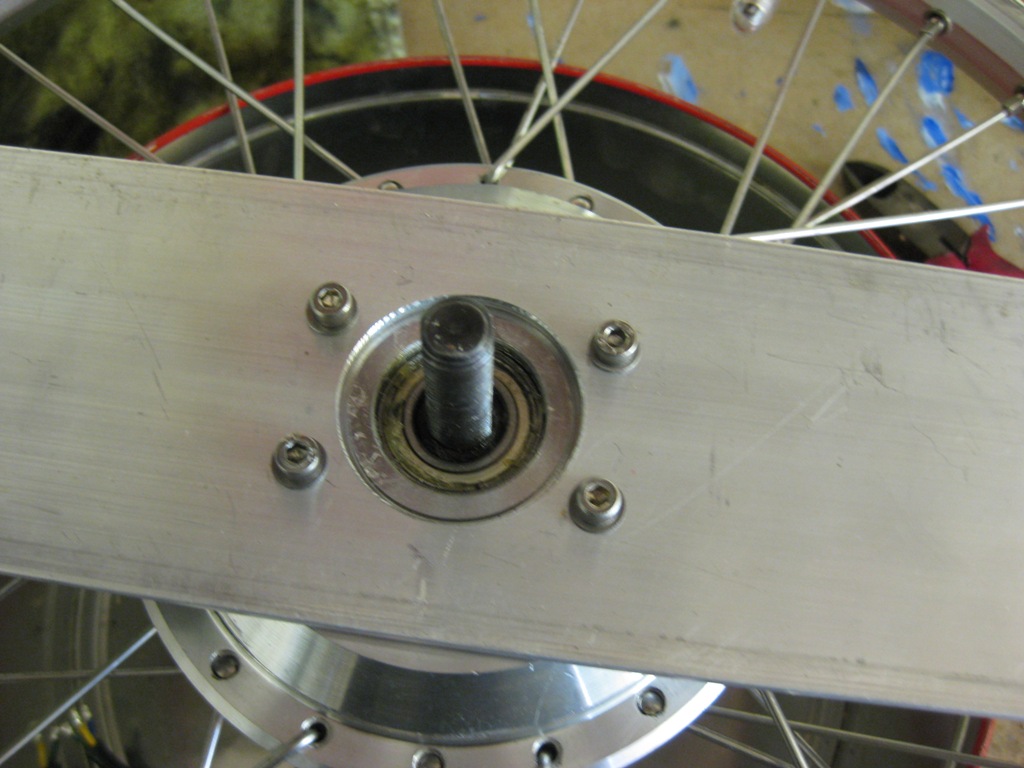
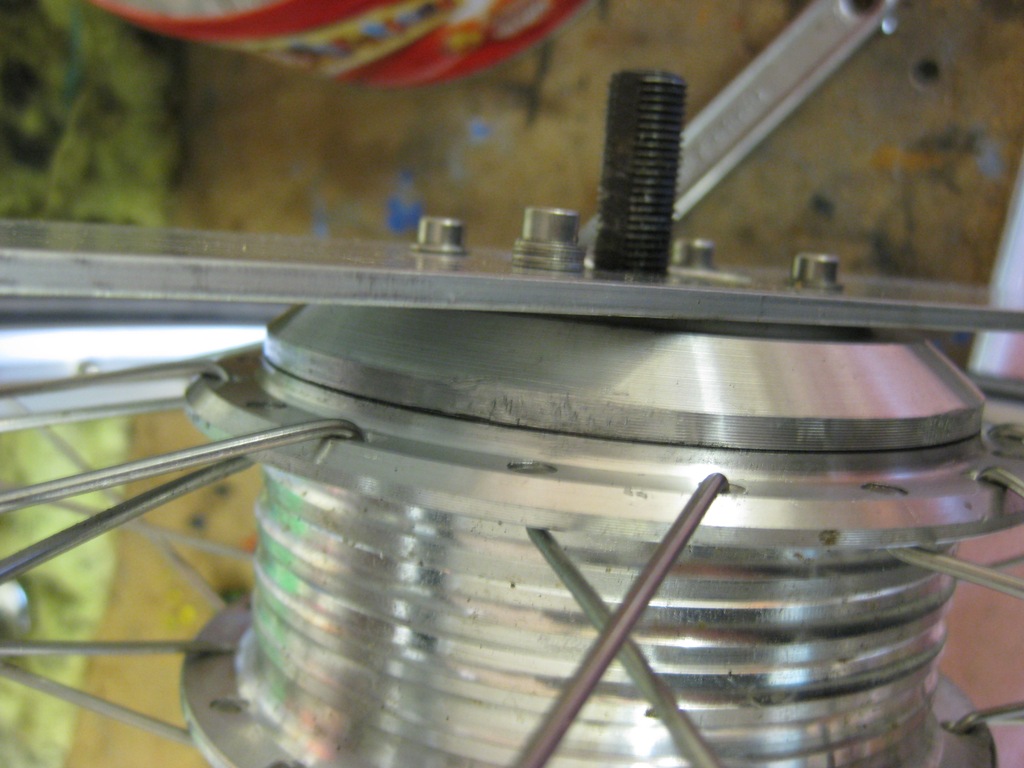
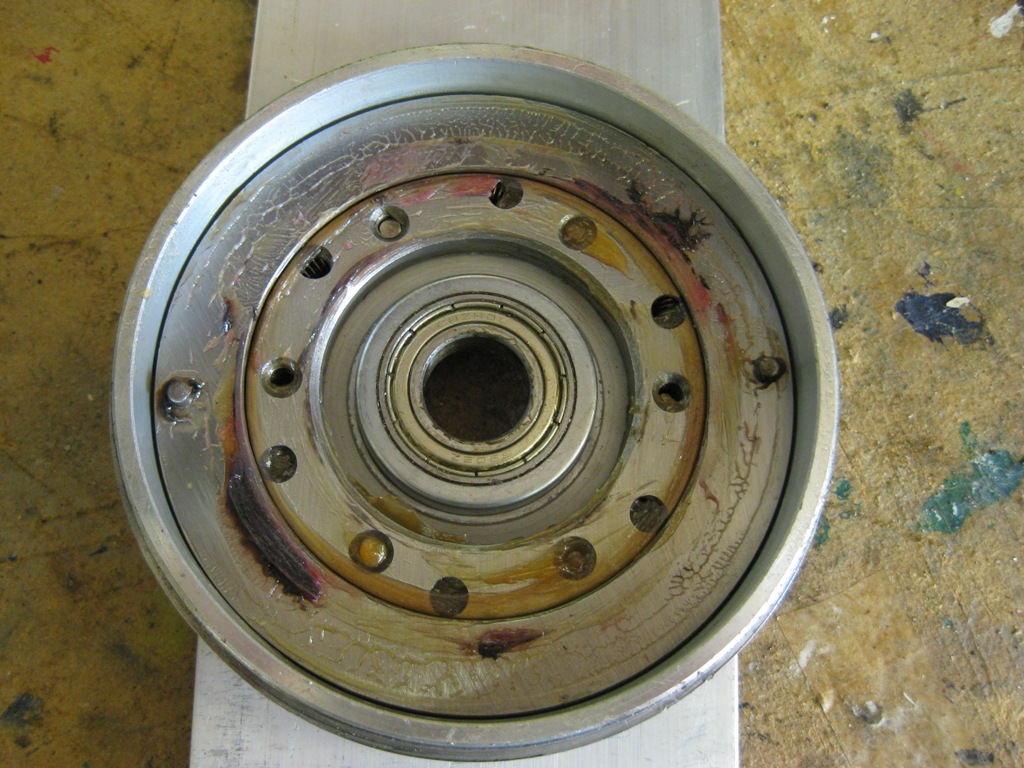
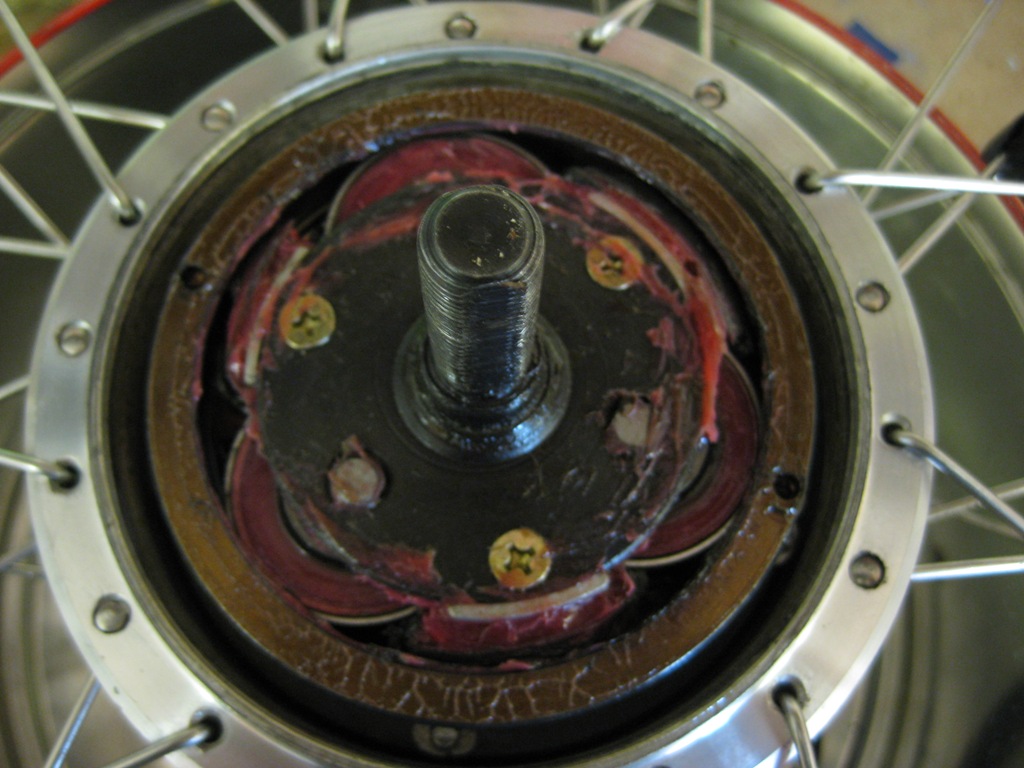
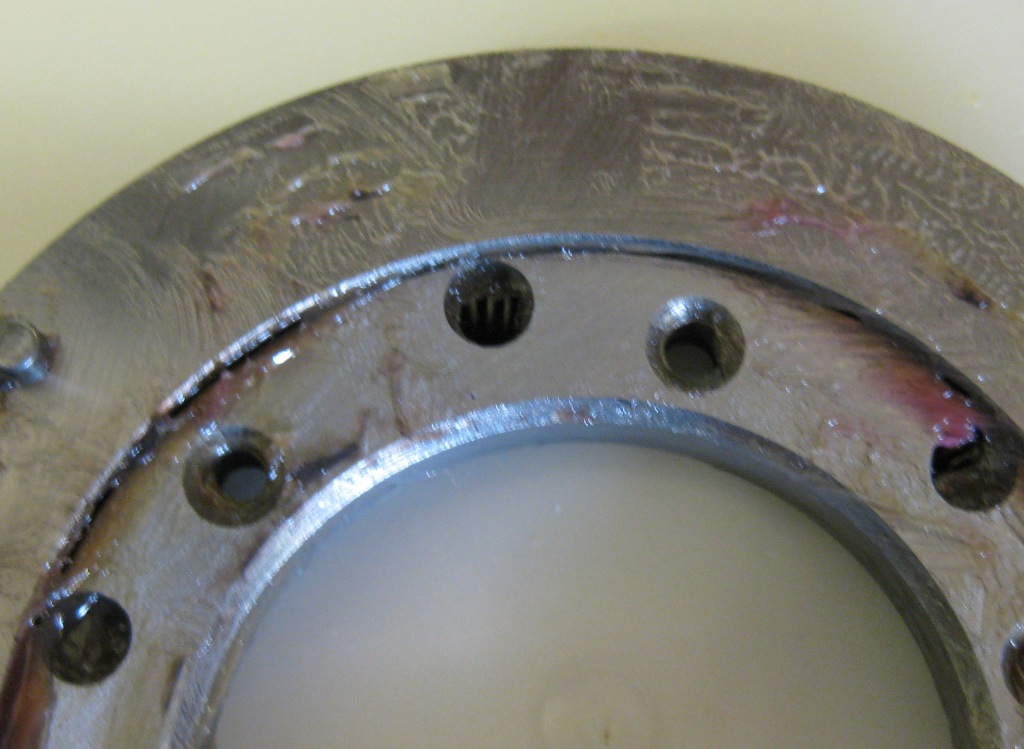
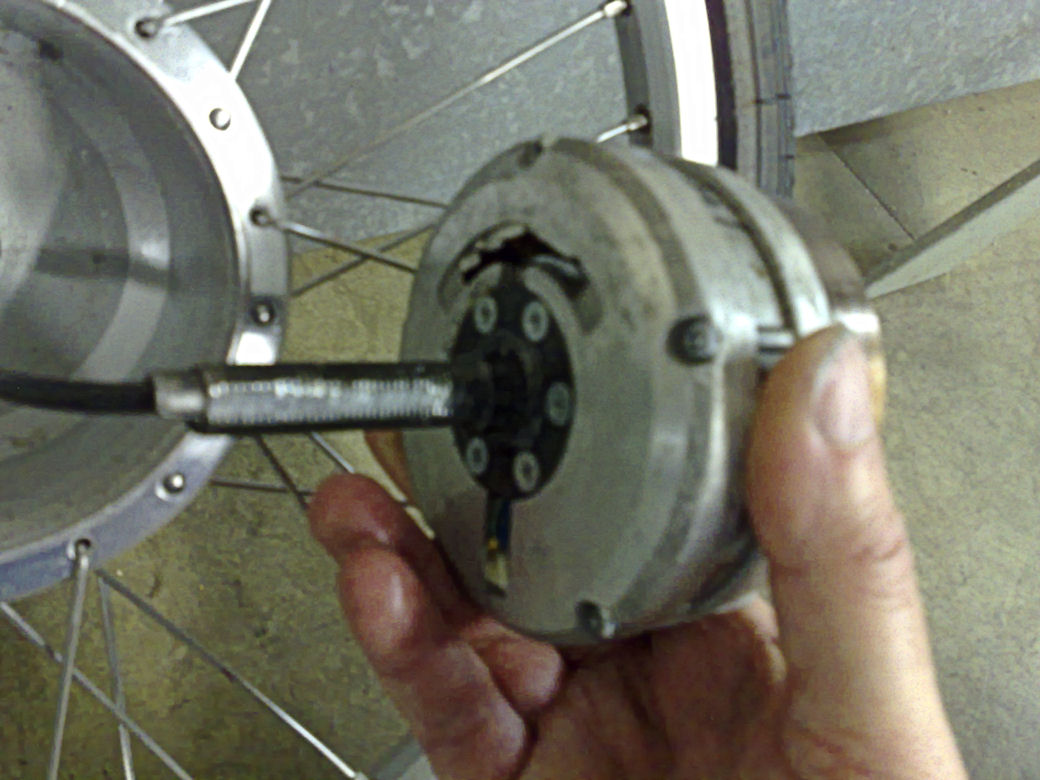
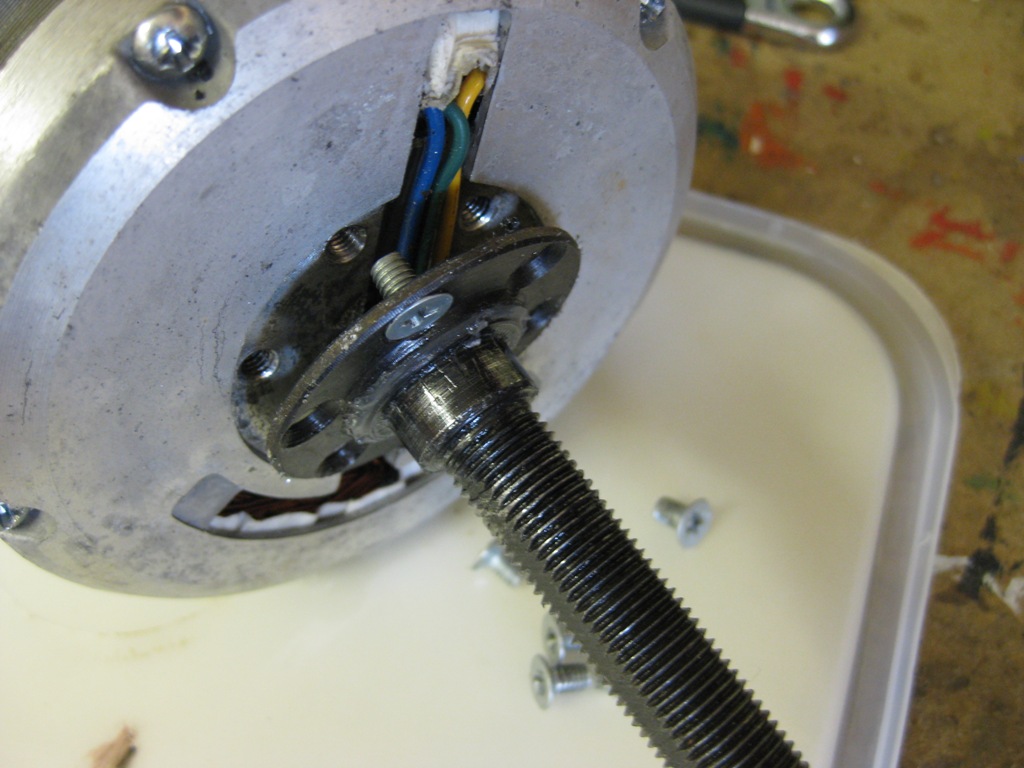
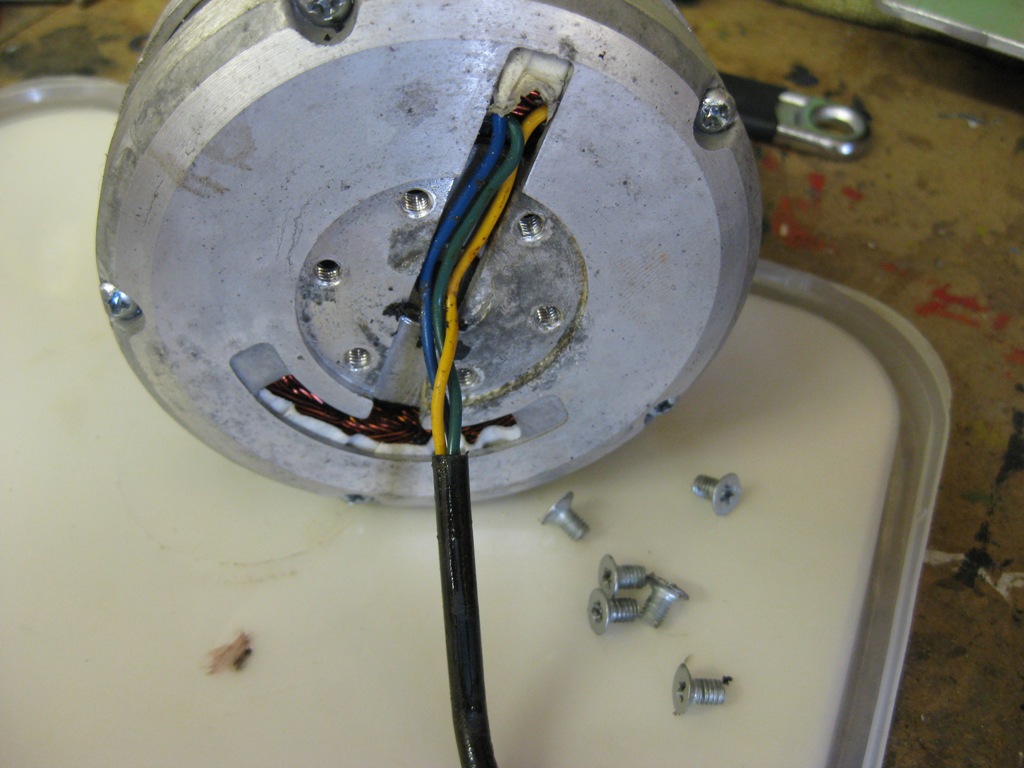
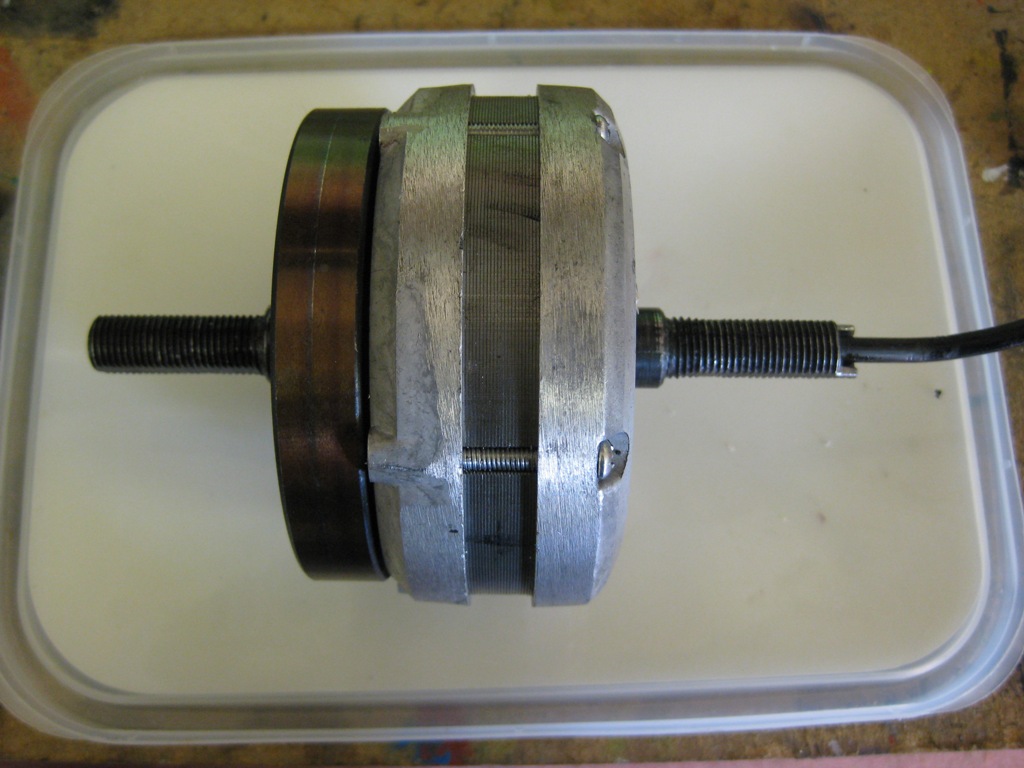
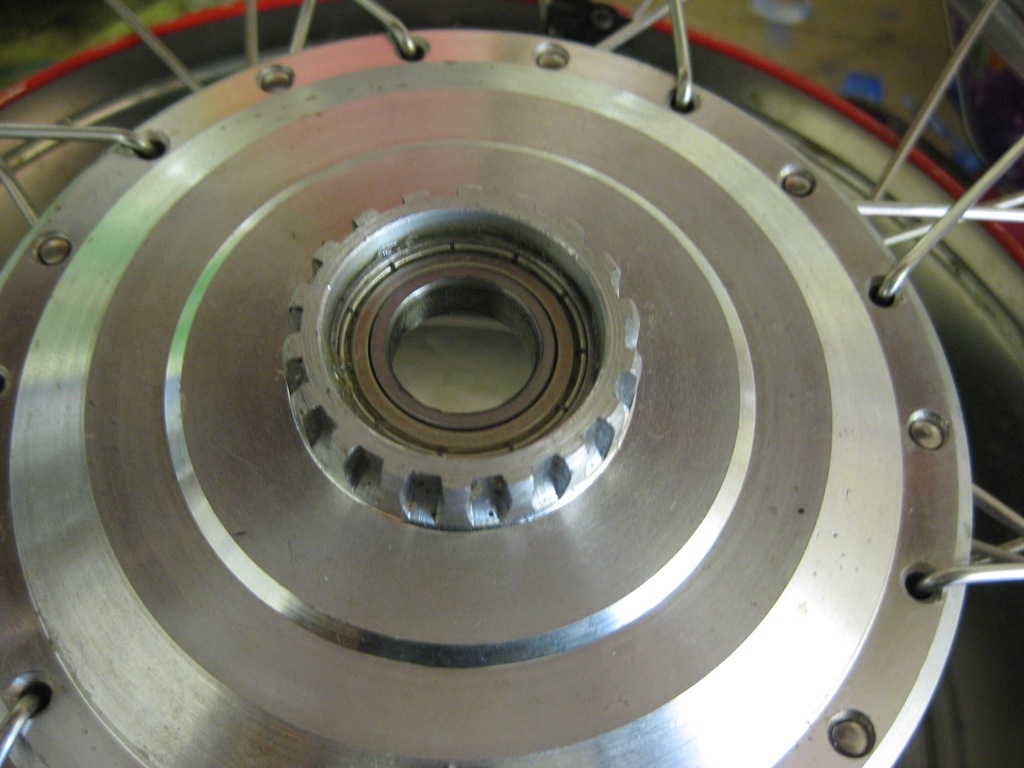
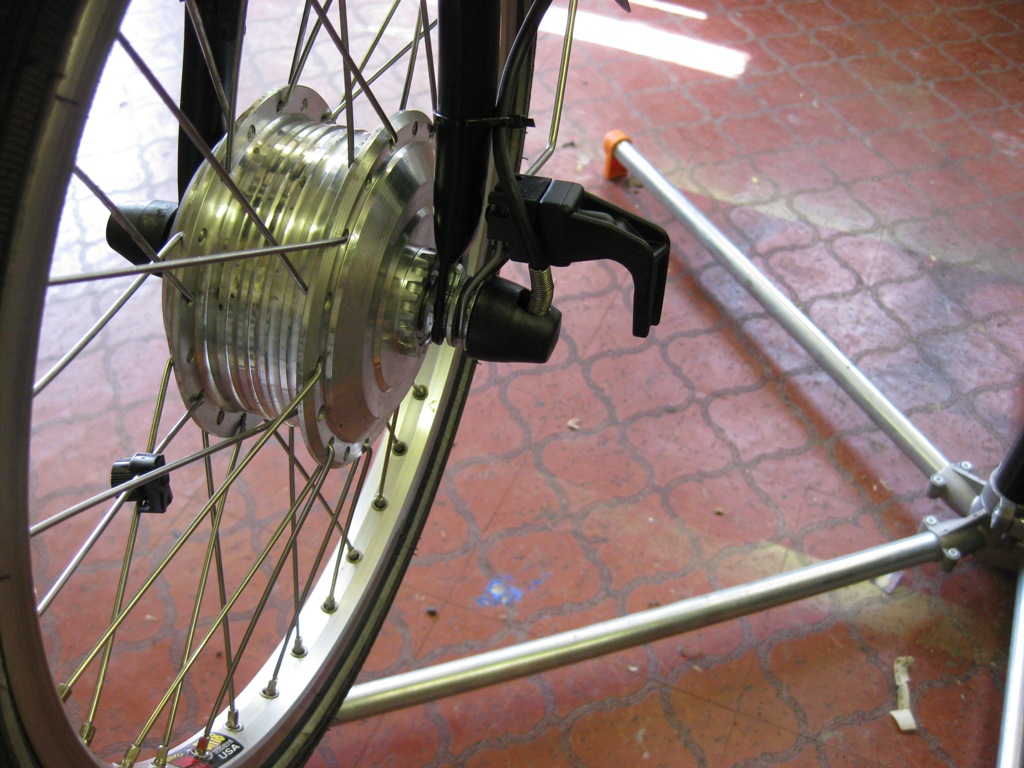
After about three month I had problems with my Tongxin motor and intially stripped it down as shown in this post. I took the motor apart using a vice to clamp the motor plate but this is not really advised as you can easily strip the threads. The other thread also had some pretty blurred pics. I have therefore posted this breakdown as there seems to be very little on the internet about taking these things apart or any decent pictures. I hope it will be of use to some in the future.

I also want to say a big thanks to the member "mkc1" who helped me get to this point.

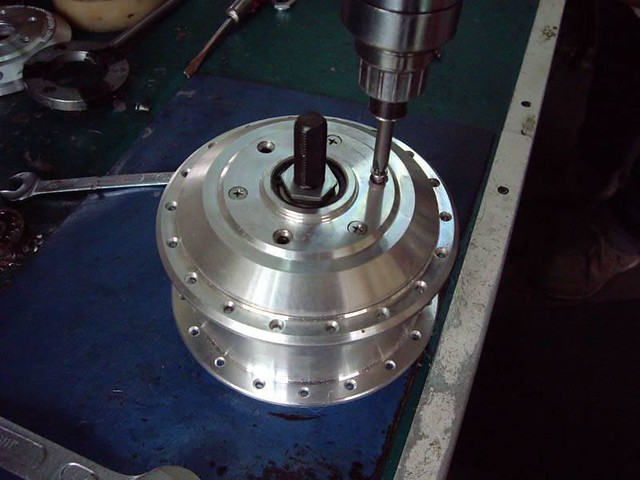
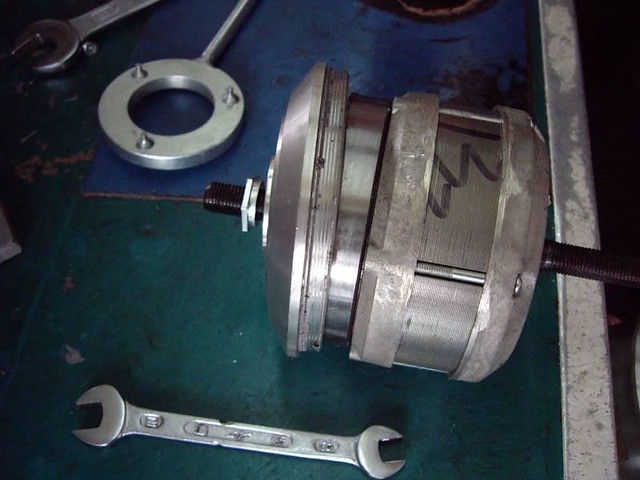
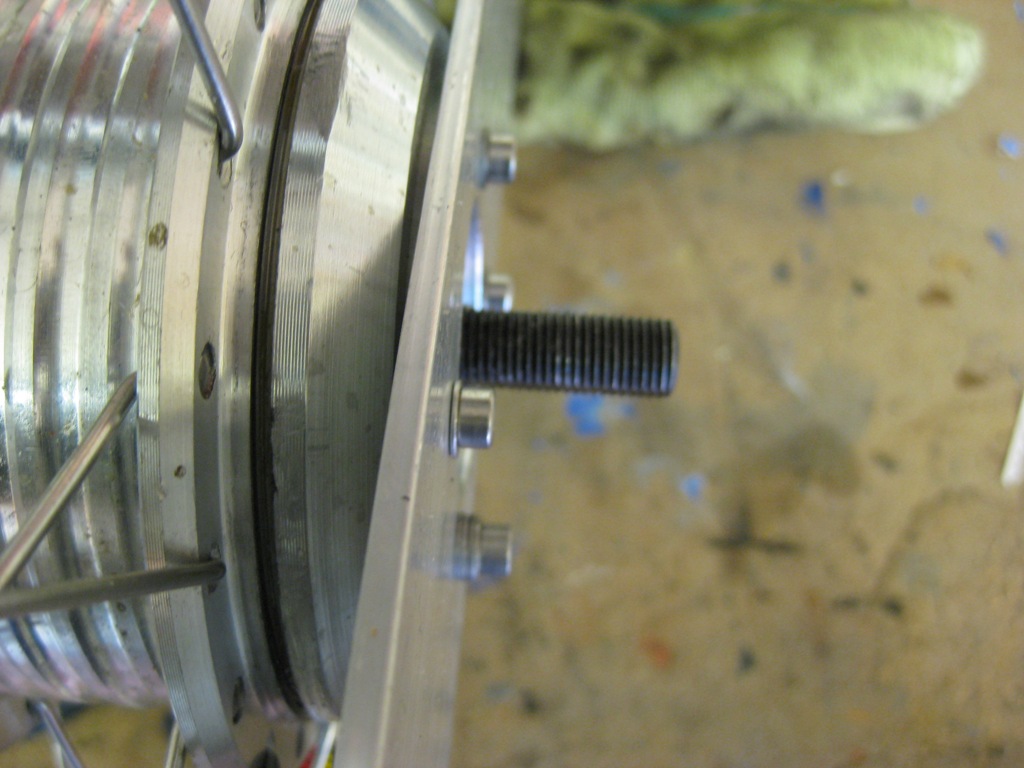
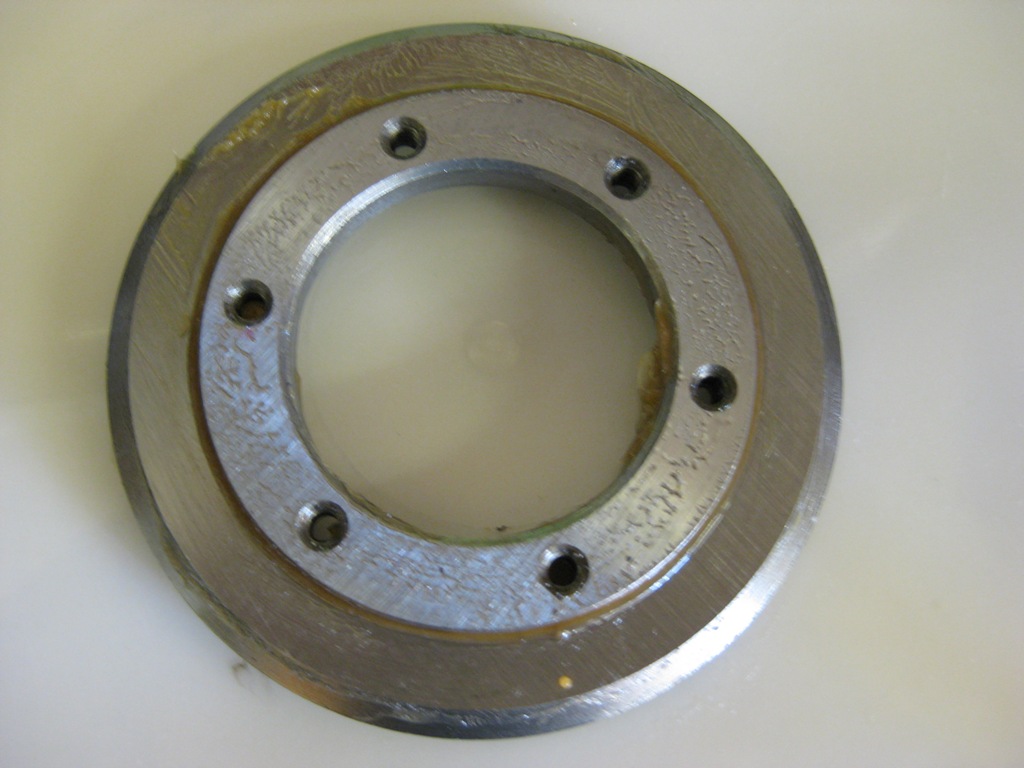
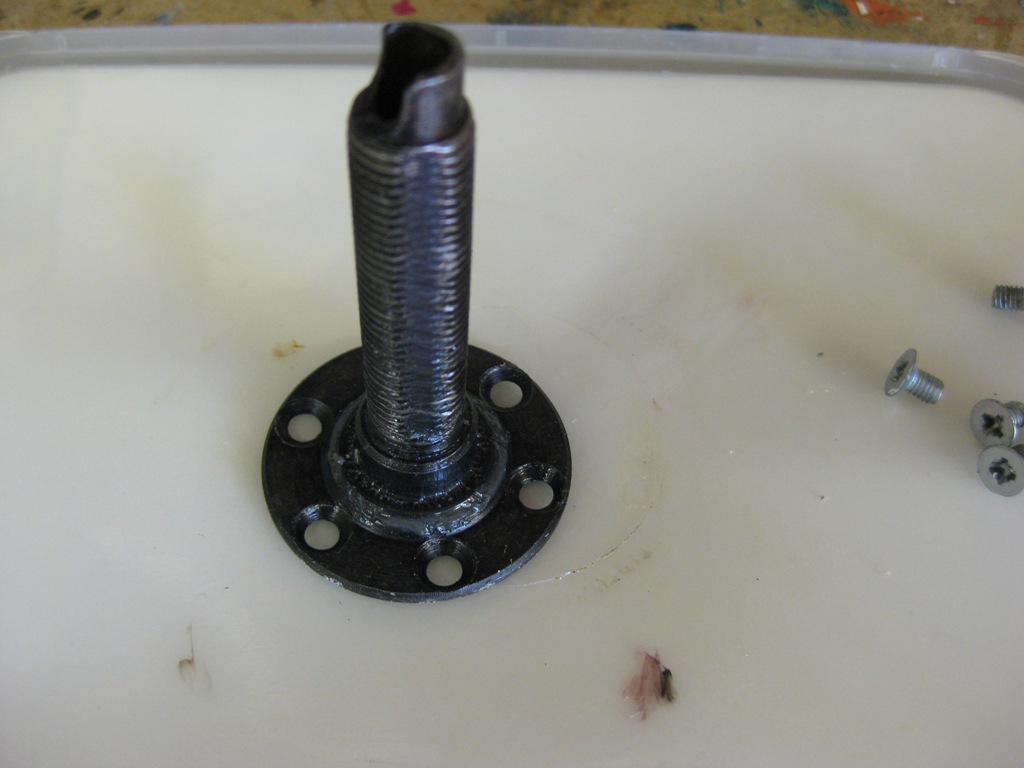
The best place to start is to make a tool to help take the front hub motor plate off as shown below. One of the engineers at work helped me make it up out of a strip of aluminium plate.


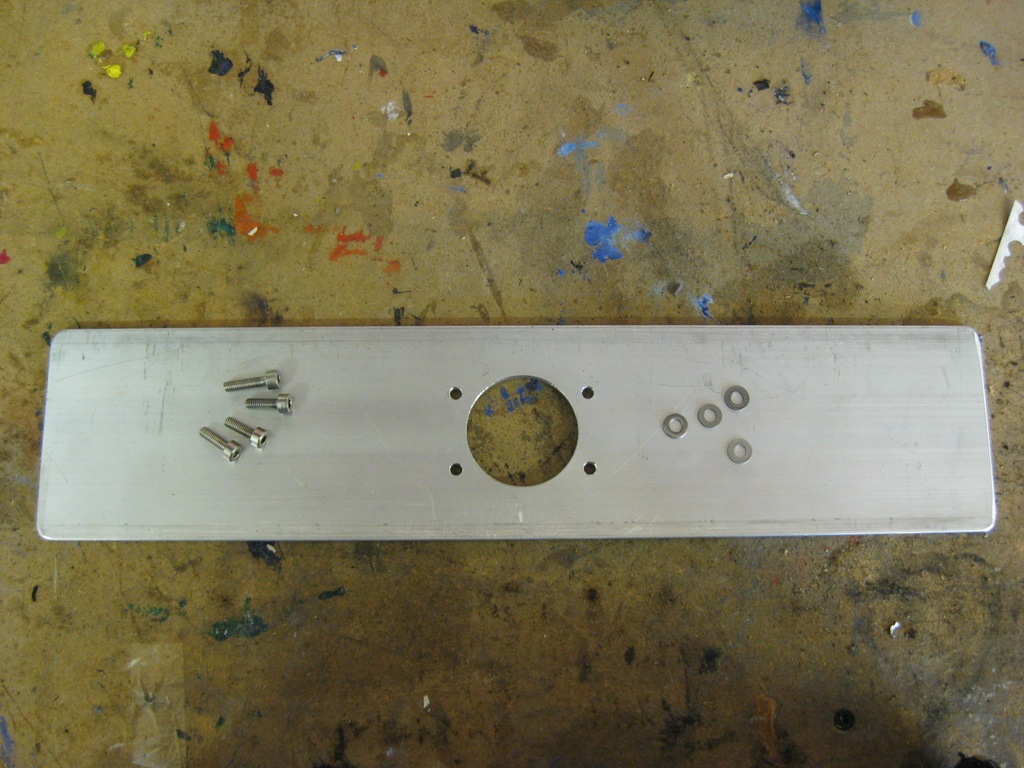
The center hole goes over the man shaft and raised boss on the cover plate and then the four holes allow you to screw it down onto the cover plate.
 
Last edited:

jerrysimon

Esteemed Pedelecer
Aug 27, 2009
3,292
112
Cambridge, UK
Ok lets get this thing apart!

My motor was already laced into a wheel which is probably where most people will start. Its probably easier to hold the motor anyway when its laced up than when its in its unlaced state.

Having taken all the nuts and washers off the first thing to do it to remove the slim retaining nuts against the outer bearings on both side


Note the one on the circlip side has a deeper flange so it does not catch it so don'w muddle them up.

Next remove the circlip


Circlip off


Now thake the screws off the cover plate that go into the freewheel behind it. You only really need to remove the ones that your tool will screw onto, in my case four. I removed them all and note if you do this, the freewheel and shaft will then spin freely and you will have to line up the holes when you attach the tool

 
Last edited:

jerrysimon

Esteemed Pedelecer
Aug 27, 2009
3,292
112
Cambridge, UK
Tool fitted with four screws. Note the screws should not be longer than the originals plus the thickness of you tool plate


Now the fun starts.

Apply pressure either side to get the plate moving. I had already taken mine off so it was not hard to remove. I have also undone my other motor which had never been used and it was barely hand tight and came undone very easily. It seems they tend to tighten up if they have been used in a wheel, so a little tap may be required if it is. We are going anti clockwise very slowy as we don't want to strip the threads. Also I notice that on the thread they put a strip of sealing gunk I think.

Ok, see how a gap begins to opens up


And more, its almost off now. Note the marks on the edge of my cover plate are from when I initially undid it in a vice NOT recommended.


And its off with the freewheel still attached to the cover plate

 
Last edited:

jerrysimon

Esteemed Pedelecer
Aug 27, 2009
3,292
112
Cambridge, UK
Ok and on the main casing side still attached to the wheel the main motor is revealed. You can see the three steel roller gears rather than the nylon ones that other hub motors use. This is one of the reason why the Tongxin is so much quieter.


Ok here is the freewheel plate which consists of two rings, inner and outer. They spin against each other held I think with steel wedges that are kept in place with the little springs which you can see in the holes. I have seen many pictures where these are poking out or damaged but mine are in good condition (its only had 4-5 months usage) . I had previously cleaned it all out and regreased it when my freewheel was making a rachette noise. Note the two pins at 10 and 4 oclock in the outer ring that locate into the two corresponding holes in plate round the motor shown in the previous pic.


Close up of one of the springs


Here is the other side of the freewheel showing where the screws go into it when you attach the front plate.

 
Last edited:

jerrysimon

Esteemed Pedelecer
Aug 27, 2009
3,292
112
Cambridge, UK
Ok now we can go back to the main motor which will come out assuming you have removed the connectors on the cable so the power cable can gow through the casing hole.

Bit blurred


Inside the casing.


The motor. The shaft is split and attaches via those screws so worth checking that they are tight


This shows the main motor which in my case had a longer shaft which I want to cut down.


At this point having checked that nothing is broken or cracked and that the shaft screws for bothshafts on either side are done up tight, you should be able to clean it all up, regrease and put it back together. Previously I had to clean the freewheel out with WD40 and blew air through it as something was in the mechanism causing it to make a rachette sound when the freewheel spin or maybe one of the springs was dislodged but it works fine now. Go easy when you do up the main cover plate. I locate the freewheel on the main motor first and then did up the outer cover as far as I could, before I attached the tool to the holes and do up hand tight with the leverage on the tool. Refit your motor power connector remembering to put all the washers and nuts on first in the right order.

The next few posts will cover shorterning the shaft and removing some of the roller brake bushing, that mine came with.
 
Last edited:

jerrysimon

Esteemed Pedelecer
Aug 27, 2009
3,292
112
Cambridge, UK
Ok this shows the long shaft that I need to take off so I can cut it down


Wires underneath going into the motor unit


Original shaft off. Its longer than it looks and needed about 15-20mm cutting off.


Shaft cut down and shaped at the end with burs etc taken off

 
Last edited:

jerrysimon

Esteemed Pedelecer
Aug 27, 2009
3,292
112
Cambridge, UK
Shaft refitted to the motor.


Side by side. This should enable me to fold the Brompton much smaller.

Next I set about chopping off some of the roller brake bushing using my dremel.

 
Last edited:

jerrysimon

Esteemed Pedelecer
Aug 27, 2009
3,292
112
Cambridge, UK
Finally all back together and fitted to the EBrompton


How it looked before. I have reduced the overall width by around 15mm-20mm which all helps with a better fold. Also as the bushing is cut down I no longer need a washer on that side to space the motor casing away from the fork frame.


I guess had I known that it was so easy to take the motor apart (with the right tool), I would have done this at the begining.

Regards

Jerry
 
Last edited:

flecc

Member
Oct 25, 2006
52,735
30,309
Great job Jerry, and a good thread likely to help many others in future. Shortening the spindle has left the cable
protector rather larger than necessary, so maybe you'll be able to fabricate a shorter one or a modified mounting
for it?
.
 

jerrysimon

Esteemed Pedelecer
Aug 27, 2009
3,292
112
Cambridge, UK
Great job Jerry, and a good thread likely to help many others in future. Shortening the spindle has left the cable
protector rather larger than necessary, so maybe you'll be able to fabricate a shorter one or a modified mounting
for it?
.
Thanks flecc that was my hope, that others would find it of benefit for the future.

Re the protector not quite sure what you mean ? If you mean the clip "spacing" that is required for where it clips onto the rear frame when folded as shown below in the original, before I cut the shaft down . It now clips on with the rubber nut cover flush against the frame.


Regards

Jerry
 
Last edited:

flecc

Member
Oct 25, 2006
52,735
30,309
Thanks Jerry, now I understand. :). It reminded me of the motor-cable protector that some others have to
prevent damage to the cable where it enters the motor spindle. Same shape!
.
 

jerrysimon

Esteemed Pedelecer
Aug 27, 2009
3,292
112
Cambridge, UK
Ok I thought it worth posting this full set of photos of a Tongxin stip down, kindly provided to me by the member "Spike" who was sent them from Outdrider/Tongxin together with tools and a new ring to repair his motor!

If only the rings and this tool were readily available to us all.

The first part of the stripdown has been well covered. The latter when they show you how to take the rollers out, is interesting as I have not seen this process before.


The stock tool to take the motor apart looks neat


Last edited:

jerrysimon

Esteemed Pedelecer
Aug 27, 2009
3,292
112
Cambridge, UK


Now its getting interesting as I have not gone this far with my strip down.


Last edited:

jerrysimon

Esteemed Pedelecer
Aug 27, 2009
3,292
112
Cambridge, UK
This is the tool I think they use to compress the ring to take the rollers out


Is there a second blanking ring here which is part of the tool ?

EDIT. Ah now I see its actaully the profile of the ring tool as it slopes into the ring.


Looking at the score marks on the tool its obviously been used a few times!

The blanking ring removerd ?

 
Last edited:

jerrysimon

Esteemed Pedelecer
Aug 27, 2009
3,292
112
Cambridge, UK


I have heard about those little pins first time I have seen them.


Last edited:

jerrysimon

Esteemed Pedelecer
Aug 27, 2009
3,292
112
Cambridge, UK


Last picture


spike

Pedelecer
Nov 29, 2008
29
0
Hi All

I finally got around to using the tools to repair the broken motor. The wife went shopping while the kids were asleep which gave me a few hours to play :) In a nutshell it was a pain in the a@$e to change the retaining ring and reinstall the gear assembly. The pictures are very useful but they don't give you a feel for how difficult it is to work out how to put the roller gears inside the new ring in such a way that they will lock together sufficiently to put back on the spindle. Then how you have to twist the assembly to get roller gears loose enough to push all the way onto the spindle. Then how you have to micro adjust the assembly while putting all the pins back in. A bit of a Chinese puzzle! Anyway I did it, and I've learned something new, and I'm happy to have a working motor again. If anyone wants more info just ask or pm me.

Cheers

Spike
 

jerrysimon

Esteemed Pedelecer
Aug 27, 2009
3,292
112
Cambridge, UK
Spike glad you go it sorted.

Thanks again for the update and the pics.

Keep us posted on how it goes :)

Regards

Jerry
 

mr-motorvator

Finding my (electric) wheels
Apr 30, 2007
10
29
Service or Repair of nano motors in UK

I have the tools to dismantle the nano motors in UK along with spare parts. I also have the correct grease: if you have tried oiling or greasing it yourself, I will need to clean it out completely.

Also I can replace the freewheel and fix motor cable damage - probably the most common problem!

Drop me an email tony@mr-motorvator.co.uk. Price from £30 - £70 depending on work and parts required.

all the best

Tony
 
Last edited: