Woosh XF08 CST rear hub kit on 2001 Raleigh Stonefly

Ashley750

Pedelecer
May 12, 2018
39
9
60
Kenilworth
The Build Begins

So after asking lots of questions on this forum on eBikes, I eventually ordered a Woosh XF08 CST rear hub kit to convert my old Raleigh to use for commuting to work.


Whilst waiting for the kit to arrive, the bike was stripped down, to give it a clean and check the condition of the working parts.


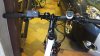
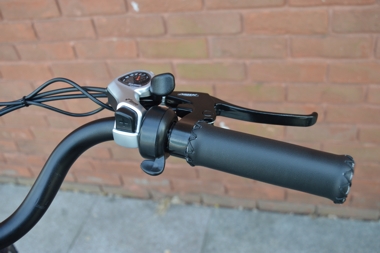
Bits that needed changing were the wobbly old BB cassette, and the kinked brake and gear cables. I ordered a Shimano HG41 7 speed cassette, as the old wheel had a free wheel, and a new HG40 chain to go with it. I also bought some swept back handle bars for a slightly more upright riding position.


The Woosh kit arrived 2 days after ordering, and I could now start playing with all the bits :).
 
Last edited:

Ashley750

Pedelecer
May 12, 2018
39
9
60
Kenilworth
Not All BB Cassettes are Equal

When I ordered the kit from Woosh, I opted for the left side pedal sensor, as I though it was a very neat looking piece of kit. I was a bit surprised when I saw it was hexagonal on the inside to fit on a square taper. Woosh assured me it was fine (being an updated version), and it fitted OK on the original BB cassette - a TH BB-7700.


However this was well past it best, so my LBS found me a Shimano BB-UN54 as a replacement. With this BB however, there was no way the left side pedal sensor would fit!


Some measurements soon revealed that the spindle dia was 16.8mm, whereas the old one was 16mm. In addition the teeth on the sensor would not engage in the slots in the plastic retaining ring. After returning to my LBS, the Shimano was swapped for a First Components BB, to which the sensor fit is even better than with the original BB.
 
Last edited:
  • Informative
Reactions: Gaz and Woosh

Ashley750

Pedelecer
May 12, 2018
39
9
60
Kenilworth
It's Riveting!

First job was to fit the battery pack. Spent a while trying to find the best position, keeping the weight low, but trying to utilise the existing water bottle mounting points. Ended up fitting it as low as possible using the top water bottle fixing, so then drilled 2 holes above that.


After painting with antirust primer the rivnuts were fitted following the instructional video linked from the Woosh website. Quite straight forward to do.


Which just left a trial fit of the battery.


First job on the list ticked :).
 

Ashley750

Pedelecer
May 12, 2018
39
9
60
Kenilworth
Bit Of A Dish

Time to look at putting the rear wheel together. I needed a 3mm spacer to sit behind the 7 speed cassette, and I had to file 2 notches to account for the rivets holding the cassette together. Once the cassette was fitted, it was time to look at the fit of the wheel in the frame.

The distance between the dropouts is 137mm, towards the low end of the 135-145mm the wheel is suitable for. Playing around with various thicknesses of washer under the locknuts, I found that 6.2mm of washers under the locknut on the drive side, and no washers on the other side, meant it was easy to fit in the dropouts, and gave me 6.5mm from the CL of the smallest gear to the frame, and therefore enough clearance for the chain.

However, this left the CL of the wheel 5mm offset to the non drive side compared to the CL of the frame.


I have never really tried adjusting spokes in bike wheels before, but as is always the case nowadays there always a How To video online. Having watched several, I gave it a go, loosening the non-drive side 1/2 a turn first, and then tightening the drive side by the same amount. After doing this 3 times, the rim is pretty much central in the frame, and the brakes look even side to side.


There is still a bit of axial and radial runout I can look at improving, what is considered acceptable?

 
  • Like
Reactions: Woosh

Ashley750

Pedelecer
May 12, 2018
39
9
60
Kenilworth
The Reassembling Has Started

Spent some time putting the bike together this evening, having spent yesterday evening removing the decidedly tatty stickers.

Wheels are on, as is the battery and the new handlebar.


A couple of problems identified tonight. I bought new brake and gear cables, and the outers were cut to same length as the old ones at my LBS, however with the new Trekking bar they are too short! Also, as the gear shifters are integrated into the brake levers, with the up change lever underneath, I cannot find a way to mount the throttle without it being in the way of the shifter or too far away to use.


Any thoughts on how I could fit it, or do I just leave it off and use the pedal sensor?
 

Woosh

Trade Member
May 19, 2012
19,519
16,457
Southend on Sea
wooshbikes.co.uk
  • Like
Reactions: BG bicycle

Ashley750

Pedelecer
May 12, 2018
39
9
60
Kenilworth
Topeak bar X-tender
You can move the LCD and the front gear shifter to the extender, the space vacated by the front gear shifter can then be occupied by the left thumb throttle.
Unfortunately, that won't work, as the gear shifters are part of the brake lever mechanism.


From looking online, something like this might fit better, but it is still fairly large, and would need changing to a HIGO connector to connect to the Woosh kit.

Any other ideas out there? I can't be the first with this type of integrated brake and shifter levers.
 

Woosh

Trade Member
May 19, 2012
19,519
16,457
Southend on Sea
wooshbikes.co.uk
how about fitting the throttle on a bar extender?
 

Ashley750

Pedelecer
May 12, 2018
39
9
60
Kenilworth
Might be in an odd place, but the throttle has ended up on the LHS, slightly tucked under the display unit. I can reach it with my left thumb, but I'm not sure how much I will actually use it.


Next job was fitting the hydraulic brake sensors, Initially, I was not sure on where the magnet needed to be in relation to the sensor, but a question to Woosh quickly provided the answer, and I quote:-

1. plug one brake sensor in.
2. switch on the LCD, you should see error 25 shown. Error 25 means brake sensor is activated, the motor power is cut,
3. bring the magnet closer and closer to the sensor head. When it's close enough, error 25 disappears on the LCD. That mean the motor can receive power again. You now have a good idea how close it is that you have to keep the magnet not to activate the cut out. Bring the sensor and magnet to the lever and find a suitable place to stick the sensor.
4. Repeat steps 1, 2, 3 to find a place where to glue the magnet. Don't glue it yet until you are certain that it will work. Use araldite or similar glue. For test, sellotape the magnet then cable tie over.

This worked a treat to find the best place. I ended up drilling a 2.5 mm hole on the lever and screwed the magnet on.

 
Last edited:
  • Like
Reactions: Woosh

Ashley750

Pedelecer
May 12, 2018
39
9
60
Kenilworth
Sunday afternoon was spent refitting the last few bits, connecting up all the wiring, and then trying to cable tie it up neatly. Really pleased with how it has turned out. Would like to thank Woosh, who have been very quick and helpful in answering all my questions. Excellent Customer Service, even out of hours via this forum.


The only thing I need to do to really neaten every thing up is to thing of a way to hide the excess wiring at the bottom of the seat tube. For the time being it is bound up with insulation tape and cable tied in place.


Could do with finding a small black plastic box or bit of black tube to hide it all away. Any ideas?
 
Last edited:

Ashley750

Pedelecer
May 12, 2018
39
9
60
Kenilworth
So I've now cycled to work and back twice, the first time on Sunday afternoon to see how long it would take. Google maps shows cycling the 7.2 miles should take 38 mins, but I was able to do it in 30.

On Sunday I kept the assist level on 3, but this morning I put it on 5, and then used 4 for the return journey. Have to say, level 5 is addictive! So after nearly 30 miles, the display is still showing 6 out of 10 bars for the battery, and the battery shows 1 red and 2 (out of the 3) green lights, so should be good for quite a distance :D.
 
  • Like
Reactions: BG bicycle

sjpt

Esteemed Pedelecer
Jun 8, 2018
3,670
2,674
Winchester
Helpful to have posts like this before taking the plunge, thank you.

Which size battery did you go for?
 

D C

Esteemed Pedelecer
Apr 25, 2013
1,140
575
Nice job and useful write up.
I bought the same kit from Woosh about this time last year and I'm very pleased with the it and with the Woosh customer service.
It's a good powerful kit and with 36 volt15 ah battery I easily get 30 miles and more with loads of battery left, mainly on off road tracks with lots of hills.
Dave.
 
Last edited:

Charliefox

Esteemed Pedelecer
Feb 11, 2015
322
88
79
Culloden Moor Inverness
Unfortunately, that won't work, as the gear shifters are part of the brake lever mechanism.


From looking online, something like this might fit better, but it is still fairly large, and would need changing to a HIGO connector to connect to the Woosh kit.

Any other ideas out there? I can't be the first with this type of integrated brake and shifter levers.
My Giant has Sram5 gear change. Like yours it has under bar levers. I turned the throttle 180 degrees to 'upside down' so that the cable from it went from the top side. Worked fine for me, moulding on the throttle body was a bit different but soon got used to it.03 Control panel and upsidedown throttle.JPG
 

Ashley750

Pedelecer
May 12, 2018
39
9
60
Kenilworth
Which size battery did you go for?
I went for the smaller of the 2 options at 13Ah. Certainly looks like it's capable of giving me a good range.

Had a play around with the assist levels after cycling back from work. Put the bike in it's lowest gear, so I could spin the pedals for the pedal sensor, without providing any assistance to the motor, just to see how fast it would take me.
  • Level 1 = 6.7mph
  • Level 2 = 10.1mph
  • Level 3 = 12.5mph
  • Level 4 = 13.8mph
  • Level 5 = 16.3mph
In general with using level 4 or 5 for commuting, I'm able to keep it on the 42 tooth gear at the front, and on 1 of the 3 smaller gears at the back.

Also weighed the bike. It started at 18kg before, and now weights in at 23.7kg, so the kit adds just under 6kg. But with the motor, it doesn't really matter :D.
 
Last edited:

sjpt

Esteemed Pedelecer
Jun 8, 2018
3,670
2,674
Winchester
Thank you. I've just ordered mine with the XF07 front and smaller 13Ah battery. I thought maybe a bigger battery for the tandem, but looking at much more expensive prebuilt e-tandems many only had batteries around the 13Ah size. Maybe their bottom bracket motors can give better efficiency and therefore better distance?
 

Woosh

Trade Member
May 19, 2012
19,519
16,457
Southend on Sea
wooshbikes.co.uk
Maybe their bottom bracket motors can give better efficiency and therefore better distance?
you can't fit a BBS motor to a tandem.
 

Woosh

Trade Member
May 19, 2012
19,519
16,457
Southend on Sea
wooshbikes.co.uk
Might be in an odd place, but the throttle has ended up on the LHS, slightly tucked under the display unit. I can reach it with my left thumb, but I'm not sure how much I will actually use it.
I am looking for a solution at the moment.
Would this thumb throttle better for you?


sjpt

Esteemed Pedelecer
Jun 8, 2018
3,670
2,674
Winchester
you can't fit a BBS motor to a tandem.
You can't retrofit a BBS (at least, not at all easily). However, most tandems sold as e-tandems use a BBS motor, eg Orbit, Circe, Moustache (all alarmingly expensive). The first two have batteries around the 468wh of the smaller Woosh battery; the Moustache uses two such batteries.
 

Woosh

Trade Member
May 19, 2012
19,519
16,457
Southend on Sea
wooshbikes.co.uk
Take the Raleigh Adventurer as a typical tandem:


The front chain ring is on the wrong side of the BBS chainring.
The rear chainring is two sided, you can't fit a BBS kit there either.
Even if you could swap the front chainring to the right hand side like they did in your examples, the bottom bracket shell is too big for the BBSes - there is a gap of less than 10mm between the motor and the bottom bracket on the BBS. I have already given up on fitting BBSes to CF frames on normal bikes because of the bulge on their BB shells.

This is the Orbit:


Bespoke job, no problem with the BB shell, no problem with the rear chainring.
 
Last edited: