Benji's Raleigh Shopper Build

  • Thread starter Deleted member 4366
  • Start date
D

Deleted member 4366

Guest
I started it already. I would have been nearly finished by now apart from a bit of a hiccup.

. The brief was to install a front hub-motor and change both rims to aluminium. He suggested Sun CR18 rims. I looked in my shed and found three new 36 hole ones, so I ordered the spokes. I ordered the rear matching one with 28 holes for the Sturmey Archer hub, but I can't order its spokes yet until I know (measure) the ERD. I ordered a rack battery from BMSBattery.

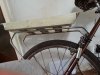
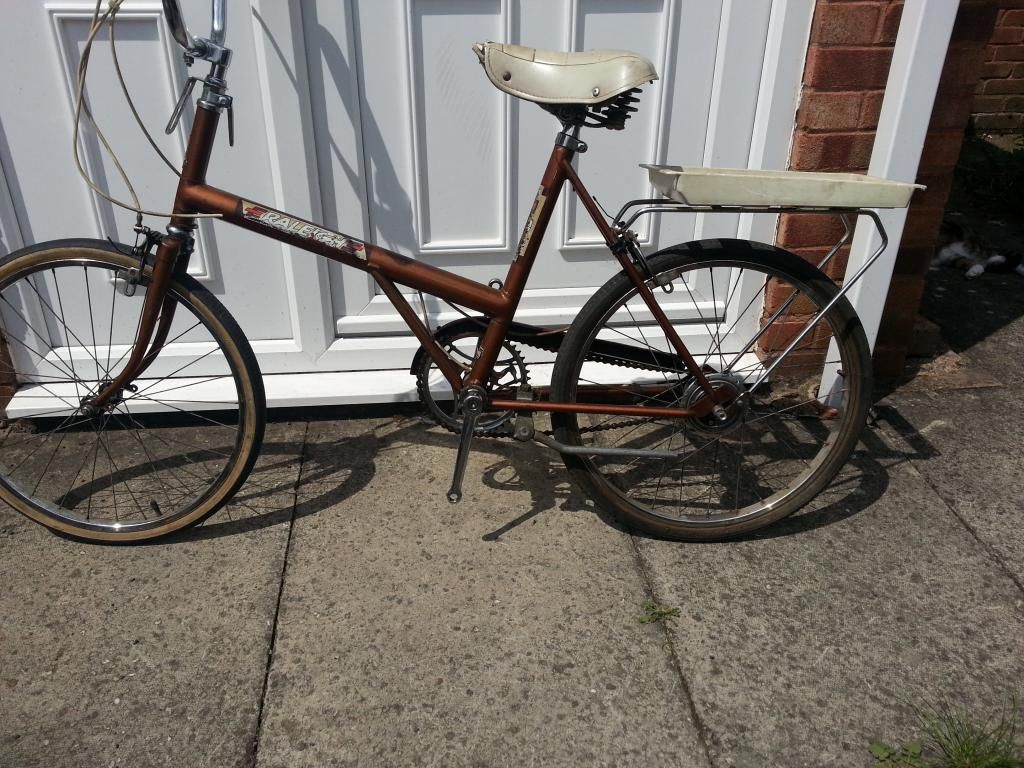
The bike with 20" steel rims and three-speed hub gears:


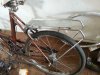
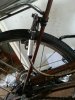
The forks are quite narrow, so the Q100 doesn't fit directly:


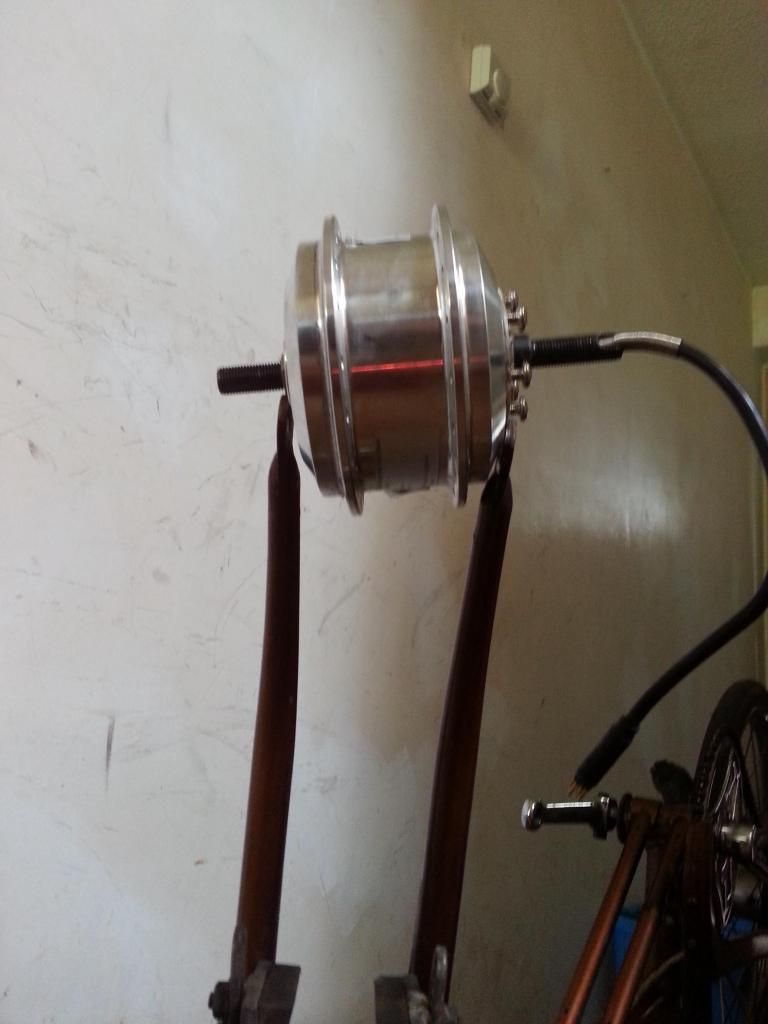
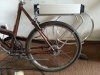
A quick heave-ho and the motor fits nicely. It's dead easy to move these forks:


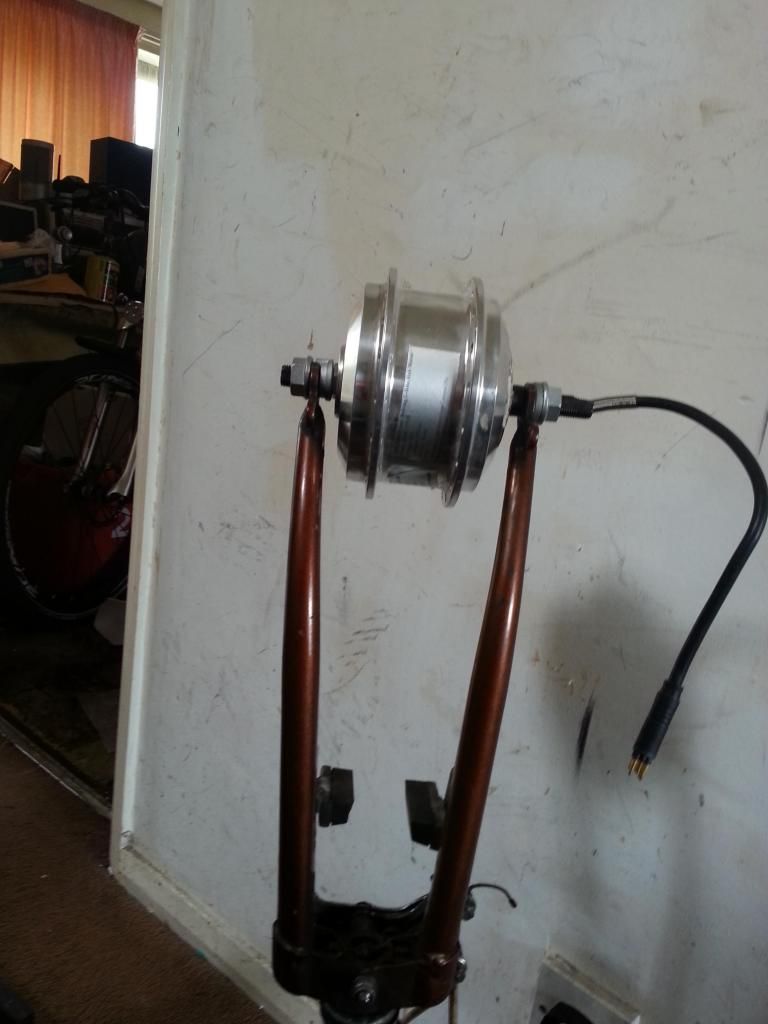
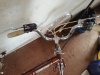
Half-hour later, and the wheel is built. You might now be able to see the hiccup:


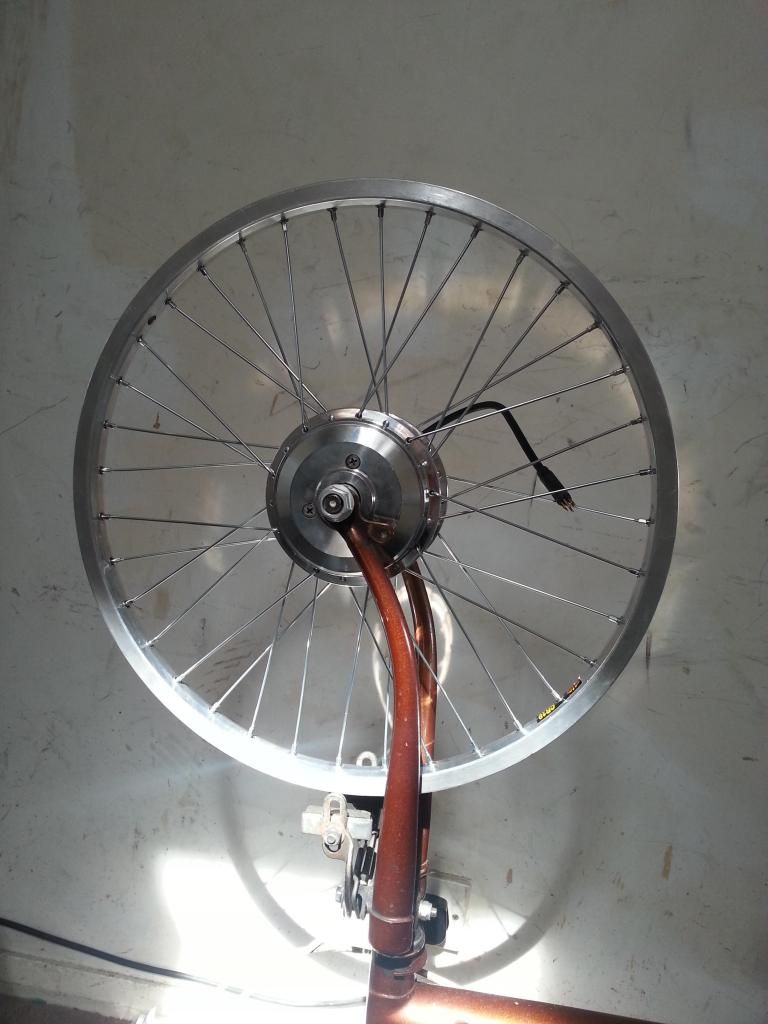
When I came to fit the tyre, I noticed a bit of a problem. The rims are Brompton rims, which is a bit of a result, but no good for the Raleigh. I've now ordered a new rim, which I'll have to wait for before I can order new spokes. I wondered why I didn't have any spokes near the correct size for that rim.
 

MikeyBikey

Pedelecer
Mar 5, 2013
237
23
One problem you may well get is a weak single pivot brake, and when you use a spare Brompton double pivot caliper, it won't have enough drop to the rim.
But I'm sure you're familiar with using 2x old reflector brackets, a long bolt and spacers to 'drop-bolt' it on.
If the Brompton's front caliper bolt is too short, you'll find the rear one is longer!
My '92 Raleigh shopper is different, so you might get lucky with the clearance. Koolstop Salmon pads are extremely grippy, even with chrome rims, in the dry anyway!
Good luck, though i'm sure you won't need it. :)
 
D

Deleted member 4366

Guest
They're not Brompton rims unfortunately. Like with 16" wheels, there's two sizes of 20" ones: 37 x 411 (normal) and 37 x 451 (Raleigh). That's nearly two inches difference! How can they call them both 20". The two different sized tyres are both marked 20" x 1 3/8"! I've got the correct rims now. I'm just waiting for the spokes.

The battery came today two weeks from ordering, so I was able to install it. I'm afraid the lovely plastic tray thing has to go:
20140630_120530.jpg

These batteries are dead easy to fit. First bolt the plate to the rack:

20140630_131034.jpg
 
Last edited by a moderator:
D

Deleted member 4366

Guest
Then slide on the battery. It's a bit fiddly to get the lock-bolt into the hole, so I'll probably fabricate a positive stop to stop the battery from sliding too far, and hold it in the correct position for the lock-bolt.

20140630_130956.jpg

All the wiring has been done except at the controller end. Only a thumb-throttle and control panel on the handlebars:

20140630_120506.jpg :
 
D

Deleted member 4366

Guest
The kit's brake levers with switches were miles too big for the tiny handlebars, so I left the original brake levers and fitted in-line sensors:

20140630_121641.jpg
 
D

Deleted member 4366

Guest
More progress, but also with the inevitable problems. I have the correct rim and spokes now, so the wheel is built. Now the problem. No matter how much I manipulate the tyre, every time I try to pump it up, it pops off the rim. The rim is the same size as the original one. The tyre alignment line is nicely concentric with the rim. The tube seems to be slightly smaller diameter - possibly 37-411 instead of 37-451 if they make different ones. Also, it's relatively fat for the size of the tyre. Has anybody experienced this before? Is it a tube or tyre problem?


D

Deleted member 4366

Guest
Now to the controller and connectors. When you convert a bike, the wire lengths are always wrong, so you have a lot of spare wire to hide somewhere. The controller box needs to be quite small to look nice, which means not enough room for all the connectors and wires.The plan therefore is to wire the battery connector direct to the pcb along with the motor wires. At the same time, I need to change the connector from two to three wires for the in-line brake sensors, which means finding a 5v supply from somewhere. I'll also get rid of anything that's not needed..

Here's the controller:


After the phase and hall wires, cruise, battery and brake wires have been removed:


There's a spare pad in the 5v bank to give the feed for the brake sensors:


Now with the new battery and brake connectors:


Just the phase and hall wires to finish it now.
 
  • Like
Reactions: Artstu
D

Deleted member 4366

Guest
Here's the controller and connectors in the box:


And here's the bike nearly finished. Just got to fit the PAS, the tyres and rebuild the back wheel with a matching rim. It should look quite smart when finished:

 
D

Deleted member 4366

Guest
I've made a bit more progress. New tyres have sorted out the problem with the previous ones popping off. While I was waiting for the spokes, I had a chance to try it out. Everything works, except that the back brake stopped working. When I looked, the brake pads were below the rim. The whole bracket that holds the brakes had slid down. Close inspection showed that it had been previously bodged with epoxy after the welds had failed. Here's the plate:


I fixed it with a clamp plate and a couple of tie-bars:


The spokes that came for the back wheel are all 5mm too long. That'll teach me to read the ERD from the internet rather than measure it. I can't find the correct length spokes, so I've ordered a thread rolling tool to lengthen the threads, then I can chop the ends off. This is where I'm up to now. Everything's done except the building of the rear wheel:

 
  • Like
Reactions: pdarnett