Where to find wiring diagram for whisper works 905e

electricspeed

Finding my (electric) wheels
Dec 26, 2016
7
0
35
Manchester
I have an opportunity today to pick up a whisper 905e minus the battery at a decent price that is worth maybe taking a chance on.

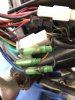
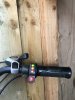
It is my intention to try and put a temporary supply to the bike to check motor function etc but it is my understanding the the removable batteries where flat terminal connected when slid/locked into the bike.

Would anyone know where I could find the right wiring diagram, or advise me which way is best to put a temporary supply to the bike to enable me to check the function of the bike before fully committing to a new power source?

Thanks
 

electricspeed

Finding my (electric) wheels
Dec 26, 2016
7
0
35
Manchester
Many thanks for the replies. It’s great to know that Wisper have a presence here.

All being well it should just be a case of adding power and off we go but as with anything it could also be a total dud of a project.
 
D

Deleted member 4366

Guest
If you want to use a different power source to the battery, it needs to be in the range 32v to 44v. The controller sits in a compartment under the battery. There's two wires from the battery connection to the controller, which have bullet connectors. Pull them apart and apply the power directly to the controller.

When the controller is switched on, there will be 5v between the red and black throttle or PAS wires.
 

electricspeed

Finding my (electric) wheels
Dec 26, 2016
7
0
35
Manchester
Well I decided to take a chance on it, for £50 it might be worth it or it might not.

Brought it home and opened up the controller compartment and it appears all of the wiring is connected and in tact, however I did notice a blue and a green wire that appeared to be blackened. Anybody know what these wires are for?
 

Attachments

D

Deleted member 4366

Guest
They're the main phase wires that provide power to the motor. Often, there's a connector near the motor, so those burnt connectors aren't needed, in which case cut them off and solder them directly to each other.

They burn like that when they don't make good contact, probably because either they're not pushed fully home or they've been inserted a couple of times, which makes them loose. It will probably be difficult to get them apart because the melted plastic glues them, but if you can, you can try crimping down the barrels a bit to make them tighter.

Your bottom bracket looks very corroded in that picture. Turn the pedals to see if it's notchy and check for freeplay. If it's bad, you can get a better cartridge replacement BB assembly from Halfords for about a tenner.

The thick red and black wires in that white block connector are the two that come from the battery. That's where you need to apply your voltage to test if it works.
 
Last edited by a moderator:

electricspeed

Finding my (electric) wheels
Dec 26, 2016
7
0
35
Manchester
They're the main phase wires that provide power to the motor. Often, there's a connector near the motor, so those burnt connectors aren't needed, in which case cut them off and solder them directly to each other.

They burn like that when they don't make good contact, probably because either they're not pushed fully home or they've been inserted a couple of times, which makes them loose. It will probably be difficult to get them apart because the melted plastic glues them, but if you can, you can try crimping down the barrels a bit to make them tighter.

Your bottom bracket looks very corroded in that picture. Turn the pedals to see if it's notchy and check for freeplay. If it's bad, you can get a better cartridge replacement BB assembly from Halfords for about a tenner.

The thick red and black wires in that white block connector are the two that come from the battery. That's where you need to apply your voltage to test if it works.
Many thanks. The bottom bracket is fine although a bit rusty on the surface. Ssge to say the gent who had this didn’t know what it was nor the best way to look after it.

I will give them a better crimping as I couldn’t get them apart, like you said more than likely glued down from the melted plastic.

I noticed the controller has a low voltage protection of 31.5v. Out of curiosity, what happens if you applied 24v as opposed to 36v? I would assume nothing however this intrigued me.
 
D

Deleted member 4366

Guest
Out of curiosity, what happens if you applied 24v as opposed to 36v? I would assume nothing however this intrigued me.
Nothing. The controller cuts power when the supply drops below 31.5v. The upper limit for voltage is probably around 50v.
 

electricspeed

Finding my (electric) wheels
Dec 26, 2016
7
0
35
Manchester
Well the good news is that I’ve put 36v (38 measures with voltmeter) to the power on the controller and got full power lights at the twist grip. Bad news is when using the throttle I got no movement of the rear wheel. I could also swear I saw a small amount of smoke from the control unit but can’t be 100%.

More investigation needed but not sure where to go from here. Maybe disconnect the motor phase wires and test at that point?
 

Attachments

D

Deleted member 4366

Guest
You won't be able to test anything meaningful on the phase wires because the controller fires some pulses, and if it doesn't see movement, it stops.

I told you above in post#5 that you need to check whether you have 5v on the throttle.
 

Advertisers