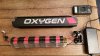
Back story....
- Battery cells are confirmed ok and registering 42V per multimeter at outlet
- Sans Charger appears ok registering 42.1v per multimeter at outlet. see this thread
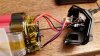
- Issue is trying to get battery to charge. I am seeing a green light on the charger when it should be red. I am only able to see the light go red when manipulating the battery (by turning over/ upside down on worktop and giving a gentle tap) : Suggest loose connection somewhere within battery case.
- Note: battery cells appear to move/ rattle within the battery case which is particularly noticeable when riding over uneven surfaces or when the battery is manipulated. This rattling has been getting worse with continued mileage - currently at 184miles.
Am considering carefully taking the battery pack apart to see if I can see what the issues are and effect my own repair before taking the risk of sending it off.
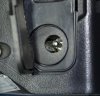
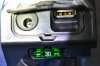
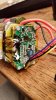
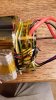
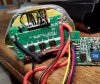
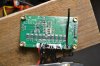
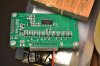
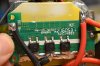
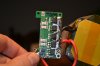
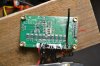
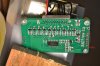
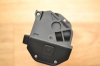
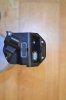
Has anyone here experience with these issues in a battery pack or indeed dismantled the oxygen battery pack and can assist? Pics included to show the packs ports/fuse & visible screws.