New Cheaper Wattmeter

  • Thread starter Deleted member 4366
  • Start date
D

Deleted member 4366

Guest
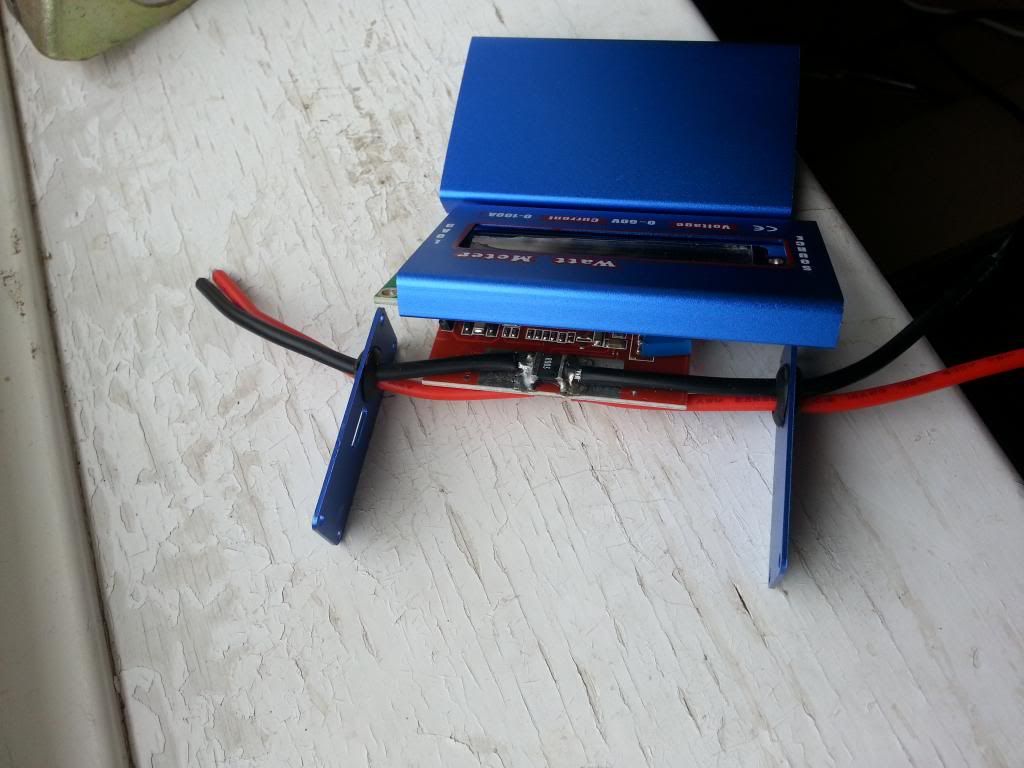
In case you don't know, It's best to keep the wires as short as possible unless you want to use very thick wire that makes your bike look ugly. With the other type, it's possible to remove the shunt and fix it between the controller and battery with thin wires running to the wattmeter display that you can then mount on the handlebars. Hopefully, it'll be possible to do this on the new one, which looks much easier to waterproof than the other one.
 

Marctwo

Pedelecer
Dec 1, 2012
182
1
Cheers, I'm also hoping to seperate the shunt. I'll likely end up following your instructions for this... lol.

If I can't remove the shunt then I doubt it'll go on my handle bars. But at that price, it's worth getting just to have a look inside it.
 
D

Deleted member 4366

Guest
It arrived today. I'll test it next week and then externalise the shunt. It looks much easier on this one than the other one because it has a solid-state shunt rather than two pieces of wire. Unfortunately no instructions with it, but it has two trim-pots inside to adjust for better accuracy. Also there's a three pin connector one end. I wonder what that's for? It looks very easy to waterproof too, or you could take the insides out and mount in a waterproof box. Loads of options.
 
Last edited by a moderator:

shemozzle999

Esteemed Pedelecer
Sep 28, 2009
2,826
686
Also there's a three pin connector one end. I wonder what that's for?
INSTRUCTIONS FOR CONNECTING AUXILIARY

Using Auxiliary Power
By connecting a receiver battery pack (of at least 4.0 V) or other power source to the 3-pin connector on the SOURCE side, the Watt Meter can measure down to 0 V. Pin 1 is Negative (0 Volts), pin 2 (middle pin) is Positive. Pin 1 is the pin farthest from the Meter SOURCE wires. Pin 3, on meter is for reset of accumulated readings.

Applying Power
The Meter requires a power source providing a minimum of 4.0 V to operate. This can come from a power source (battery or charger) on the LOAD or SOURCE side or from the auxiliary 3-pin SOURCE power input connector. If you connect an auxiliary power source of 4.0 V or more (e.g. small receiver battery pack), the Meter operates independently of power sources on the LOAD or SOURCE leads. This allows measurements down to 0V, e.g. for measuring a single cell main pack.
 

jhruk

Esteemed Pedelecer
May 13, 2009
318
68
Mine arrived this morning as well. I’ve just tried it and before adjustment it read .22A with no load – so just as well it has the trim pots!

I guess the three pin connector is for an auxiliary power supply, similar to the Turnigy or Watts-Up, so the instruction for those might be useful for those without them :

Turnigy
Watts-Up
 
D

Deleted member 4366

Guest
Thanks for that. Where did you get it from? Is there more?

I wonder if it works like a CA remembering its accumulated data until you reset it, in which case I need to add a reset switch - presumably pin 3 to ground.