Finally bought a smaller folder for conversion...

D

Deleted member 4366

Guest
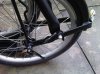
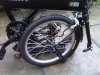
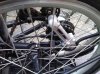
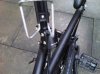
Slime is OK for thorns, small glass shards, nails and things like that, but if you're missing a rim tape, got a badly fitted tyre or tube it won't help. It sounds like you might have had a tube that was damaged during fitting, and the slimehad temporary success in sealing it, but when you rode the bike something moved, which let everything out. The other possibility is that the tyre wasn't fitted right, but you wouldn't of got leaks and fizzing noises before you road the bike. Everything would have been normal apart from wheel wobble until the tube would burst out between the rim and tyre. Saneagle had that a couple of weeks ago, but it happened while he pumped up the tyre. It went with a big bang and totally shredded the tube.
 
Last edited by a moderator:

Old_Dave

Esteemed Pedelecer
Sep 15, 2012
1,211
2
Dumfries & Galloway
and further road tests will see if the wobble is related
Nope...

Ensure you are wobbleless with the bike upside down first

Woad westing a wobbley wheel is a waste of time
 

flecc

Member
Oct 25, 2006
52,835
30,393
that second time, after I was done, there was no air loss, no hissing.. so I thought ah, puncture mended! Left it 30 mins, still good..so off I went.

This begs the question..is that slime stuff intended to do permanent fixes to minor punctures, or is it just like a temporary solution to slow down loss of air sorta thing?
Slime needs enough air-to-slime ratio to seal once a tiny bit more air is added by the puncture, so the second pumping probably achieved that ratio.

With a tubed tyre I would never trust Slime for any other than a temporary repair. Tyre to tube position can move in use and that can result in the thicker tyre wall seal pulling the seal out of the thin inner tube wall, or shearing the seal.
 

morphix

Esteemed Pedelecer
Oct 24, 2010
2,163
119
Worcestershire
www.cyclecharge.org.uk
As for tyres, any of these will fit your rim but you need to read Jerry's guide on how to fit them first:

brompton tyres | eBay

or watch this Brompton video:

Replace a tyre or inner tube : Brompton Bicycle


Note! he aligned the label on the tyre with the valve this helps with finding the valve position in low level light
conditions.
Woah he made that look so easy! I need to get some tyre levers, won't chance using table knifes or anything like that again on small wheels.
 

jerrysimon

Esteemed Pedelecer
Aug 27, 2009
3,292
112
Cambridge, UK
The secret of get tyres on that are a tight fit is to make sure the bead is right down in the center well.

Regards

Jerry
 

jackhandy

Esteemed Pedelecer
May 20, 2012
1,820
323
the Cornish Alps
Just a note of warning on the poundland levers: They can be a wee bit sharp on the edges, so take care if you slide one round the rim, like I do - It's easy to scrape off the rim's anodising.

Having said that, I use their kits all the time & keep a plastic lever in with them.
 
D

Deleted member 4366

Guest
You don't need any tools to get a tyre and tube on. All you end up doing with them is damaging the tube if you use levers. I've had people tell me that their tyre must be the wrong size, so won't fit on their rims, and then I watch their jaws drop as I pull it on with my bare hands. You just need the correct technique.
 

Old_Dave

Esteemed Pedelecer
Sep 15, 2012
1,211
2
Dumfries & Galloway
And a couple of cable ties / toe straps for the very tough ones (marathon plus), lol


Sent from my iPhone using Tapatalk
 
D

Deleted member 4366

Guest
I ca get about half the tyres off with my bare hands, but I use spoon handles for the rest. They're nice and round, so don't nip the tube.
 

cpg

Finding my (electric) wheels
Oct 24, 2012
21
0
Thanks cpg I wasn't even aware you could adjust that catch so that might just do the trick, perhaps a bit of compensation as you suggest is all that's needed there.

Another potential problem is that the seat post doesn't seem to go fully down now either since I changed the wheel, so will have to investigate that and confirm.. it may just be me being not fully familiar with the folding procedure though, as unlike the Brompton, with the Mezzo there's a very specific way of doing it and you have to remember to do each stage in the right order eh else it just doesn't work or fold neatly.

I did make a drawing of each stage and tried to simplify it, as the user guide isn't very clear and the DVD they supply is a bit too quick with computer generated imagery. It would be nice to have a video showing someone doing the fold and unfolding and explaining a simple way to remember the steps.. I'll do one when I get the bike back and everything sorted.
I hope this helps.
1) Rotate the crank so that on the drive side of the bike it points the back of the bike and is horizontal.
2) Rotate the handlebars counter clockwise until the front wheels hits the stop.
3) Lift the catch that holds the rear triangles in place.
4) Lift the bike by holding the catch so that the rear wheel and triangles rotate round and under the main part of the frame and the bike is sitting on the bag rack.
5) Open the front wheel quick release and then open the front wheel clamp.
6) Holding the front wheel clamp open lift the front of the bike so the front wheel swings out.
7) swing the front up and locate the bar at the side into the retaining clip.
8) Open the seat clamp quick release and drop the seat. If the seat does not drop all the way down apply a small amount of downward pressure on the handlebars.
9) Lift the catch on the handlebar stem and fold the handle bars down.
10) Fold in the pedals.
11) Unfolding is the reverse sequence of the above steps.

Hopefully the photos should be in the correct sequence.

IMG00528-20130209-1425.jpgIMG00529-20130209-1425.jpgIMG00530-20130209-1425.jpgIMG00531-20130209-1426.jpgIMG00532-20130209-1426.jpgIMG00533-20130209-1428.jpgIMG00534-20130209-1428.jpgIMG00535-20130209-1428.jpgIMG00536-20130209-1429.jpgIMG00537-20130209-1429.jpgIMG00538-20130209-1430.jpgIMG00539-20130209-1430.jpg
 

cpg

Finding my (electric) wheels
Oct 24, 2012
21
0
I just measured the original rear wheel axle and it looks 140mm, give or take a mm or two.

The problem I had with the new wheel was a big nut on the opposite side to freewheel...that prevented the axle otherwise just slotting in.. it was only about 4-5mm so hence I just used a spanner to give more leeway and allow for it. This will become clear when I upload the videos shortly showing this procedure and the wheel fitting with my mate.

I think the 6-spd as Dave suggested would have been better though and would have just gone straight in most likely with minimal/no bending of drop outs needed.
That sounds like the dimension for the overall length of the axle. You need 135mm between the inner faces of the drop-outs or in the case of the hub, between the outer faces of the nuts/spacers on the axle. Is there a spacer between the main body of the hub and the outermost nut on the cassette side? If there is this could possibly be shortened as long as there is space between the drop-out and the smallest cog for the chain to pass through. Could narrower inner nuts be fitted to the axle? We need good close up photos.

Going back to the fold and the problems with the chain. Before folding the D9, the chain is supposed to be in the middle of the cassette but I can not remember if its 3rd or 4th. The aim is to get the chain in a straight line so with your new wheel you will have to see which gear is best for this.
 

103Alex1

Esteemed Pedelecer
Sep 29, 2012
2,228
67
I use spoon handles for the rest. They're nice and round, so don't nip the tube.
Would four candles do instead ?
 

morphix

Esteemed Pedelecer
Oct 24, 2010
2,163
119
Worcestershire
www.cyclecharge.org.uk
I hope this helps.
1) Rotate the crank so that on the drive side of the bike it points the back of the bike and is horizontal.
2) Rotate the handlebars counter clockwise until the front wheels hits the stop.
3) Lift the catch that holds the rear triangles in place.
4) Lift the bike by holding the catch so that the rear wheel and triangles rotate round and under the main part of the frame and the bike is sitting on the bag rack.
5) Open the front wheel quick release and then open the front wheel clamp.
6) Holding the front wheel clamp open lift the front of the bike so the front wheel swings out.
7) swing the front up and locate the bar at the side into the retaining clip.
8) Open the seat clamp quick release and drop the seat. If the seat does not drop all the way down apply a small amount of downward pressure on the handlebars.
9) Lift the catch on the handlebar stem and fold the handle bars down.
10) Fold in the pedals.
11) Unfolding is the reverse sequence of the above steps.

Hopefully the photos should be in the correct sequence.

View attachment 5071View attachment 5072View attachment 5073View attachment 5074View attachment 5075View attachment 5076View attachment 5077View attachment 5078View attachment 5079View attachment 5080View attachment 5081View attachment 5082
Great job cpg, thanks ever so much for taking the time to do that. I will practice from your guide and master it ;-)
 

morphix

Esteemed Pedelecer
Oct 24, 2010
2,163
119
Worcestershire
www.cyclecharge.org.uk
Going back to the fold and the problems with the chain. Before folding the D9, the chain is supposed to be in the middle of the cassette but I can not remember if its 3rd or 4th. The aim is to get the chain in a straight line so with your new wheel you will have to see which gear is best for this.
Yes indeed, the chain always seem to give me problems with the fold as I always forget to get it in the middle of cassette (or freewheel now) or it's not lined up properly..and then it either comes off, or just gets in the way! I'll have to figure out which gear is optimal as you say and just remember that number on my shift ;-) I guess when I start using the bike more this folding and unfolding will eventually become second nature.. I've only ridden it 3 times!

If it wasn't for the obvious practical limitations on Mezzo (front wheel drop-out as part of fold preventing front-wheel motor), I would have gone for 3-5 spd hub gears...would be neater and more practical I think on a small folder like this...no hanging derailleur and a shorter chain.
 
Last edited:

morphix

Esteemed Pedelecer
Oct 24, 2010
2,163
119
Worcestershire
www.cyclecharge.org.uk
Kojack v Marathon

I'm about to order new tyres for my Mezzo and can't decide whether to go for the Marathon GreenGuard or Kojacks slicks with the Kevlar RaceGuard protection. (I think you can also get Marathon Plus now in 16" 349mm but they're a bit pricey..I have Marathon Plus on my 26" and they have been good tyres, no punctures in 2 years, even riding over glass.

The advantage of the Kojacks is the lighter weight, 175 grams per tyre at 1 1/4 size (28-349) compared to 320g for the Marathon Kevlar GreenGuard which is 3mm thick. I'm not sure how thick the RaceGuard belt is in the Kojacks or how effective it is at preventing punctures. That big weight saving though is tempting on a build where weight counts a lot.

I'm also not sure about Kojacks with the tyres being completely smooth with no tread on. I've read reviews saying they're the best for road performance speed but worried about loss of traction, risk of slippage on some surfaces, especially on wet roads..

Would welcome any thoughts on this.. I'm leaning towards Marathon GreenGuard as these seem a middle of the road compromise...they also meet the ECE75 standard for e-bikes like Marathon Plus.. They're on offer at the moment at SJS Cycles for £14.24.

Also any recommendations for inner tubes with some extra puncture resistance perhaps? Or should I just go with Schwalbe?
 
Last edited:
D

Deleted member 4366

Guest
175g for each Kojak and 1.5 kg for a decent kidney support belt!:eek:
 
Last edited by a moderator:

morphix

Esteemed Pedelecer
Oct 24, 2010
2,163
119
Worcestershire
www.cyclecharge.org.uk
175g for each Kojak and 1.5 kg for a decent kidney support belt!:eek:
So you reckon they would offer minimal protection then for punctures due to the low weight? Waste of time?
 
D

Deleted member 4366

Guest
I,m thinking about the rough time your kidneys will have with no suspension and tiny tyres at 100 psi.