
Another idea I had was to make an armchair excercise bike generator. You fix some pedals to your favourite armchair and run a chain to an ebike motor under the chair. you can also install the battery, rectifier and mppt charger in there. When you're watching TV, knitting, chilling with the dog or whatever you do in the armchair, you can operate the pedals, which not only gives you excercise, but provides power for your house too.nice idea @saneagle but i doubt my fabrication skills to make something silent and not annoy everyone for miles around..
yesterday i had 1 ebike now i have 4!
- Thread starter thelarkbox
- Start date
Ha I already own a clothes horse that was a 80's gym self powered exercise cycle Huge B&gger Most exercise i ever had was shifting it up 1 flight of stairs on my tod.. its been drying clothes since 2003.. occasionally got a work out during 2020 always 1/2 heartedly..Another idea I had was to make an armchair excercise bike generator. You fix some pedals to your favourite armchair and run a chain to an ebike motor under the chair. you can also install the battery, rectifier and mppt charger in there. When you're watching TV, knitting, chilling with the dog or whatever you do in the armchair, you can operate the pedals, which not only gives you excercise, but provides power for your house too.
There are two problems with the exercise bike: One is the very name of it; the other is that you have to kick the dog/cat off and get out of the armchair when you were nice and comfortable. Both those problems are solved with my invention if I can find the right name for it, like Relaxerator or Slump Charger.Ha I already own a clothes horse that was a 80's gym self powered exercise cycle Huge B&gger Most exercise i ever had was shifting it up 1 flight of stairs on my tod.. its been drying clothes since 2003.. occasionally got a work out during 2020 always 1/2 heartedly..
@saneagle - side track my thread eh ? ok.. the problem is considering exercise as anything more than what it really is, a side effect of doing something. now if you elect to do pointless things to receive the benefits of the side effect, fine, just don't expect many rational (heavy) folk to queue up to join you.. if you want to promote the side effect promote just about anything positive and everyone wins.
These selfish folk who expend disgustingly vast amounts of effort and energy benefiting No one other than themselves via a side effect should be ashamed to be seen in public with decent folk who refuse to waste any effort.
Probably a good job im not in charge eh? Nationalise all gyms and turn em into at cost tax free brew pubs equipped with tools to do stuff. including brew more beer")
These selfish folk who expend disgustingly vast amounts of effort and energy benefiting No one other than themselves via a side effect should be ashamed to be seen in public with decent folk who refuse to waste any effort.
Probably a good job im not in charge eh? Nationalise all gyms and turn em into at cost tax free brew pubs equipped with tools to do stuff. including brew more beer
Back on track.. (i dont know all the proper terminology for a lot of bike bits yet..)
tldr- Lots of arghhh due to bike bits agro and rust, not a huge spend required tho..
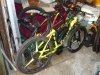
The yellow TAICO-02 bike, Needs a bloody redesign. gear cables fed through open holes in the top of the drop tube (diagonal from steering head to bottom bracket) so water gets inside and pools at the bottom bracket rusting its bearings and encapsulating fittings in the aluminium frame..
I tied the frame down Bolted on the bottom bracket extraction tool to keep it in place and used a 6ft lever with my circa 100kg mass behind it in an attempt to shift it, naa the bolt securing the extraction tool in place decided to stretch and allow the tool to skip teeth, and again after retightening down hmmmmm
Then i went stone aged impact driver at it for a good 1/2 hour with a cold chisel and hammer
However after lubing with penetrating oil targeted at the threads the bearings feel less crunchy (wishful thinking?)
I dont feel like going full out destructive with a torch yet so have decided to live with a crunchy crank to start with and may well revisit or even pass the buck to a pro bike shop.
gear wise,, its been 'upgraded' from a 7 to 9 speed freewheel, the rear frame has been stretched to accommodate this and requires wedging to remove or fit the wheel.
the rear derailleur and shifter work ok with a new cable, although the shifters indicator is not registering changes . The chain wants to jump between the different chain rings when the rear gears shift. the front shifter is seized atm so is soaking ,, smaller freewheel and new chain would be good imho.
Ive opted to buy a new 17a KT controller and lcd3 headset with waterproof julet connectors along with the suitable cables and new brake levers and sensors to replace the defunct controller and headset, although the existing sensors use higo connectors and not julet, the cables on the brake levers are worn revealing inner sleeves to further damage and i have a spare pas sensor already, so am about to spend close to £90 with aliexpress to put the bike on the road with its crunchy crank.
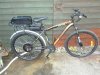
The red/orange bike with the HUGE 48v motor .. Again rust is the major issue seized solid chain crunchy crank tho the bottom bracket looks easy to pull,, its not rusty.. and rusty forks.
no gears are fitted to this bike although the motor wheel has a 7 speed freewheel fitted.
with the wheel in the vice and it all wired up and powered as is the broken display shows nothing but lights up and the wheel responds to the throttle.
The wheel is a wreak 8 broken spokes, and the hub shifts left to right up and down un supported by the remaining spokes
So i have orderd new spokes and will replace them 1 by 1 staring with the broken ones and the cutting and replacing the rest..
I can use the 6speed freewheel derailleur, chain and shifter from my base donor bike
so with a successful bottom bracket exchange £30 should get this one rideable, but not on road
Photos to follow..
tldr- Lots of arghhh due to bike bits agro and rust, not a huge spend required tho..
The yellow TAICO-02 bike, Needs a bloody redesign. gear cables fed through open holes in the top of the drop tube (diagonal from steering head to bottom bracket) so water gets inside and pools at the bottom bracket rusting its bearings and encapsulating fittings in the aluminium frame..
I tied the frame down Bolted on the bottom bracket extraction tool to keep it in place and used a 6ft lever with my circa 100kg mass behind it in an attempt to shift it, naa the bolt securing the extraction tool in place decided to stretch and allow the tool to skip teeth, and again after retightening down hmmmmm
Then i went stone aged impact driver at it for a good 1/2 hour with a cold chisel and hammer
However after lubing with penetrating oil targeted at the threads the bearings feel less crunchy (wishful thinking?)
I dont feel like going full out destructive with a torch yet so have decided to live with a crunchy crank to start with and may well revisit or even pass the buck to a pro bike shop.
gear wise,, its been 'upgraded' from a 7 to 9 speed freewheel, the rear frame has been stretched to accommodate this and requires wedging to remove or fit the wheel.
the rear derailleur and shifter work ok with a new cable, although the shifters indicator is not registering changes . The chain wants to jump between the different chain rings when the rear gears shift. the front shifter is seized atm so is soaking ,, smaller freewheel and new chain would be good imho.
Ive opted to buy a new 17a KT controller and lcd3 headset with waterproof julet connectors along with the suitable cables and new brake levers and sensors to replace the defunct controller and headset, although the existing sensors use higo connectors and not julet, the cables on the brake levers are worn revealing inner sleeves to further damage and i have a spare pas sensor already, so am about to spend close to £90 with aliexpress to put the bike on the road with its crunchy crank.
The red/orange bike with the HUGE 48v motor .. Again rust is the major issue seized solid chain crunchy crank tho the bottom bracket looks easy to pull,, its not rusty.. and rusty forks.
no gears are fitted to this bike although the motor wheel has a 7 speed freewheel fitted.
with the wheel in the vice and it all wired up and powered as is the broken display shows nothing but lights up and the wheel responds to the throttle.
The wheel is a wreak 8 broken spokes, and the hub shifts left to right up and down un supported by the remaining spokes
So i have orderd new spokes and will replace them 1 by 1 staring with the broken ones and the cutting and replacing the rest..
I can use the 6speed freewheel derailleur, chain and shifter from my base donor bike
so with a successful bottom bracket exchange £30 should get this one rideable, but not on road
Photos to follow..
You know the bottom bracket is left hand thread on the left side and right hand thread on the right side?Back on track.. (i dont know all the proper terminology for a lot of bike bits yet..)
tldr- Lots of arghhh due to bike bits agro and rust, not a huge spend required tho..
The yellow TAICO-02 bike, Needs a bloody redesign. gear cables fed through open holes in the top of the drop tube (diagonal from steering head to bottom bracket) so water gets inside and pools at the bottom bracket rusting its bearings and encapsulating fittings in the aluminium frame..
I tied the frame down Bolted on the bottom bracket extraction tool to keep it in place and used a 6ft lever with my circa 100kg mass behind it in an attempt to shift it, naa the bolt securing the extraction tool in place decided to stretch and allow the tool to skip teeth, and again after retightening down hmmmmm
Then i went stone aged impact driver at it for a good 1/2 hour with a cold chisel and hammer
However after lubing with penetrating oil targeted at the threads the bearings feel less crunchy (wishful thinking?)
I dont feel like going full out destructive with a torch yet so have decided to live with a crunchy crank to start with and may well revisit or even pass the buck to a pro bike shop.
gear wise,, its been 'upgraded' from a 7 to 9 speed freewheel, the rear frame has been stretched to accommodate this and requires wedging to remove or fit the wheel.
the rear derailleur and shifter work ok with a new cable, although the shifters indicator is not registering changes . The chain wants to jump between the different chain rings when the rear gears shift. the front shifter is seized atm so is soaking ,, smaller freewheel and new chain would be good imho.
Ive opted to buy a new 17a KT controller and lcd3 headset with waterproof julet connectors along with the suitable cables and new brake levers and sensors to replace the defunct controller and headset, although the existing sensors use higo connectors and not julet, the cables on the brake levers are worn revealing inner sleeves to further damage and i have a spare pas sensor already, so am about to spend close to £90 with aliexpress to put the bike on the road with its crunchy crank.
The red/orange bike with the HUGE 48v motor .. Again rust is the major issue seized solid chain crunchy crank tho the bottom bracket looks easy to pull,, its not rusty.. and rusty forks.
no gears are fitted to this bike although the motor wheel has a 7 speed freewheel fitted.
with the wheel in the vice and it all wired up and powered as is the broken display shows nothing but lights up and the wheel responds to the throttle.
The wheel is a wreak 8 broken spokes, and the hub shifts left to right up and down un supported by the remaining spokes
So i have orderd new spokes and will replace them 1 by 1 staring with the broken ones and the cutting and replacing the rest..
I can use the 6speed freewheel derailleur, chain and shifter from my base donor bike
so with a successful bottom bracket exchange £30 should get this one rideable, but not on road
Photos to follow..
You had me waving my hands for a second glancing up to the right as i recalled the way i was twisting and yes.. i had overdosed on yt vids before hand tooYou know the bottom bracket is left hand thread on the left side and right hand thread on the right side?
cheers..Holding the bottom bracket horizontally on a vetical metal spike and gently bashing the frame in immediate contact with the BB, loosened the BB on my bike enough to eventually remove. It took ages - this was a bloody good tip from my local bike shop owner, who's been in the bicycle game for a very long time, and might actually be aged 100+ years old. I had damaged one extraction tool trying to remove the totally seized (probably by galvanic corrosion) BB, so the bolt of that damaged tool got shoved through a hole I'd drilled into a plank of wood, to serve as a vertical spike, sticking up from the floor.I tied the frame down Bolted on the bottom bracket extraction tool to keep it in place and used a 6ft lever with my circa 100kg mass behind it in an attempt to shift it, naa the bolt securing the extraction tool in place decided to stretch and allow the tool to skip teeth, and again after retightening down hmmmmm
Then i went stone aged impact driver at it for a good 1/2 hour with a cold chisel and hammer
However after lubing with penetrating oil targeted at the threads the bearings feel less crunchy (wishful thinking?)
Last edited:
Cheers @guerney, Its crazy if the date on the motor indicates the bikes age, its just over 1 yr old.
And while the chain was rust colored it was not at all seized and was free moving, every link articulated.
its rusted from the inside out!!
But as this is 'now' an unrestricted bike with a controller intended for slightly larger 350w motors with a twistgrip throttle an additional ebay splurge this evening - reimposing discipline tomorrow.. Circa £100 now spent on the bike. in for a penny eh?
I dont expect to do much other than ghost pedal on the way to off rd (1/2-1 mile up a cycle track from here..) where it will be throttle only fun n games..
If however it were my daily hop on and go bike where i generally dont turn the ebike aspect on until i return up hill home now the novelty has worn off a little. well yes i would want that bottom bracket exchanged pronto.
If it starts getting wobbly as well as crunchy then i will revisit and strip the frame bare to work on it.
More intense percussive persuasion, long levers, and this time heat.. and if that fails I will potter down the road to the bike shop and finally give them some work..
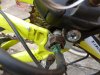
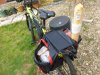
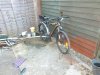
Foul weather, and i arrived home damp, the drizzle died diwn a bit so i took a few snaps but stopped at any further disassembly.. Im not a photographer..
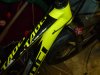
the brake sensor cable wear. I could fix with a dollop of epoxy or hot glue but £12 buys new lever/sensors..
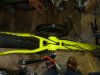
Slots in the top of the downtube!!! WTF!!
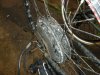
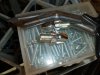
The big dodgy wobbly wheel sat in the frame ready for re-spoking
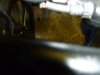
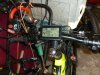
After borrowing the 5 into 1 julet extension lead from my kit build the new cable management stuffs all the excess cable up under the front stand prop.
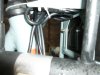
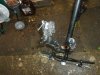
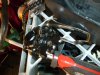
THE Bottom bracket
Ive fitted new cables to all brakes and gears except the rear brake on the yellow bike, I bought cable kits (ebay) and used the 'long' brake cable on the front,, I swear last time i brought a brake cable for a bike they were all long and u just cut it down to size??
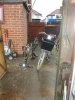
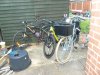
Sorry its not as promised with bits stripped off but the weather means either i am in the wet working or at least 2 of the bikes are.. my garage is fine housing the honda750 and the pushbike but 3 pushbikes require tessellation.
the brake sensor cable wear. I could fix with a dollop of epoxy or hot glue but £12 buys new lever/sensors..
Slots in the top of the downtube!!! WTF!!
The big dodgy wobbly wheel sat in the frame ready for re-spoking
After borrowing the 5 into 1 julet extension lead from my kit build the new cable management stuffs all the excess cable up under the front stand prop.
THE Bottom bracket
Ive fitted new cables to all brakes and gears except the rear brake on the yellow bike, I bought cable kits (ebay) and used the 'long' brake cable on the front,, I swear last time i brought a brake cable for a bike they were all long and u just cut it down to size??
Sorry its not as promised with bits stripped off but the weather means either i am in the wet working or at least 2 of the bikes are.. my garage is fine housing the honda750 and the pushbike but 3 pushbikes require tessellation.
Attachments
-
 6.2 MB Views: 9
 -
 1.8 MB Views: 9
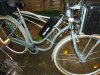
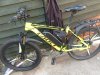
YELLOW BIKE RIDES AGAIN!!
Bits arrived, some issues.. but a quick fit, brake check and adjust, and whoosh she runs..
The replacement 17a controller is a few mm to big to fit inside the original controller housing which has screws rusted into it atm anyway..
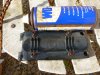
Well i did order a bigger box but its too big to fit in the frame so i am using the redundant yosepower controller bag that was supplied with my kit build..
The replacement brake levers with sensors to cut the motor power are poor quality, the brake cable adjustment screws supplied were PLASTIC!! ffs..
So i replaced them with the sets from the original levers thankfully they were the same thread.
the other issue with the brake levers was the tightening screw It is screwed into a blind hole and bottoms out before clamping, a couple of rusty washers and a strip of popcan wound round the bars to bulk out a bit too sorted that out..
The gears and chain need attention, the chain needs replacing, the crank shifter was seized tight, a week in a poly bag with oil lubbed it up and it now moves, i will clean degrease and re lube re fit and fingers crossed..
So new chain.. clean and tweak the gears, refit the rear mudguard and rack, and finally cable management. - I would like to raise the handlebars about 6 inches tho dont know how atm.
Getting there
Bits arrived, some issues.. but a quick fit, brake check and adjust, and whoosh she runs..
The replacement 17a controller is a few mm to big to fit inside the original controller housing which has screws rusted into it atm anyway..
Well i did order a bigger box but its too big to fit in the frame
so i am using the redundant yosepower controller bag that was supplied with my kit build.. The replacement brake levers with sensors to cut the motor power are poor quality, the brake cable adjustment screws supplied were PLASTIC!! ffs..
So i replaced them with the sets from the original levers thankfully they were the same thread.
the other issue with the brake levers was the tightening screw It is screwed into a blind hole and bottoms out before clamping, a couple of rusty washers and a strip of popcan wound round the bars to bulk out a bit too sorted that out..
The gears and chain need attention, the chain needs replacing, the crank shifter was seized tight, a week in a poly bag with oil lubbed it up and it now moves, i will clean degrease and re lube re fit and fingers crossed..
So new chain.. clean and tweak the gears, refit the rear mudguard and rack, and finally cable management. - I would like to raise the handlebars about 6 inches tho dont know how atm.
Getting there
The photo's not clear, but it looks like your motor wheel is in upside down. The slot for the cable exit should face downwards towards the road.YELLOW BIKE RIDES AGAIN!!
Bits arrived, some issues.. but a quick fit, brake check and adjust, and whoosh she runs..
View attachment 54184View attachment 54185
The replacement 17a controller is a few mm to big to fit inside the original controller housing which has screws rusted into it atm anyway..
View attachment 54181
Well i did order a bigger box but its too big to fit in the frame
The replacement brake levers with sensors to cut the motor power are poor quality, the brake cable adjustment screws supplied were PLASTIC!! ffs..
View attachment 54183
So i replaced them with the sets from the original levers thankfully they were the same thread.
the other issue with the brake levers was the tightening screw It is screwed into a blind hole and bottoms out before clamping, a couple of rusty washers and a strip of popcan wound round the bars to bulk out a bit too sorted that out..
The gears and chain need attention, the chain needs replacing, the crank shifter was seized tight, a week in a poly bag with oil lubbed it up and it now moves, i will clean degrease and re lube re fit and fingers crossed..
View attachment 54182
So new chain.. clean and tweak the gears, refit the rear mudguard and rack, and finally cable management. - I would like to raise the handlebars about 6 inches tho dont know how atm.
Getting there
De-Ja vu or what,, You or perhaps someone else said exactly the same thing about my kit build and despite my initial protests were right to my shame.. This time i am confident in saying its a smear of green colour grease thats giving that impression I must have double checked it half a dozen times today..The photo's not clear, but it looks like your motor wheel is in upside down. The slot for the cable exit should face downwards towards the road.
(one quick pop into the garage later..)
in fact ive just wiped the grease off my finger tip after quintuple triple checking again...
Thanks for raising the issue tho..
Its been a Long evening, got home circa 3 pm and got my hands nice n greasy
Getting there, Brakes are tweaked to perfection Having never touched cycle disk brakes before i was expecting lots of problems especially after my special shim job to centre the pads on the rear disk.
Ive rotated the bars up from their original drop down position but thats resulted in back to front handlebars for the present..
Added an airtag bell my neighbour has an iphone and has offered to 'own' the airtag.
Gears and chain, Oh boy... what a malarky, got the rear gear shift to work, it remains on the freewheel at the top and bottom and finally isnt slipping in the high (low tooth count) gears.
The old chain actually broke while testing and an amazon van was pulling away from dropping of a new chain as i pushed the bike back home..
The front shifter however?? 3 positions but it only moves between 2 cogs, chainrings? with the expression of all 3 positions on the shifter , so i currently have it positioned over the larger 2 chainrings..
the rear gear indicator is f'd
I spent a while cleaning the plastic with acetone to degrease and soaked the tiny broken bit with the intention of superguleing them together, however my tiny drop of superglue on a pin prick was too much and flooded the whole piece and its anchored in place now.. and in frustration i knocked away the retaining screws.. aarrgghh!! 2 substitute small screws later and its back on the bike..
Almost sorted the cabling too but ran out of the spiral wrap, amazon to the rescue again..
rear mud guard and rack both fitted £1.33 paniers next.. yes i bought 2x
Front light wired in too.. 3 feeble leds no problem using the controller feed i hope.
PAS semsor.. Hmm the bike is fitted with one already a right side sensor clamped in by the bottom bracket, terminated with a jst type higo connector? i intend to use this eventually.
the controller has julet sockets for pas sensors.
I have 2 pas sensors (left side) with julet connectors 1 brand new, the other originally fitted to my yose kit bike but due to an oversized crank wasn't a good fit and was replaced while working with a right side type.
So for now i figured fit a left side sensor and plug it in to get started. BUT neither of the left side sensors i can plug in seem to work?? while 1 did work and 1 is brand new.
?????????????
I assume pas is enabled out of the box with a KT controller why else have the up and down buttons change the 'gear' But since i have not dug out reading glasses ive not read the instructions yet..
SO Outstanding jobs..
1) read instructions and confirm pas is enabled on the controller (speed control works) and get to the bottom of the pas sensor problem..
2) pull and refit the handlebars
3) revisit the gears front shifter.
4) fit panniers
i assume if i give a pas sensor 5v + and - and pop a meter on the sensor wire i should see a voltage blip if i wave a magnet over the sensor??
extra pic below especially for @saneagle still hard to tell tho..
Getting there, Brakes are tweaked to perfection Having never touched cycle disk brakes before i was expecting lots of problems especially after my special shim job to centre the pads on the rear disk.
Ive rotated the bars up from their original drop down position but thats resulted in back to front handlebars for the present..
Added an airtag bell
my neighbour has an iphone and has offered to 'own' the airtag. Gears and chain, Oh boy... what a malarky, got the rear gear shift to work, it remains on the freewheel at the top and bottom and finally isnt slipping in the high (low tooth count) gears.
The old chain actually broke while testing and an amazon van was pulling away from dropping of a new chain as i pushed the bike back home..
The front shifter however?? 3 positions but it only moves between 2 cogs, chainrings? with the expression of all 3 positions on the shifter , so i currently have it positioned over the larger 2 chainrings..
the rear gear indicator is f'd
I spent a while cleaning the plastic with acetone to degrease and soaked the tiny broken bit with the intention of superguleing them together, however my tiny drop of superglue on a pin prick was too much and flooded the whole piece and its anchored in place now.. and in frustration i knocked away the retaining screws.. aarrgghh!! 2 substitute small screws later and its back on the bike..
Almost sorted the cabling too but ran out of the spiral wrap, amazon to the rescue again..
rear mud guard and rack both fitted £1.33 paniers next.. yes i bought 2x
Front light wired in too.. 3 feeble leds no problem using the controller feed i hope.
PAS semsor.. Hmm the bike is fitted with one already a right side sensor clamped in by the bottom bracket, terminated with a jst type higo connector? i intend to use this eventually.
the controller has julet sockets for pas sensors.
I have 2 pas sensors (left side) with julet connectors 1 brand new, the other originally fitted to my yose kit bike but due to an oversized crank wasn't a good fit and was replaced while working with a right side type.
So for now i figured fit a left side sensor and plug it in to get started. BUT neither of the left side sensors i can plug in seem to work?? while 1 did work and 1 is brand new.
?????????????
I assume pas is enabled out of the box with a KT controller why else have the up and down buttons change the 'gear' But since i have not dug out reading glasses ive not read the instructions yet..
SO Outstanding jobs..
1) read instructions and confirm pas is enabled on the controller (speed control works) and get to the bottom of the pas sensor problem..
2) pull and refit the handlebars
3) revisit the gears front shifter.
4) fit panniers
i assume if i give a pas sensor 5v + and - and pop a meter on the sensor wire i should see a voltage blip if i wave a magnet over the sensor??
extra pic below especially for @saneagle still hard to tell tho..
Don't assume anything about LCD settings. We've had all sorts on this forum. PAS will work if you put 5v on black and red wires. Check both directions of pedalling, as they only work in one direction, and people sometimes get it wrong.
Cheers Im only just starting to digest the 25page pdf detailing the P and C settings UG! and i thought the double sided a4 sheet that came with the headset was complicated..Don't assume anything about LCD settings. We've had all sorts on this forum. PAS will work if you put 5v on black and red wires. Check both directions of pedalling, as they only work in one direction, and people sometimes get it wrong.
However i am reading it ..
The last page is interesting tho as it details the connection of 2 controllers for sending settings from one to the other.. This raises the question can i program the controller with the lcd3 headset and then connect it upto a simple looking led kt headset and transfer the config to the more basic looking device. hmm???
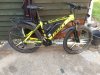
YELLOW BIKE WENT TO TESCO :TODAY)
I switched the handlebars around before testing the bike on a ride to tesco for dinner supplies. managed a good load and it all arrived home safely..
Very different ride from the sit up n beg position im used to, not uncomfortable, easier to peek behind myself for one thing,
Once the settings have been a) understood, and b) applied, i can finish off the cable management and finalise the diy cable connections for lights and pas sensor and finish with some of the marine grade heat shrink ive seen mentioned in here.. I am atm wrapping with pvc insulation tape to my shame
the above panniers were more expensive than the £1.33 set, and involved more pnp too after checking just over £8 in total,
it needs a kickstand tho.. im sick of up ending buckets
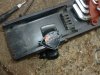
175mm long spokes arrived and i laced up the orange bike rear wheel, took me a while but i eventually got it within 1mm of round and 1-2mm of true before bending all the spokes and repeating the true-ing..
and finally I fitted a tyre.. So I had to see how far i could get..
and i spent the afternoon fitting a chain adjusting the brakes and finalising the rear wheel set up with an additional torque arm, I retrieved the controller and detangled it confirming the connections, and reconnected the wheel and its sensors,.
When it came to mounting a battery slide i got confused as no way could the bottle holder holes attach the battery slide, and i ended up using the slides bottom hole in the bottom frame hole only (BIG MISTAKE!!(
the battery slide includes an aluminium plate which slides within the plastic to allow different mount positions (mine are just not within its range, when i plugged in the battery this alluminium plate also slid down and shorted the battery contacts.. Loud POP!
The battery shows voltage but the bike controller is unresponsive,
the headset display is cracked and black however it did still work with the controller and turn on. Now not.
I tried to replace the headset with a working one, (sw900) to no avail. I put the bike away and came in to check the battery voltage its showing 39v atm so no fuse blown in the battery..
Taking a break for some grub and may return to checking out the controller tonight but probably will leave it till tomorrow pm now.. one step forward and two back eh
You don't need the LCD control panel for testing. if you bridge the red and blue wires, the controller should work with the throttle.
Don't connect brakes or PAS for testing.
Don't connect brakes or PAS for testing.
And then there were Three.
Ok the controller bag is an old travel toiletries bag and its secured to the frame with gaffer tape, but after too many hours trying to tesselate the controller and wires into what was described as an extra large controller box (ha) Trust me this is bloody good enough for today!!
Yes still quite a bit outstanding on the 'orange bike' like sorting out the brakes! and arranging some better controller housing.
a complete overhaul of the brakes from new sensor levers (well the ones originally from the yellow bike)
to new cables sheaths and pads.. the rear brake seems to be only pressing from the one side and in doing so bends the rotor/disk?? so that needs looking at ..
I must have tested the controller/motor with a fully charged 36v battery as its a 48v controller not the dual voltage input i expected?? so no wonder the 38-39v charge in the battery i used to test yesterday didnt do anything.. Today with a half charged 48v battery installed it flys like the proverbial rocket up and down the back yard and driveway.
Ive fitted a basic cycle speedo so just need to measure the front wheel circumference to get that running.
Still no output to a new sw900 lcd display? but the new display came with an adaptor to switch blue and black wires that i have yet to try.
so a fair bit of basic cycle maintenance and tidying up to do. While not an initial fan of the soft bag controller enclosure im beginning to see the benefits..
Next time i hope to report in with 3x roadworthy e-bikes.
Orange Bike Rides again!! I pulled the rear mudguard and rear rack off an old junker and bodged them onto the bike, this allowed me to mount the battery on the rear rack as an alternative to on the top of the crossbar.
The brakes were a doddle to sort out, they take the same pads as the yellow bike but are hardly worn atm, the cables are ok too (well i found a nasty break in the sleeve of the back brake later but i have a spare cable.. ) just needed tweeking and degreasing..
I wrestled with cables and the controller until i crammed it all into a controller box, I need to address the non typical controller box mount and seal against water ingress somehow??
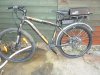
I will have to buy a front mudguard and stand still. and sort out some lighting.
And the brake lever adjusters are too small, the ones supplied with the sensor enabled brake levers were 'plastic' and thrown. i expected to simply use the ones from the sensorless levers being replaced but no, its not that simple..
Having already kicked the battery twice mounting and dismounting i think it will go back on top of the crossbar..
The brakes were a doddle to sort out, they take the same pads as the yellow bike
but are hardly worn atm, the cables are ok too (well i found a nasty break in the sleeve of the back brake later but i have a spare cable.. ) just needed tweeking and degreasing..I wrestled with cables and the controller until i crammed it all into a controller box, I need to address the non typical controller box mount and seal against water ingress somehow??
I will have to buy a front mudguard and stand still. and sort out some lighting.
And the brake lever adjusters are too small, the ones supplied with the sensor enabled brake levers were 'plastic' and thrown. i expected to simply use the ones from the sensorless levers being replaced but no, its not that simple..
Having already kicked the battery twice mounting and dismounting i think it will go back on top of the crossbar..
Related Articles
-
 MTF Enterprises announces acquisition of EMU Electric Bikes
- Started by: Pedelecs
-
 Wisper 806T folding bike wins Which? ‘Best Buy’
- Started by: Pedelecs
-
 Sustrans calls for protected cycle lanes
- Started by: Pedelecs
-
 Amazon launch their first UK e-cargo micromobility hub
- Started by: Pedelecs
