Peugeot revisited...

NRG

Esteemed Pedelecer
Oct 6, 2009
2,592
10
Been out on my first test ride. Good weather for testing (not!) ..the bike passed but I need to improve my wet weather clothing! :D

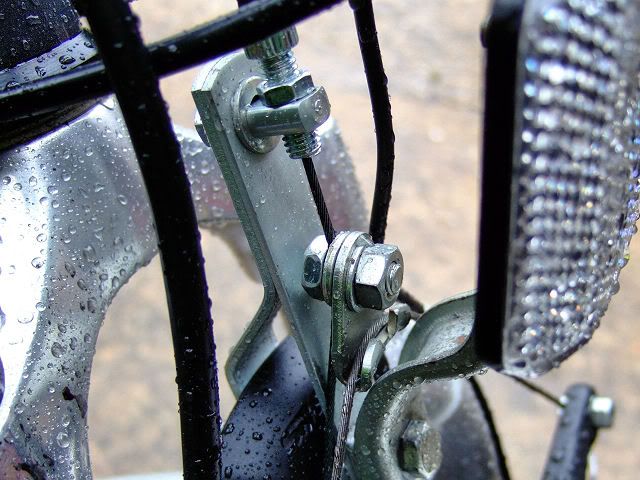
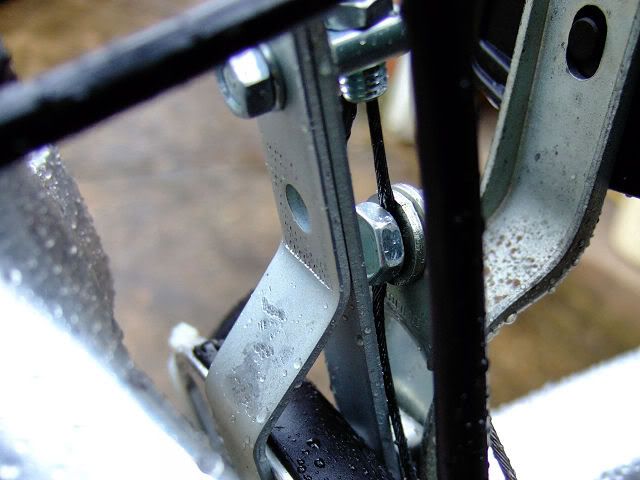
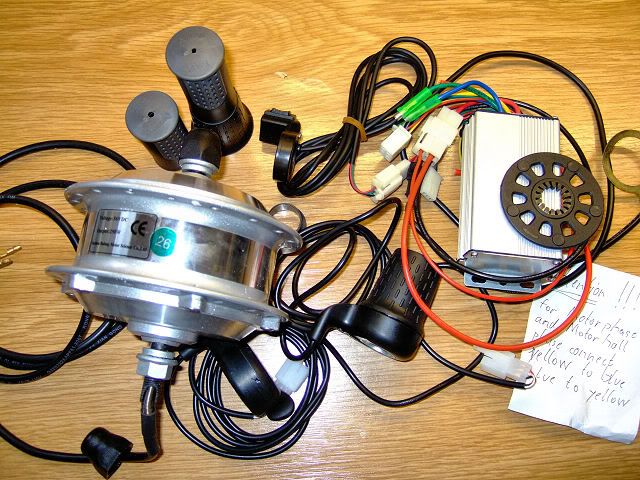
Love the front forks. They work really well and help soak up the bumps...wish I had fitted them sooner. Found the Pedelec doesn't work, may have the sensor disk on the wrong way 'round but everything else worked a treat.

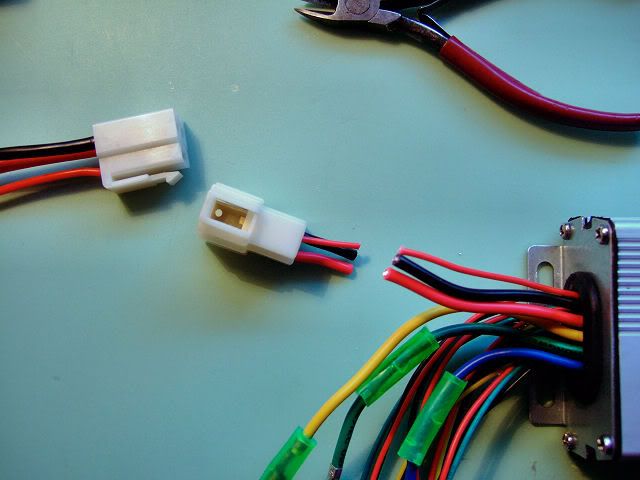
The three speed switch works well, I really like the low speed setting for pottering along, assisted to 10mph as predicted. The middle setting was good for 15mph and the high setting for about 19mph. Not bad. I wonder if this controller would work on the Alien...

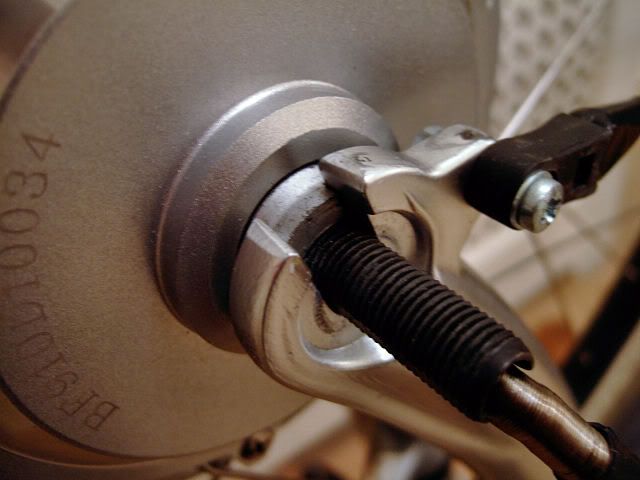
Hill climbing was good, I was concerned given the 700C wheel but it coped well and seems a bit better than the direct drive Cohnis motor. Also, it's a lot quieter than the Bafang on my Alien, which really whines up hill, you can here this one buts is more subdued...

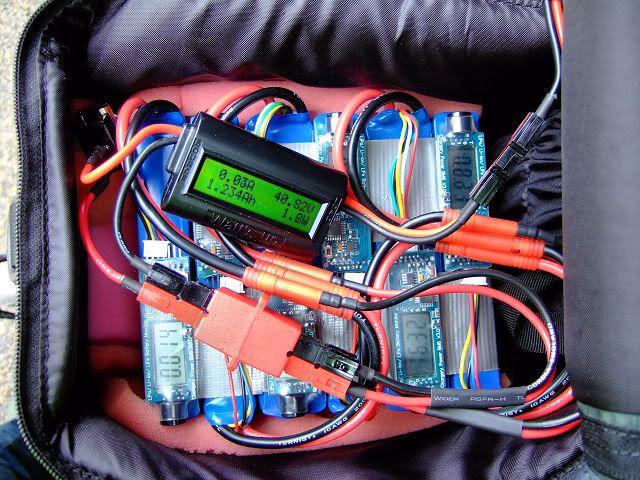
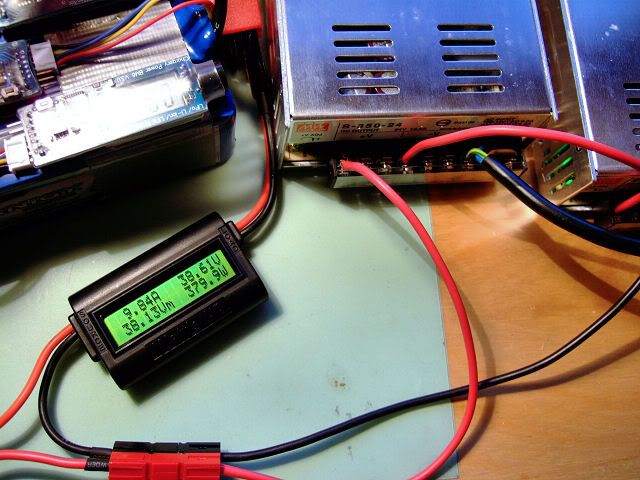
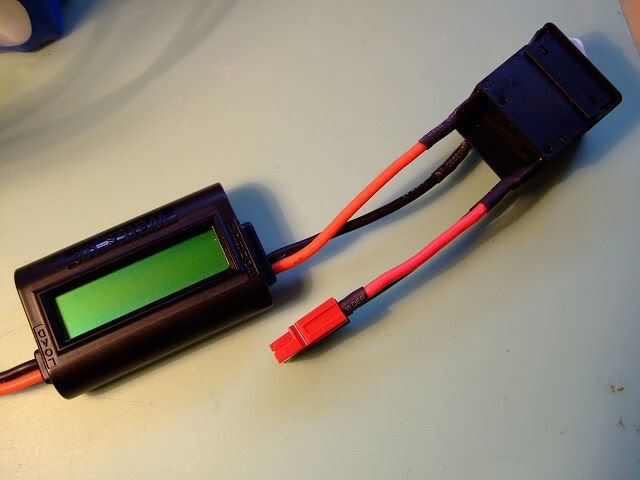
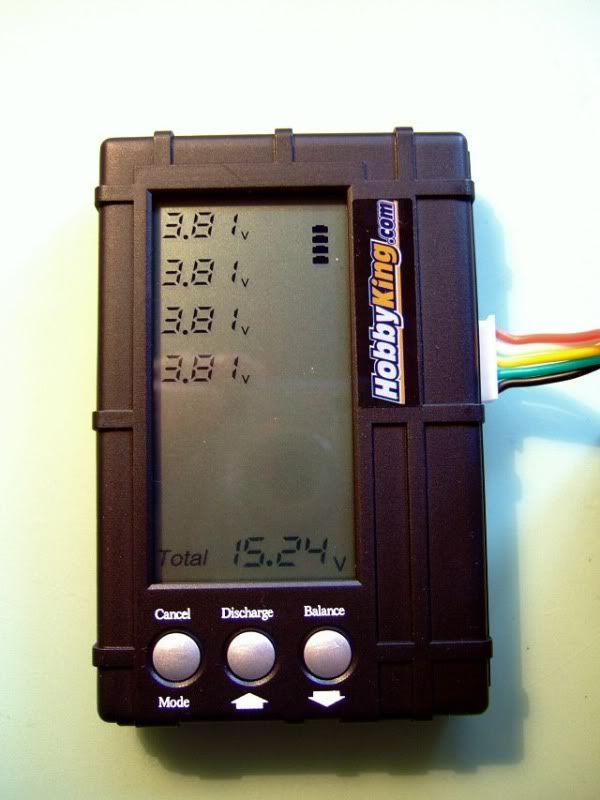
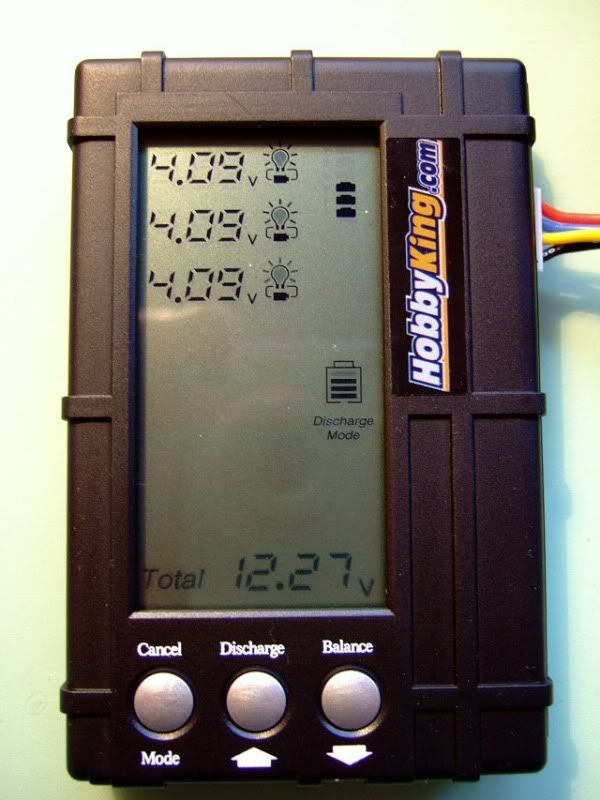
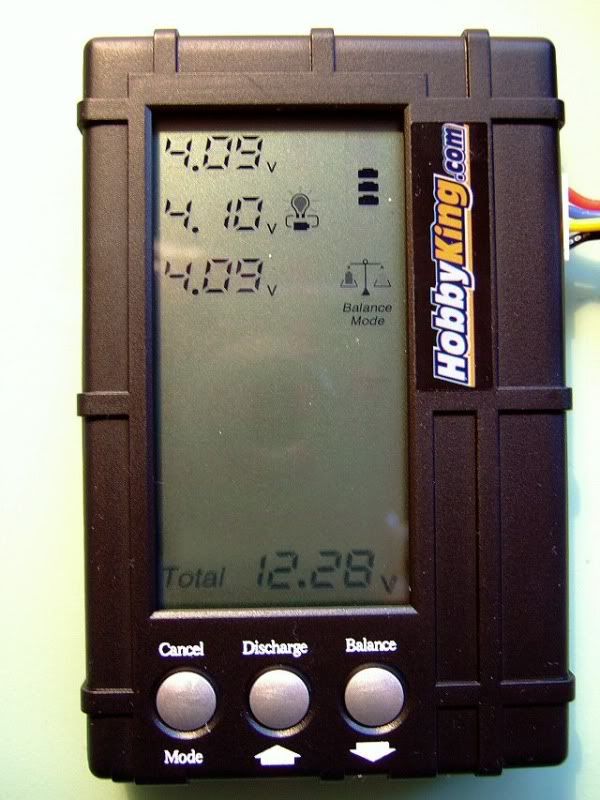
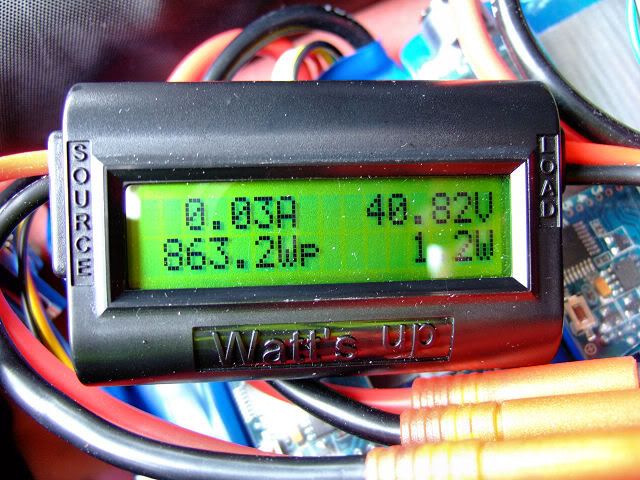
This controller is definitely set for 20+amps! I managed a peak 21amp draw and an 860W peak! Not sure I want to raise the voltage much more :p


Riding unassisted is also now a pleasure, sure you can just feel the drag from the motor but its ridable now, much more so than with the Cohnis and perhaps a little better than the Alien despite the Alien still being lighter.
 
Last edited:

NRG

Esteemed Pedelecer
Oct 6, 2009
2,592
10
The front fork was fun to fit. Took me a while to find a suitable 700C one but this one works well. I used the headset bottom race from the old one but found the steerer was slightly too large (there are two sizes apparently) So I 'machined' the boss on the steerer with a file :eek: and borrowed a race/steerer fitting tool from my LBS. It went on OK and I used the tool to provide alignment whilst I took 10mm from the length of the steerer tube.

I overlooked one thing when fitting the new forks... as the brakes are center pull and as the forks are suspension ones pulling the brake lever compressed the suspension with the resulting loss of all front brake power! As the suspension compresses the brake blocks fall away from the rim!

So a bit of lateral thought and a discussion with my LBS again, we came up with this bracket that I bent, drilled and filed into shape, used with a cable adjuster mounted on the bracket both ends of the cable are now anchored and so the brakes work!


Last edited:

NRG

Esteemed Pedelecer
Oct 6, 2009
2,592
10
Here's the front wheel. As you can see SJS did a fantastic job, it fits the front forks like they where designed for each other, really pleased.


Nice large gap and the axle washers fit perfectly onto the fork for a really secure fitting.


NRG

Esteemed Pedelecer
Oct 6, 2009
2,592
10
I managed to reduce the number of connections in the battery feed using the PowerPole connectors...these are the best connectors I've so far come across, rated for 45amp they are and easy fit and can't be connect up the wrong way.

I used one on the controller eliminating the automotive spade type and I've found a combined rocker based on -off switch with an inbuilt thermal circuit breaker from RapidOnline to eliminate my separate breaker and toggle switch ...only trouble is its rated for 15amps....I ordered it before knowing the real current draw...doh!


The controller is smaller than the one I was using before and it fits neatly into a side pocket of my Pannier bags.


And here's the battery in place, just over 2.5Kg of power...

 
Last edited:

NRG

Esteemed Pedelecer
Oct 6, 2009
2,592
10
I really need to source a BMS / Balancer. Whilst I can bulk charge well enough its a pain when the cells drift, I know Gary at TPPacks is about to come out with one so I'll investigate that when its available.

For now I'm using these Meanwell CC/CV PSU, modified to give a 10v to 35v range and limited in current to 10amps. They are 24v units as standard and used in series I can charge my 37v pack and also adjust them to charge a 48v one if I need.


Another nice thing about the PowerPole connectors is this: I can now use my WattsUp meter to monitor the battery charge as well as discharge just by pulling the connectors apart and turning the meter the other way 'round in the loom! This let me see how much charge goes in as well as out.


NRG

Esteemed Pedelecer
Oct 6, 2009
2,592
10
Another soaking wet run, 16miles for 160Wh, not bad.

This improves on the previous motor where I averaged 12Wh or more per mile.

So in theory 37miles should be achievable on average given my local hilly terrain and the current battery setup.

Saw a peak draw of 21.54amp today with a whopping 877W peak :eek:

Next up is to raise the voltage by adding two more cells in series to give 44.4v nominal.
 

Herb

Pedelecer
Nov 9, 2009
106
0
Saw a peak draw of 21.54amp today with a whopping 877W peak :eek:

Next up is to raise the voltage by adding two more cells in series to give 44.4v nominal.
Stand by for take off, Keep up the good work.

Herb
 

NRG

Esteemed Pedelecer
Oct 6, 2009
2,592
10
Amazing what an extra 7.4 volts does to the performance of a bike.

I'm now running 12s 2p config for a nominal 44.4v with 50v fresh off the charger...that's just about good for 23mph with me assisting on a fresh charge. The bike is a joy to ride, the hill climbing even on 700c wheels is a delight, I'm very happy with it. It's now my preferred ride over the Alien.

Also I'm now a member of the 1Kw club :D

Battery pack chaos!


Arranged the packs into 5s+4s+3s

I also have enough left over to make up another 12s1p to boost range or use as a get home battery if necessary.


Done, still using the BM6 monitors but I've worked out I'm OK with three Cellog8's if I make up some Y cables to join the packs together, the two 5 and 3 packs, and the two 4 packs...

 
Last edited:

jerrysimon

Esteemed Pedelecer
Aug 27, 2009
3,292
112
Cambridge, UK
Only just caught up with this thread. Some nice work. The cellog8s are nifty little beasties.

Those forks ligs look just like the ones that are on my Cytronex FX7300 and as you say the motor goes in perfectly.

Your display on your Watts Up looks much more readable than my blue one on the Turnighy :(

Still useful though as you say, for both checking Ahrs both discharging and charging.

PS just a thought but with the higher voltage and subsequent power/torque would you need/be advised to fit a torque arm especially if those forks are not steel ?

Regards

Jerry
 
Last edited:

Old Timer

Esteemed Pedelecer
Dec 5, 2009
1,279
12
Only just caught up with this thread. Some nice work. The cellog8s are nifty little beasties.

Those forks ligs look just like the ones that are on my Cytronex FX7300 and as you say the motor goes in perfectly.

Your display on your Watts Up looks much more readable than my blue one on the Turnighy :(

Still useful though as you say, for both checking Ahrs both discharging and charging.

PS just a thought but with the higher voltage and subsequent power/torque would you need/be advised to fit a torque arm especially if those forks are not steel ?

Regards

Jerry
Hiya Jerry

I`ve been thinking about torque arms! surely the only possible benefit would be some sort of torque arm that comes up to the frame near the handlebars. Of course you then run into the fact that something has to swivel.

edit
If you connected to the bars then they turn when the forks do.
 
Last edited:

jerrysimon

Esteemed Pedelecer
Aug 27, 2009
3,292
112
Cambridge, UK
The problem is the failure point will be in the fork lug where the flat of the motor shaft will twist out, spreading the fork lug.

The torque arm goes over the shaft and attaches on one side to a fork arm.


The arm then takes the load and stops it twisting out the fork lug.

If you do a search you will see some failures. If it happens the wire coming out of the centre of the shaft can be ripped out ruining the motor.

Quick search I found this.


Its not really a problem on lower powered motors, but I reckon runnung a motor at 48v fitted on non steel forks I would not want to risk it.

Regards

Jerry
 
Last edited:

Old Timer

Esteemed Pedelecer
Dec 5, 2009
1,279
12
The problem is the failure point will be in the fork lug where the flat of the motor shaft will twist out, spreading the fork lug.

The torque arm goes over the shaft and attaches on one side to a fork arm.


The arm then takes the load and stops it twisting out the fork lug.

If you do a search you will see some failures. If it happens the wire coming out of the centre of the shaft can be ripped out ruining the motor.

Quick search I found this.


Its not really a problem on lower powered motors, but I reckon runnung a motor at 48v fitted on non steel forks I would not want to risk it.

Regards

Jerry
Point taken
 

NRG

Esteemed Pedelecer
Oct 6, 2009
2,592
10
Only just caught up with this thread. Some nice work. The cellog8s are nifty little beasties.

Those forks ligs look just like the ones that are on my Cytronex FX7300 and as you say the motor goes in perfectly.

Your display on your Watts Up looks much more readable than my blue one on the Turnighy :(

Still useful though as you say, for both checking Ahrs both discharging and charging.

PS just a thought but with the higher voltage and subsequent power/torque would you need/be advised to fit a torque arm especially if those forks are not steel ?

Regards

Jerry
Yes, jerry, its something I need to look into as your pictures above clearly demonstrate.
 

NRG

Esteemed Pedelecer
Oct 6, 2009
2,592
10
Thanks to Fecn for spotting these rocker on/off circuit breakers on CPC: Your Search Results | CPC

I went ahead and purchased a two pole 20A one to replace the separate toggle and breaker I'm currently using. This removes another connection in the power line. The two poles breakers are incorrectly listed on CPC as 32v DC but are actually rated for 60v.

The old toggle to be replaced:


60v 20amp:


Done:


NRG

Esteemed Pedelecer
Oct 6, 2009
2,592
10
....and I've got a new toy from HobbyKing, a stand-alone battery balancer and discharge unit:


It only supports up to 6 cells and is limited to around 600mA max discharge but its already proved itself in balancing out a wayward pack I had that was proving difficult to balance at full charge.

Operation is very simple, the user can set the minimum discharge voltage per cell and also the minimum balance voltage. It will automatically balance cells to the lowest cell voltage and there's a single button press to start either the balance mode or discharge mode.

Here's a shot with a 4 cell Lipo pack connected:


A 3 cell pack being discharged:


...and a three cell pack in balance mode with one cell being discharged down to the other two...


alex_h

Pedelecer
Dec 28, 2009
197
4
Look what the DHL man brought me:


Prompt delivery from Frank, took just 5 days for delivery.

He's programmed the controller for 15Amps and I have the choice of 36v or going up to 48v so should be interesting. I bought both a twist throttle and thumb throttle. I like the idea of a thumb throttle on the left side of the handlebars with the 3 stage power switch on the right, like Daniel has on the Brompton.

The Bafang sure is lighter than the current installed Cohnis, so I can't wait to get started!

Not sure if I should lace the wheel my self or just let SJS do it....I'm tempted to have a go but don't want to mess it up.... :confused:
nrg who is frank?
 

NRG

Esteemed Pedelecer
Oct 6, 2009
2,592
10
Updating this thread from the work carried out on my Alien one.

I've upgraded the controller with new low Rdson FET's. This follows my experiments with the Parameter Designer program that allows you to tweak the settings of these XieChang 116 controllers from E-Crazyman.

I found the controller was getting a little too warm for my liking using the original IRF3205 FETs, these where dissipating about 4w each, 24W total. Using IRFB3077 as recommended by Jeremy Harris on ES dissipation is 1.3w each or 8Wtotal, 2/3 less.

The new FETs have a higher voltage rating as well at 75v, I was running the 3205 close to their limit and also the phase caps which where rated at 50v, even though PWM would lower the effective voltage It made sense to upgrade all caps to a higher voltage and also select a cap with a lower ESR. I chose Panasonic NHG caps for this.

Some pics:

Programming port on the controller:


Programming cable:


Port wires added:


....and the JST port....


NRG

Esteemed Pedelecer
Oct 6, 2009
2,592
10
The WIN XP drivers for the USB TTL cable can be found here:

Endless-sphere.com • View topic - Problems with the prolific usb to TTL chip

A detailed description of the software parameters can be found here:

Endless-sphere.com • View topic - Keywin E-bike Lab Parameter Designer Software Manual ver 1.2

Some of the settings in that post on ES refer to modified controllers like the LVC setting so my interpretation of them is below.

The Parameter s/w


Settings of interest:

Select your board type, this version of the PD s/w is for the 116 controllers, the Infineon 8xx series is catered for in another version, see ES link above.

The key settings are Phase and Rated current. Rated Current sets the maximum draw from the battery and offers a crude current limiter to protect your battery if it has a poor discharge rating or if you use a BMS with current limitation.

The Phase Current is the so called 'current multiplier'. At partial throttle under PWM conditions each phase of the motor will see a higher current than is drawn from the battery, this is due to the way PWM and the throttle works: Power in roughly equals power out/work done minus losses, if the voltage is halved to the motor then the current doubles to maintain the same power. The setting offers a crude way to limit this current, the recommendation on ES seems to suggest that this is set to 2~2.5x the rated current.

Voltage limit sets the controller Low Voltage Cutoff(LVC). The 20% shifted figures in the ES link above are for the older 8xx controllers and only apply to the high current/voltage modified ones, standard controllers use the PD s/w settings as is.

Tolerance is how much the batt voltage needs to recover by after LVC is hit.

EBS is to do with Regen voltage, not possible with the geared Bafang motors.

Block time removes the current limiting for X number of seconds can be used for fast take off.

1:1 Design changes the way the Pedelec works, Fast = crank / pedal rotation noticed quickly and motor kicks in promptly and the motor cut off after crank pedal has stopped takes a number of seconds.

Slow = crank / pedal rotation takes a while to get noticed but motor shuts off quickly when rotation has stopped.

Limit speed works (AFAIK) in conjunction with Speed2. Speed2 is the default speed setting if no 3 way switch is installed.

Speed1 = Low, speed2 = Medium, speed3 = High

Speed mode affects the operation of the 3 way switch. Switch mode = change speed settings on the fly whilst riding, Cycle mode = switch setting only read when controller is first powered on, so to change setting you must cycle the controller power