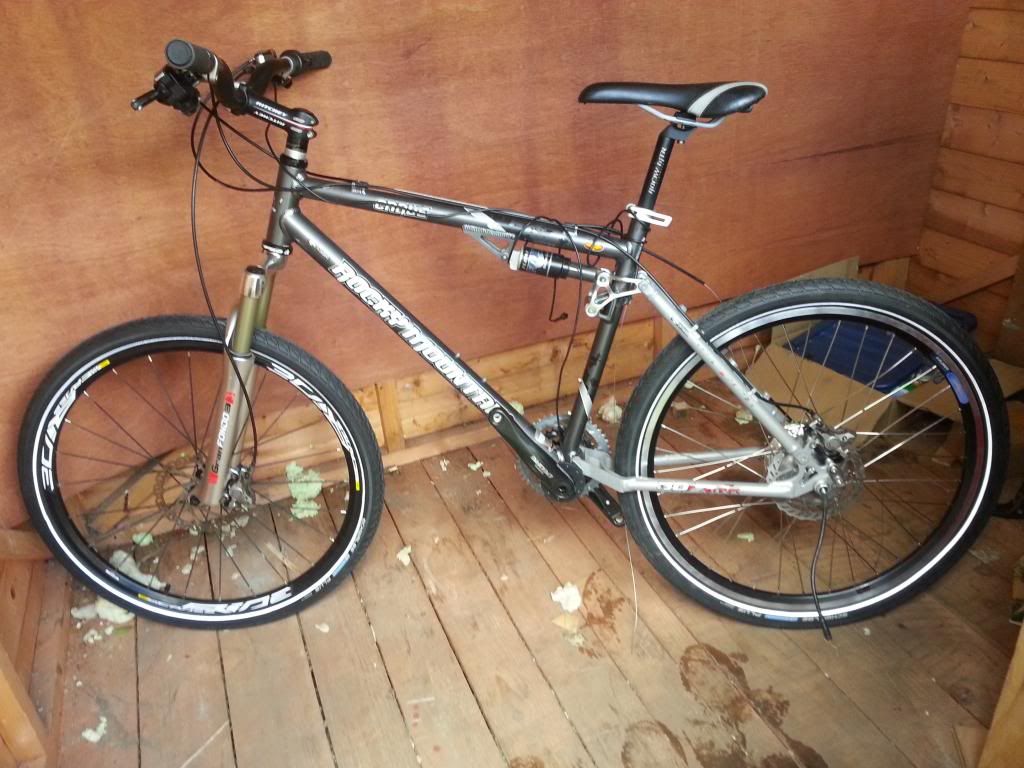
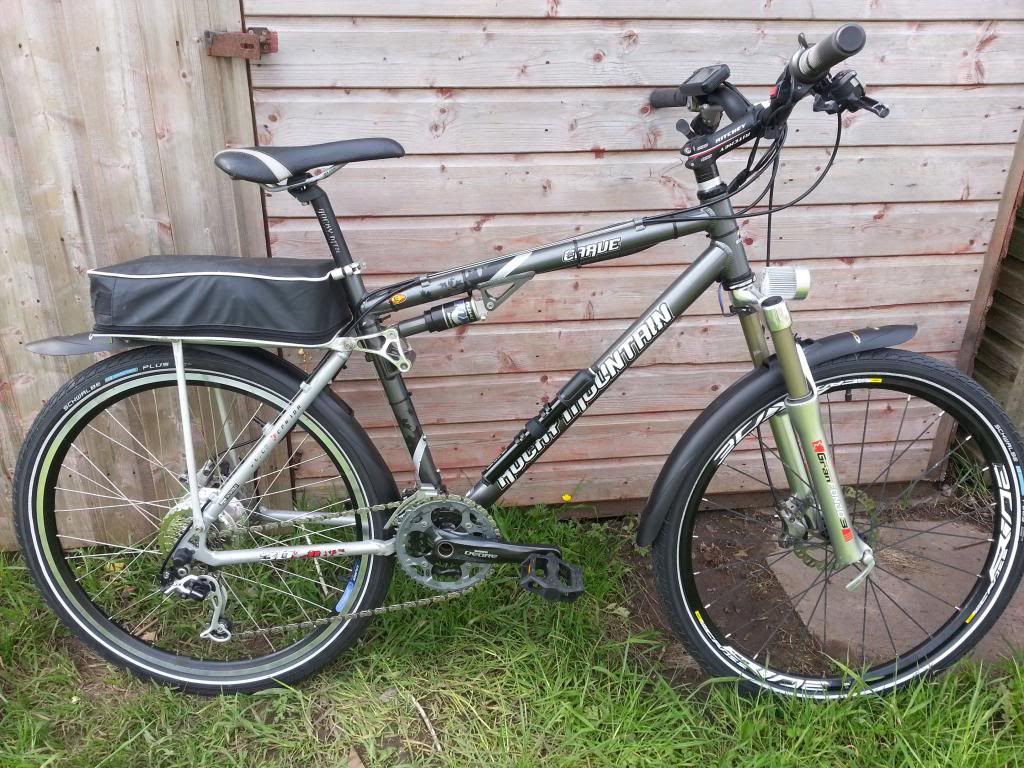
Rocky Mountain Conversion with Xiongda Kit

  • Thread starter Deleted member 4366
  • Start date
D

Deleted member 4366

Guest
I like my Xiongda motor, so I decided to build a decent bike with one. My £5 Trax bike is OK, and I enjoy riding it, but I have this frame sitting around, and you can't beat decent suspension for a long ride.
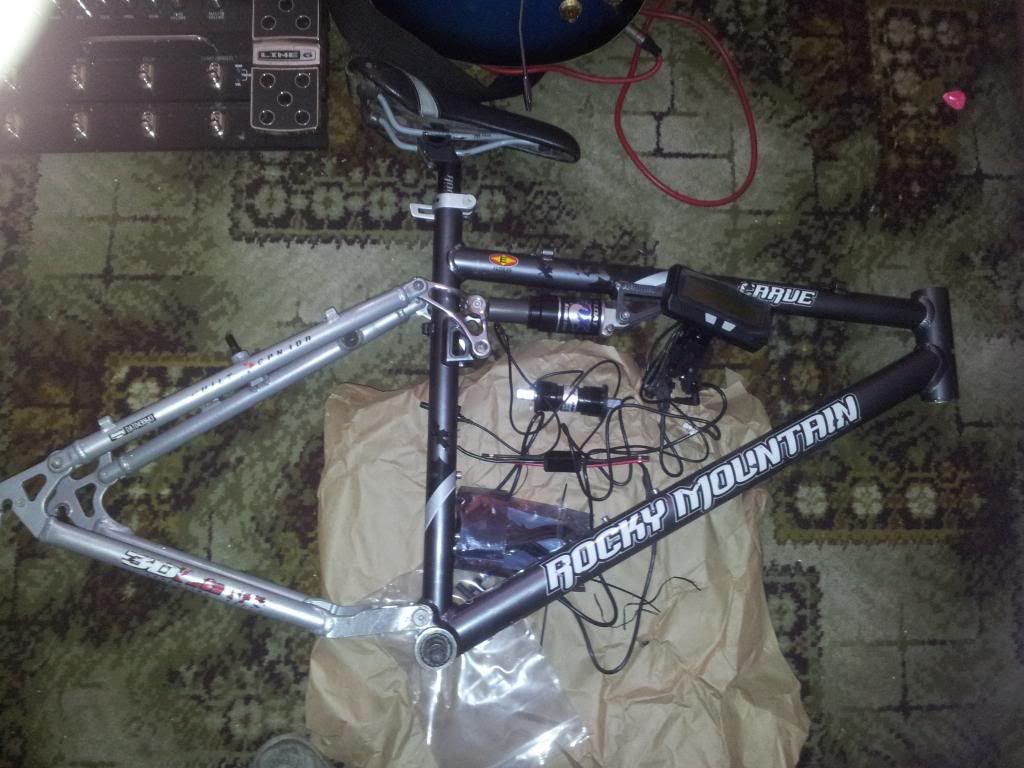


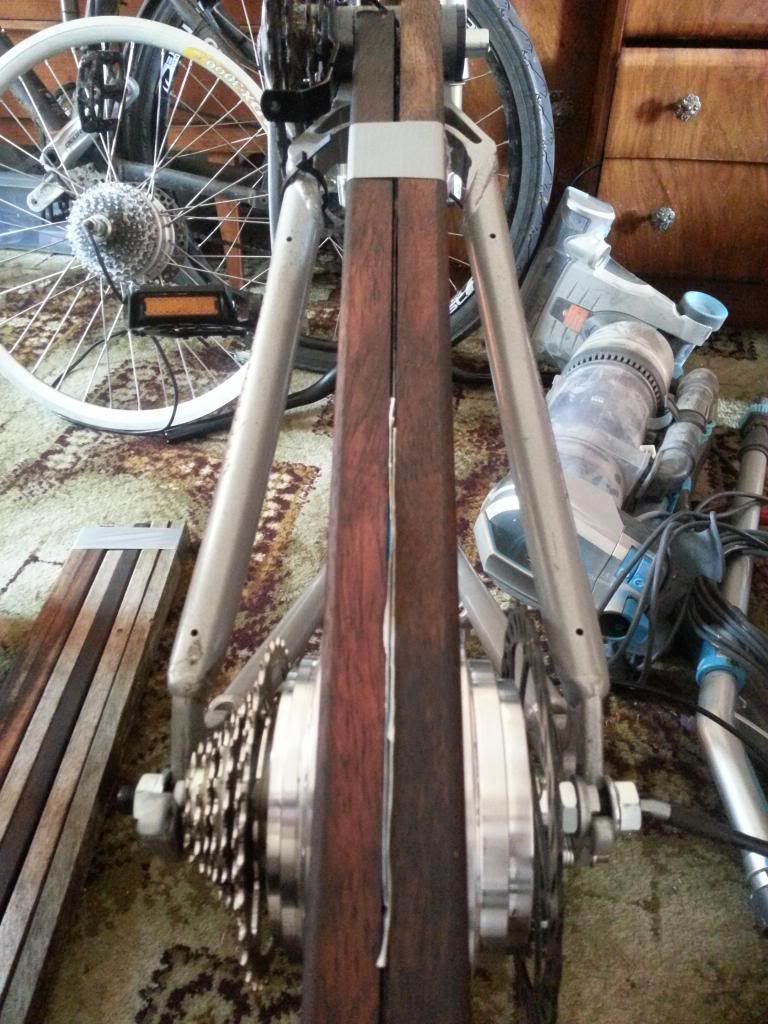
The Xiongda motor is about 150mm wide, so the first task is to stretch the frame. I do this with pieces of hardwood by hammering in additional ones like this:
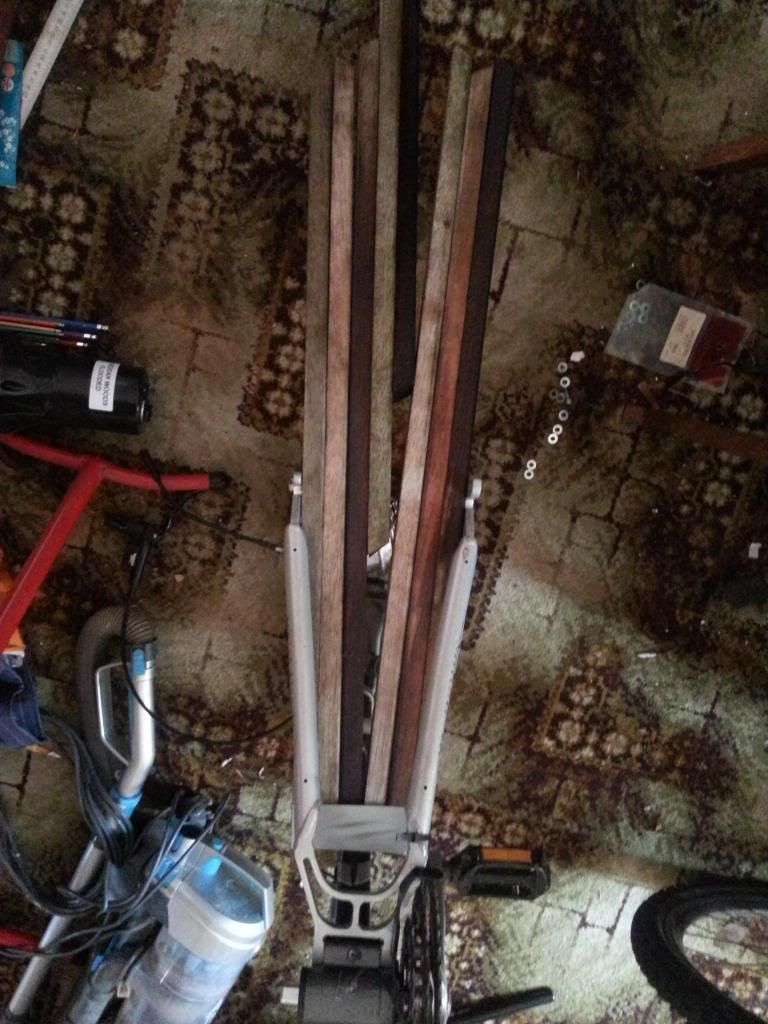


I had to open it to 220mm to take on a permanent set at 150mm. When I inserted the motor, it was miles off centre due to the 7 speed free-wheel width. I put a substantial dish on the last one, but I didn't really want that for this one, so I moved one of the thin (5mm) nuts from the drive side to the brake side, and I put the anti-rotation washers inboard instead of outboard, which increased the width to 160mm.
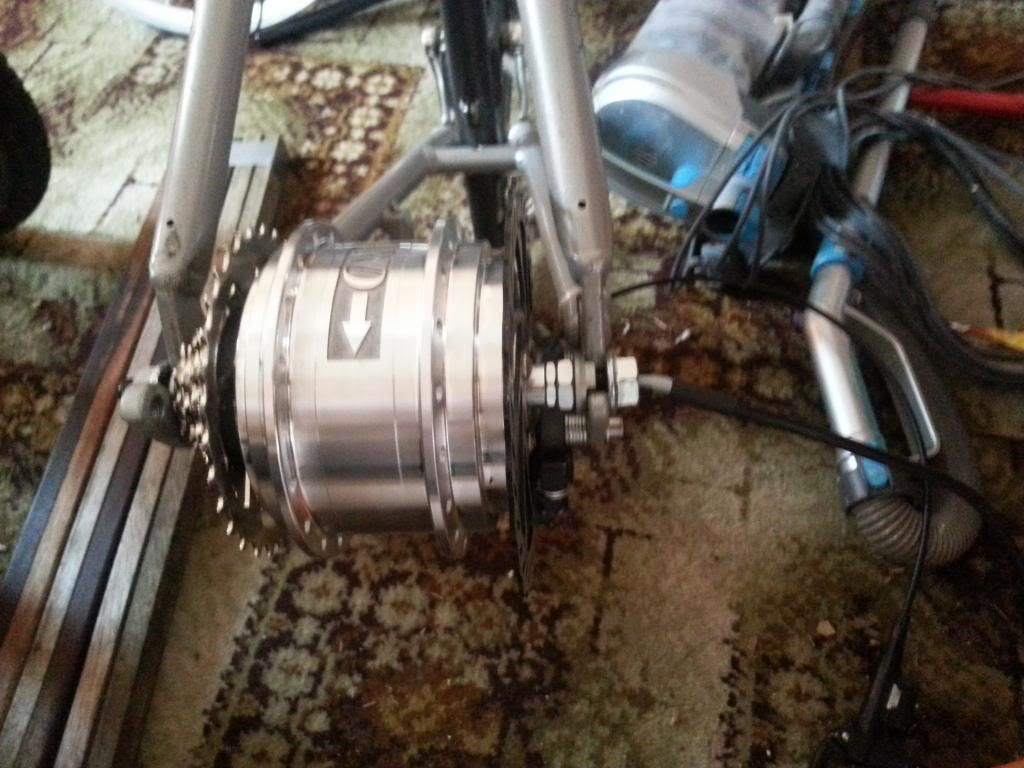


Now the spoke flanges are more central.


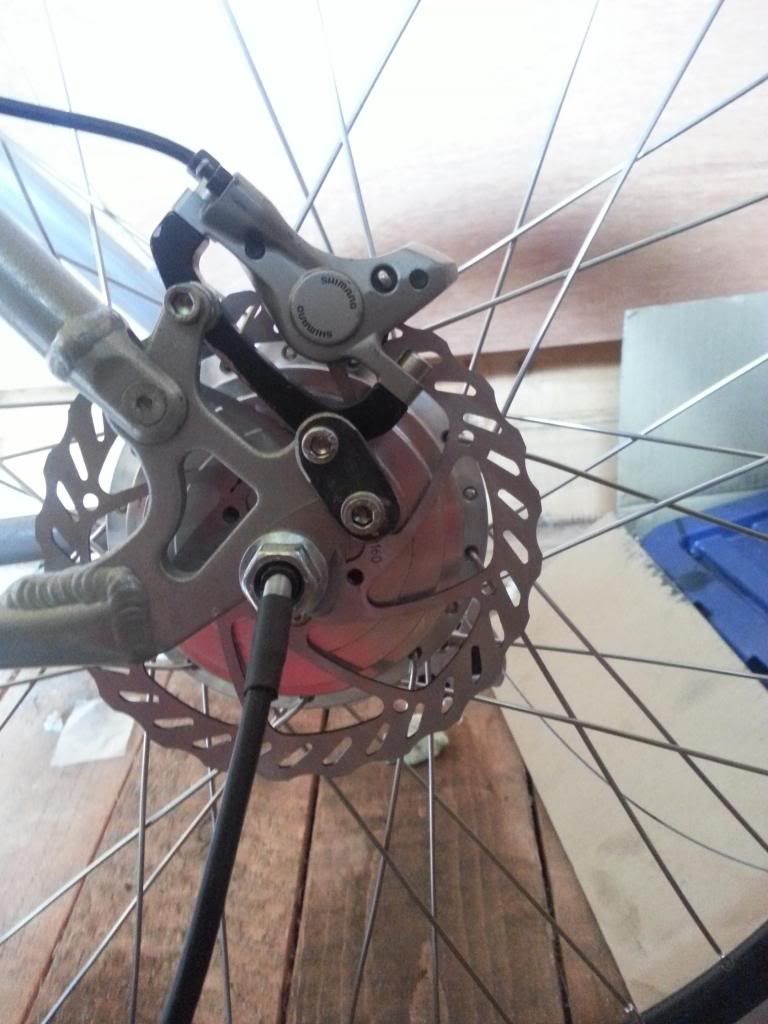
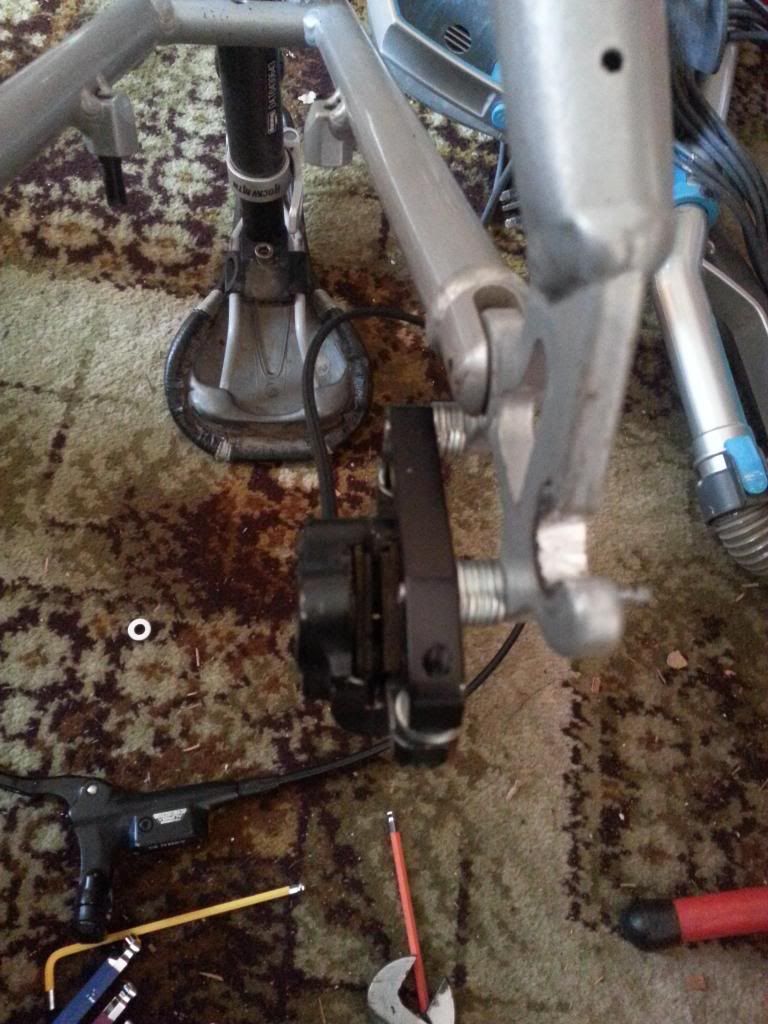
The only problem now is that the disk is too far away from the caliper, so I need some spacers. I've used washers for now between the mount and the mount adaptor. It seems rigid enough like that. I wouldn't do that on a front brake though.


Just waiting for my spokes to come from Catsnapper now, then I can get on with building the wheel.

I can't understand these people that panic about fitting a 140mm motor in 135mm drop-outs. Having said that, there's not much chance of fitting this one in a 20" folder, due to the relative stiffness of the shorter frame.
 
  • Like
Reactions: atheo and Arbol

Arbol

Esteemed Pedelecer
Aug 31, 2013
390
25
Wow, that is great, d8veh, thanks.

The Xiongda 5-7spd V-brake version is 135mm, right? Then, shouldn't it be plug & play for a standard MTB frame? (granted, ideally a hydraulic disc brake should be fitted on the front).

Is your frame an aluminum or steel one?

Edit: I recall that in the past you argued rims and spokes from BMSbattery were OK. But now you are ordering spokes from catsnapper (which I believe has a good reputation). Are these clearly superior quality as the BMSbattery ones?
 
Last edited:
D

Deleted member 4366

Guest
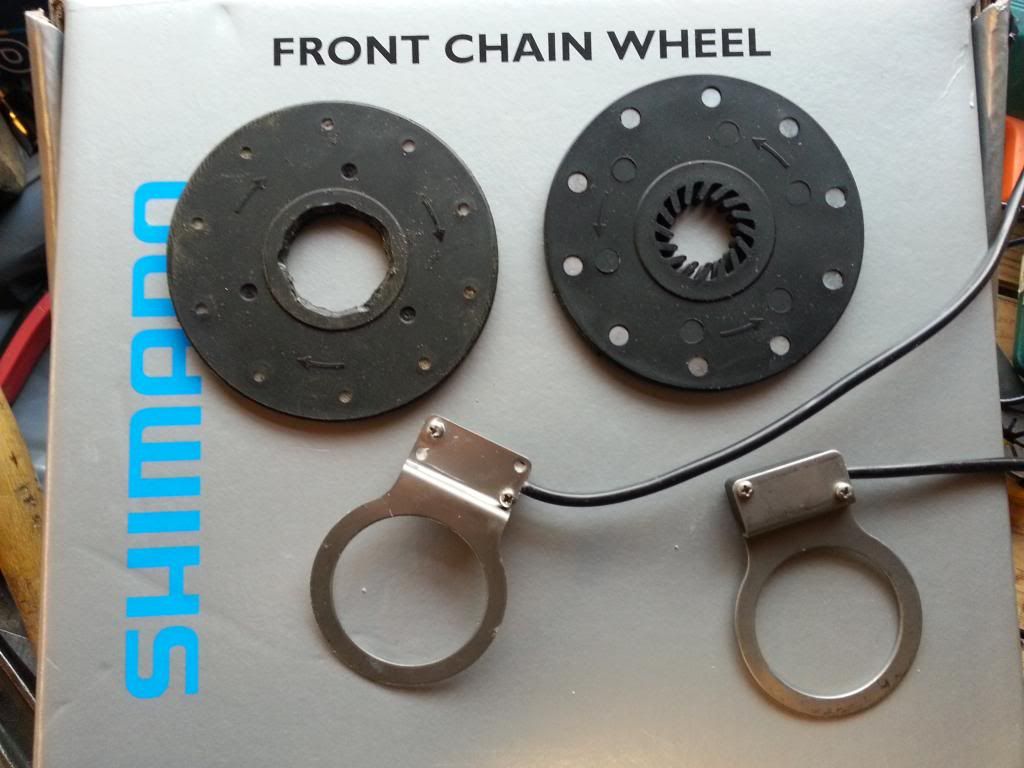
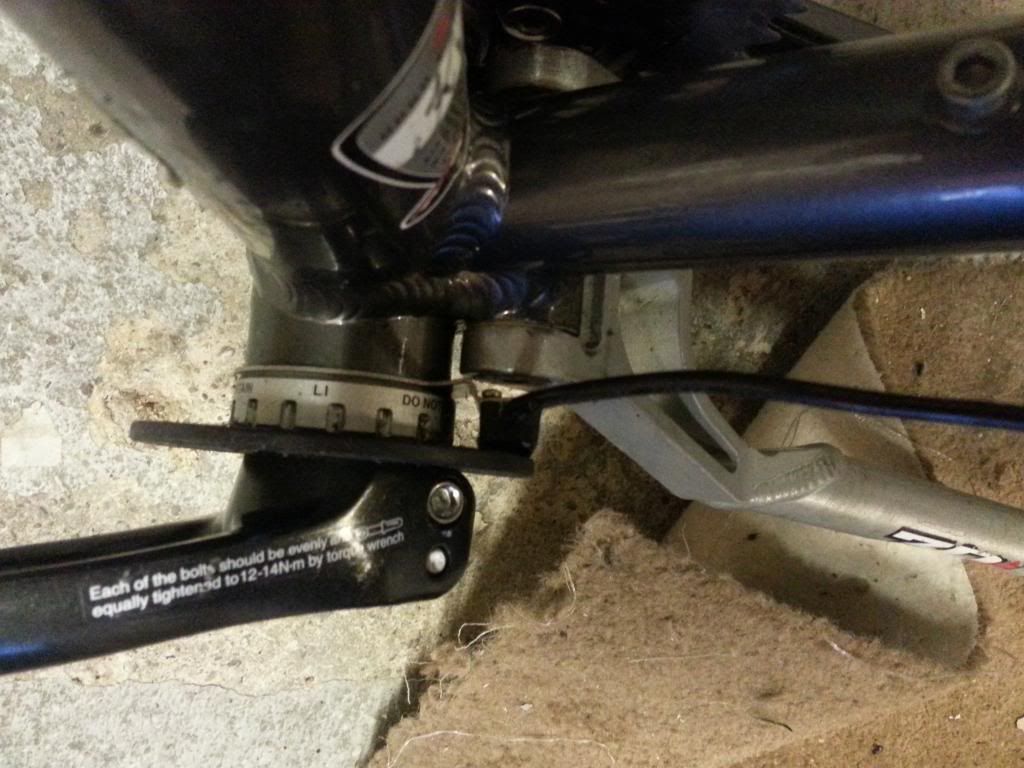
I've installed the pedal sensor now. Here's how to install one on a hollowtech crank. The first thing you have to do is fit the sensor on the other side of its bracket. This Xiongda one had the holes diagonally opposite, so I had to drill two new ones. That's not necessary on most sensors. You also need to open up the hole in the magnet disc to 25mm, which is easy because it only means removing the fingers that grip a normal BB. You don't have to be precise with the 25mm hole because the disc will be clamped by the crank-arm. You should put a slight chamfer on the inner corners to stop it interfering with the bearing seal. efore on the right; after on the left:


The bracket needed a tiny bit of adjustment because it was just touching the magnet disc. It's fitted to the left side crank, which means that the disc has to totate in the opposite direction to the arrows on it.

This bike has a 73mm BB, so I thinned down the inner flanges of the magnet disc. On a 68mm one you have to throw away two of the spacers that normally go behind the bearing holders.


trex

Esteemed Pedelecer
May 15, 2011
7,703
2,671
neat trick with the little bend in the metal ring. Love it.
 
D

Deleted member 4366

Guest
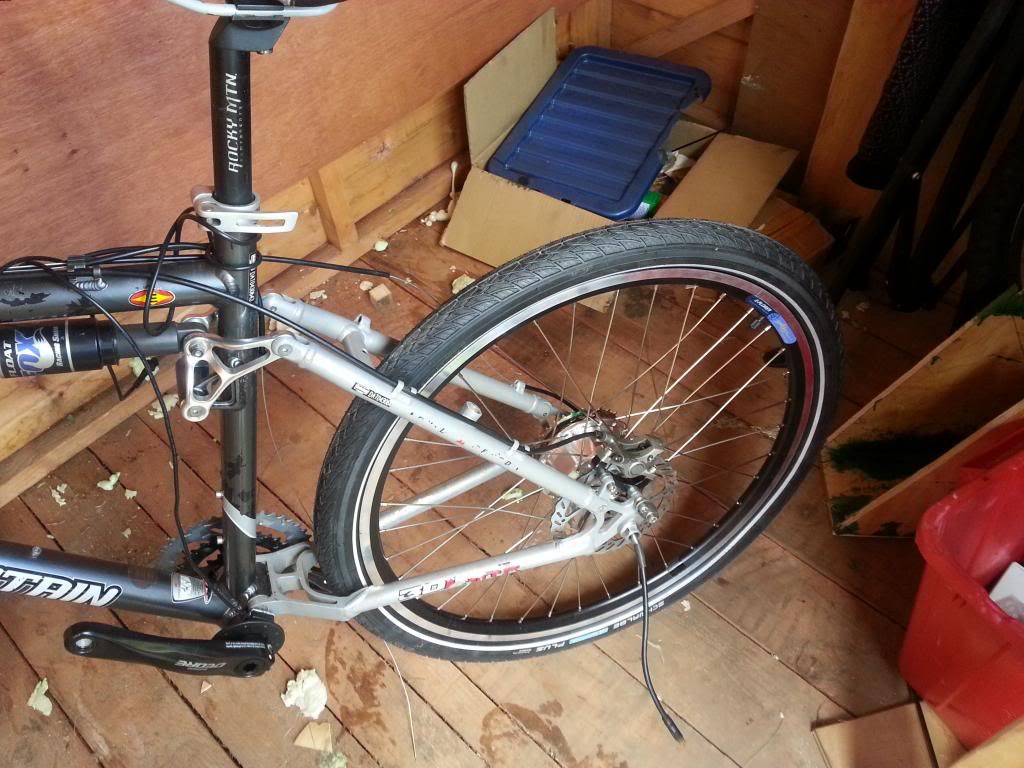
The spokes came today from Catsnapper, so the wheel is now built and installed:


I used a BMSBattery torque arm, but made my own tie-bar to tie it to the brake caliper mount, and I filed the drop-outs aout 3mm deeper to get the axle right in.


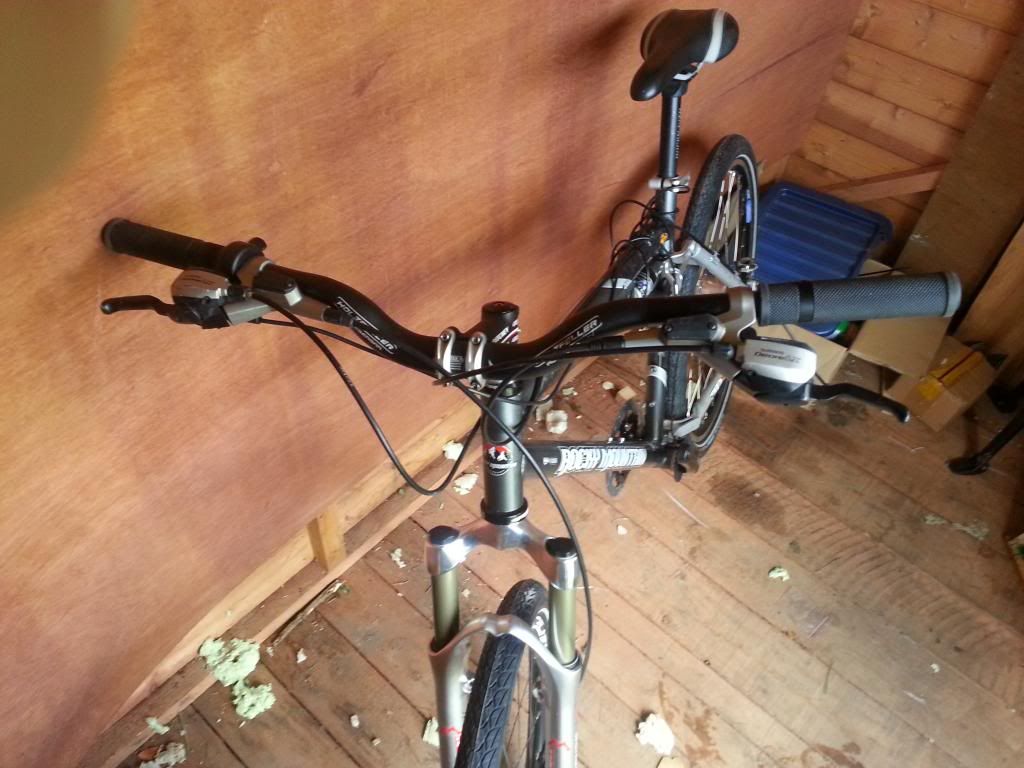
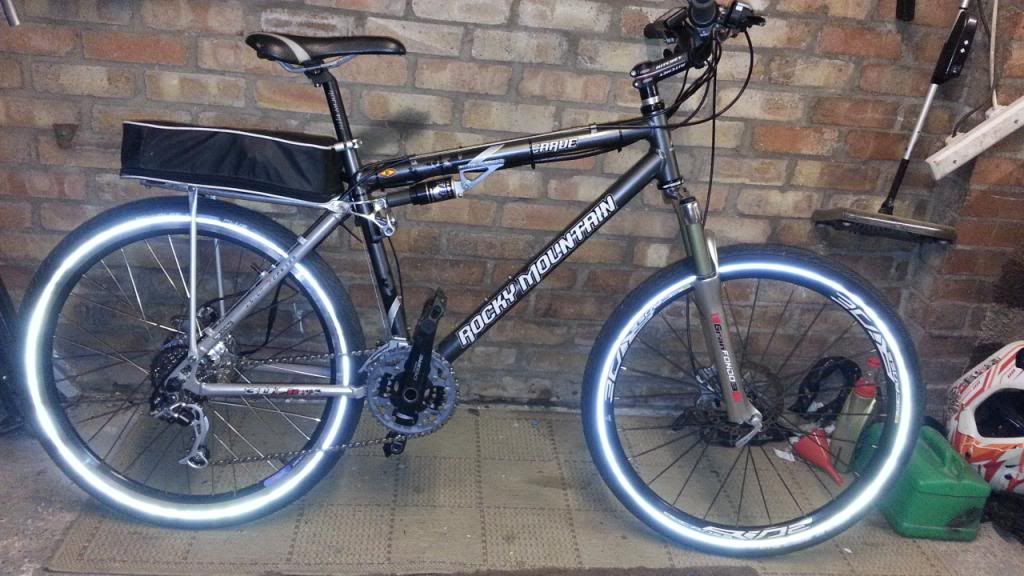
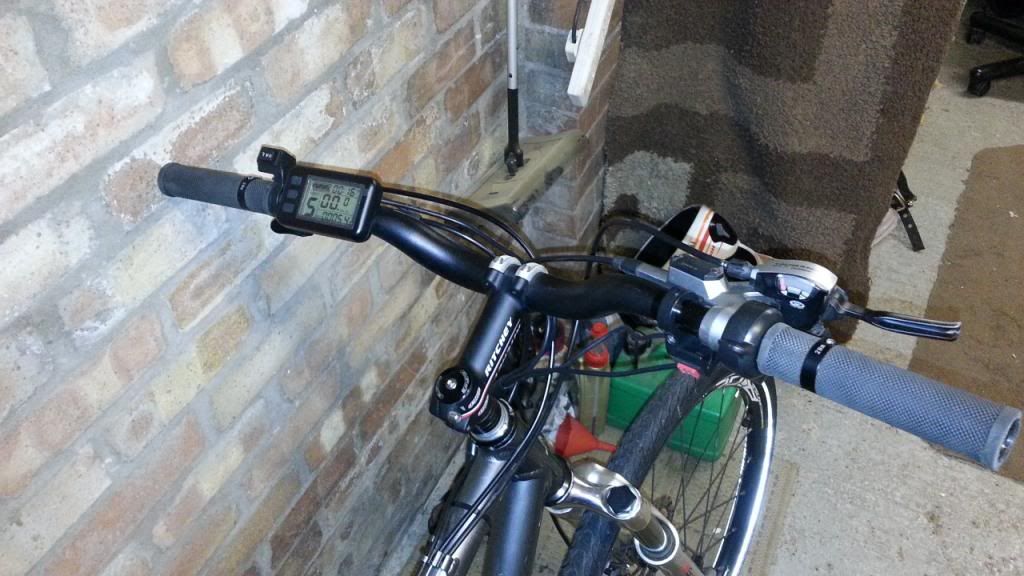
I assembled a Rockshox Float suspension unit, Shimano XT rear derailleur and Shimano LX hydraulic brakes. They're the combined shifter/brake levers, so the handlebars are less cluttered, and there's just room for a thumb-throttle underneath. It's now starting to look like a bike.


Arbol

Esteemed Pedelecer
Aug 31, 2013
390
25
That bike is awesome. It only needs the battery and the controller inside a proper box, located at the bottom of the main triangle.
 
D

Deleted member 4366

Guest
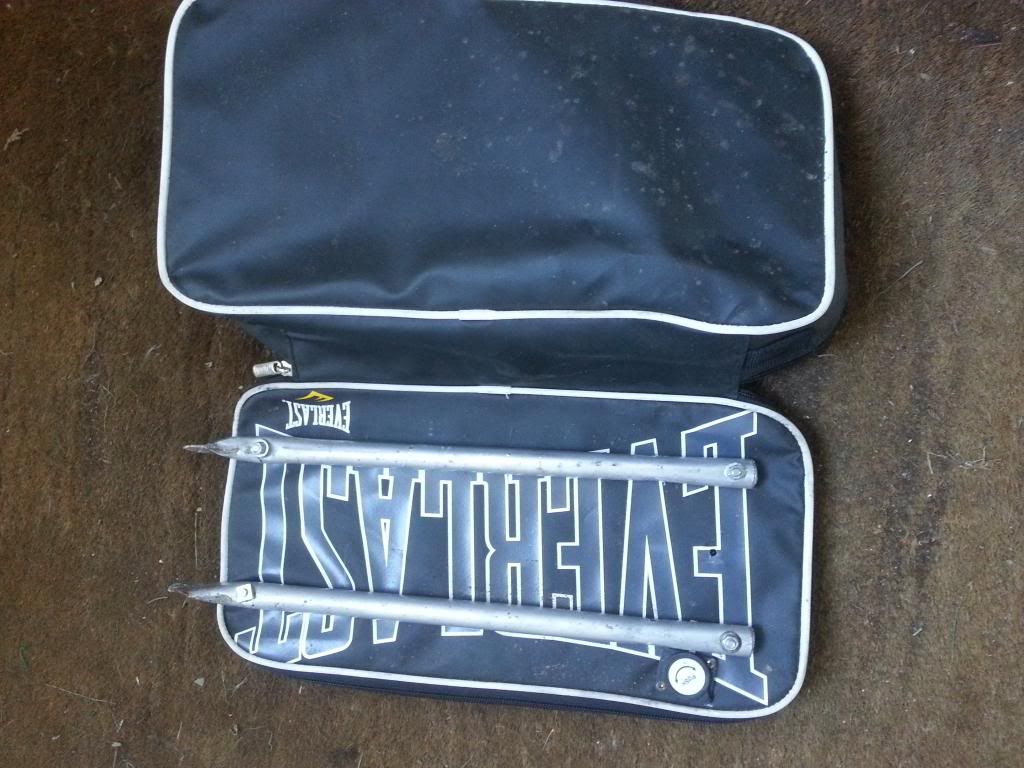
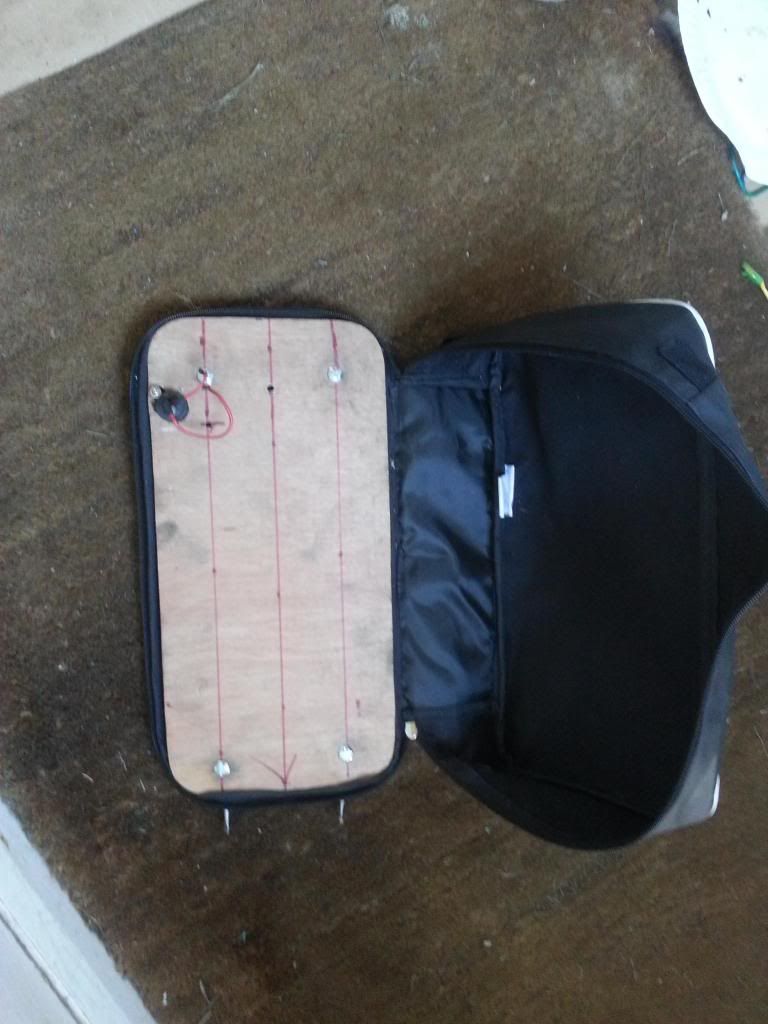
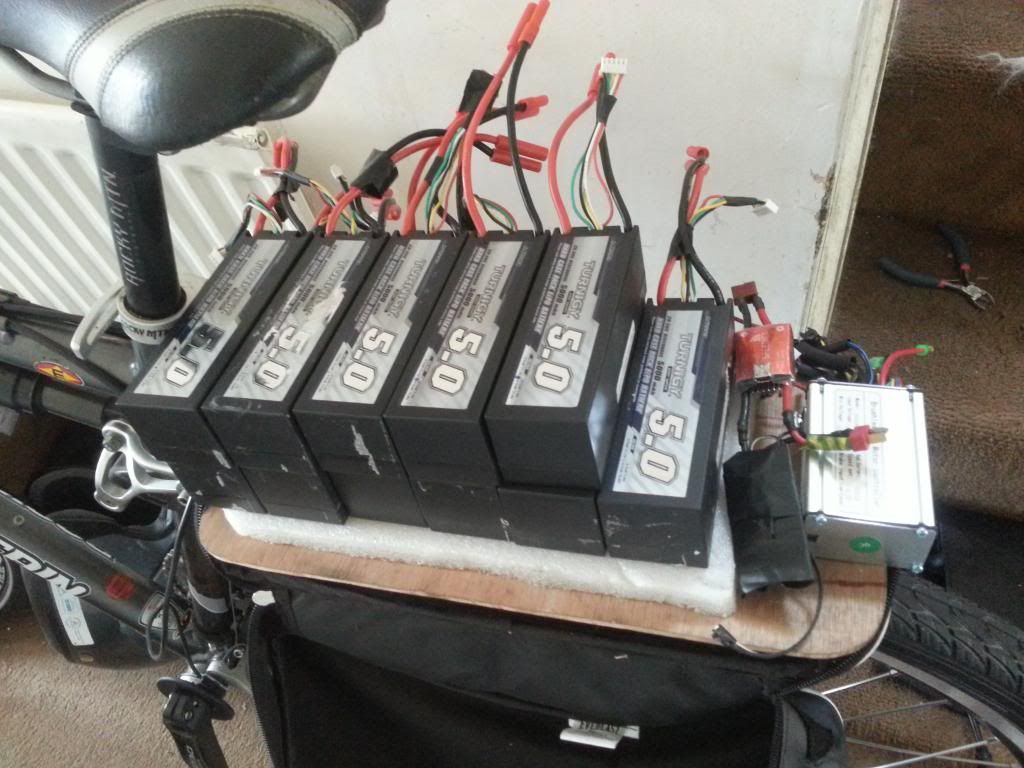
Nearly there now. I'm still thinking about installing the battery in the frame, but for now, it's my patent rack mount:


There's just enough room to get in 20aH of 12S lipos (12 x 4S 5aH), I'll make a harness so that I can gave them in 12S 5aH blocks, so that I can go out with 5, 10, 15 or 20aH depending on how far I want to go.


I'm going to use that Speedict for battery monitoring and a 4 FET master power switch. You can see them in the picture above.

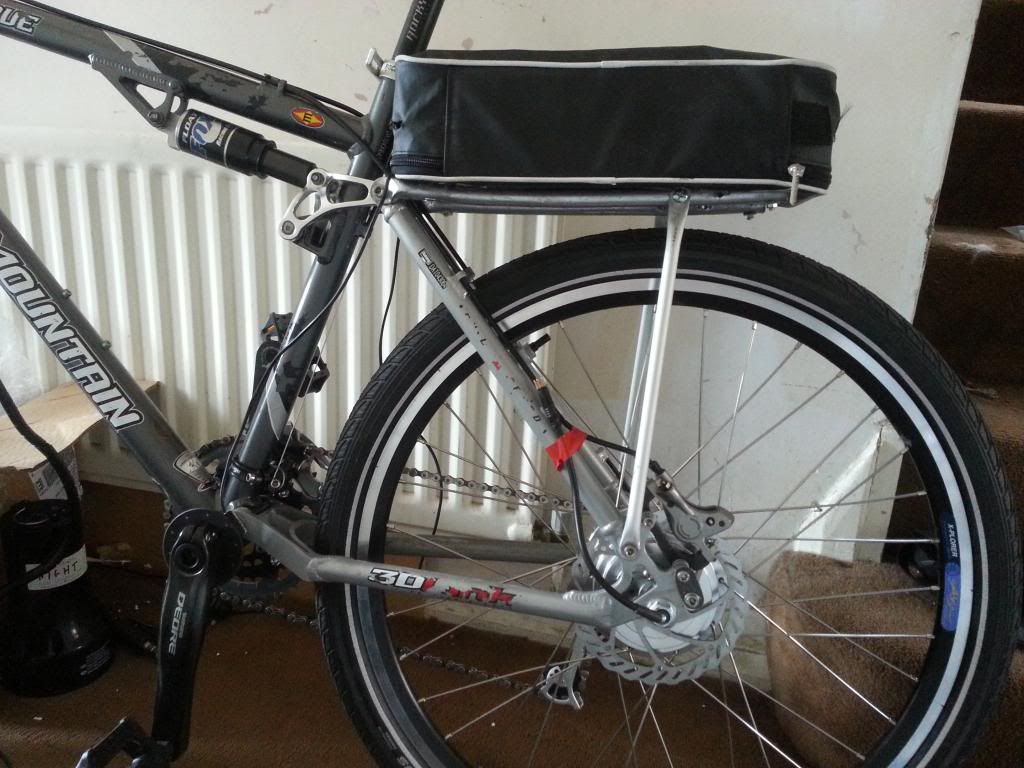
Looks (to me) quite neat when zipped up. The bolts that go through the pivots don't need to rotate, so the suspension isn't locked when they're used to mount the rack. I'll probably need to move the bag and base back a bit to allow for movement behind the seat-post. I lifted that rack off another bike just to see how it looks.:

 
D

Deleted member 4366

Guest
It's all finished now except a bit of tidying of the wiring and installing the lights. I tried it out tonight, and it's really nice. The handling and ride are superb - much better than I had hoped for. I can't wait to go out on a proper ride.


cwah

Esteemed Pedelecer
Jun 3, 2011
3,048
179
www.whatonlondon.co.uk
Excellent D8veh! really good!

I didn't know the xionga motor was so wide. Now your frame is wide enough to fit a cromotor in it ;)

Where do you source your rims? I may get directly some xionga motor like you do and order spokes (what size?) and rim separately?


ps: are you going to do a dual xionga like your other one? :)
 

cwah

Esteemed Pedelecer
Jun 3, 2011
3,048
179
www.whatonlondon.co.uk
Thanks D8veh. Do you mean that with 1 xionga you have the torque of 2 Q100H? :)

If that's the case, I'll probably get a motor and see if I can fit it to the lady bike :)
 
D

Deleted member 4366

Guest
Nearly. The Xiongda is still 60% efficient at 5mph. The Q100H would be about 40%.

I run mine at 20 amps, so input power would be about 20 x 36 =720w, output power would be about 432w.

2 x Q100H at 15 amps would be input about 1080w and output 432w

That means that the 2x Q100H at 15 ampswill make exactly the same power as 1 x Xiongda at 20 amps., but it would use less battery.
 
  • Like
Reactions: cwah
D

Deleted member 4366

Guest
Finished now with Baggood light, Lezyne pump and SKS Beavertail mudguards. It looks much better in the flesh. I used one of those expanding mudguard clamps that goes up the steerer tube to fix the light. I only had to open up the bolt hole in the light bracket, and the bracket fitted perfectly in the clamp. That's a nice way to fit a light if you can get hold of the clamp:


awol

Esteemed Pedelecer
Sep 4, 2013
1,216
374
There's just enough room to get in 20aH of 12S lipos (12 x 4S 5aH), I'll make a harness so that I can gave them in 12S 5aH blocks, so that I can go out with 5, 10, 15 or 20aH depending on how far I want to go.

Looks a really nice bike d8veh.
Wow is that 20aH's worth nearly 6kg? How is it all strapped down?
 

Rj3005

Just Joined
Aug 14, 2014
1
0
54
plus.google.com
Great build d8veh, I see you're using the same lipos that I I'm intending to buy for my build.... How far would 20ah take you?
Two questions about the motor you've put on eBay, which controller it comes with? And would you be willing to send it to Spain? (of course I would pay the extra shipping costs)
 
D

Deleted member 4366

Guest
It comes with the standard Xiongda controller. I could send it to Spain. If you want. I can sell it to you direct, which would be cheaper because no Ebay fees - say £170 plus shipping. I think the shipping cost will be a lot. I think it would be cheaper and quicker to get one direct from Xiongda.