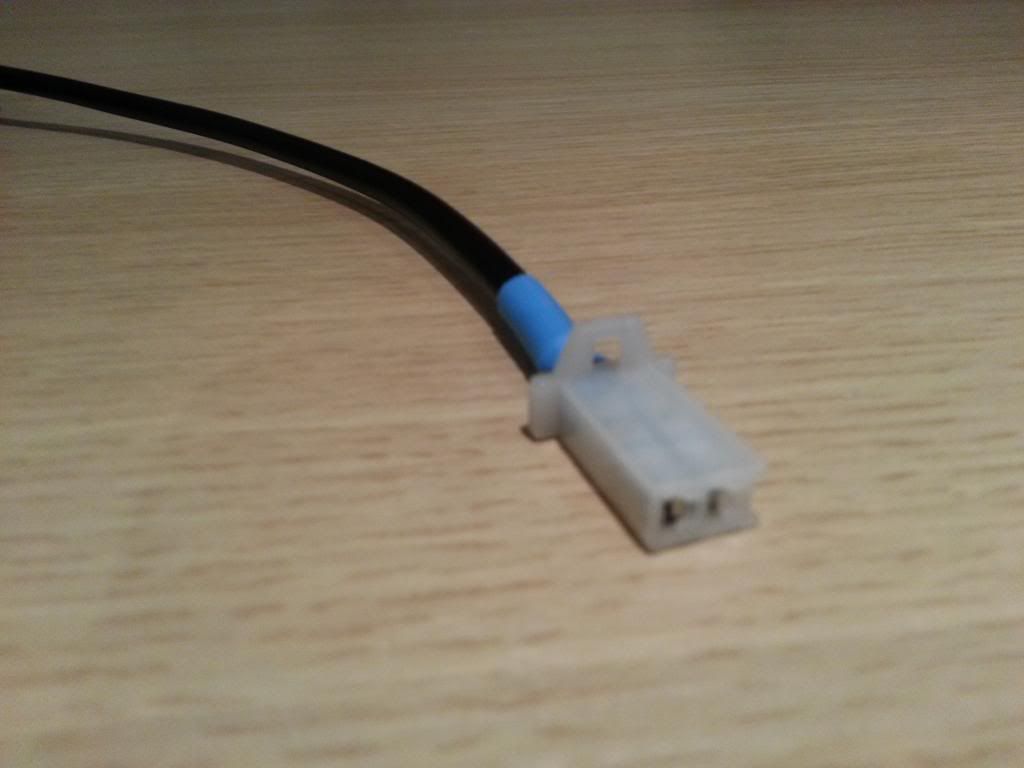
Magura hydraulic brake cut-off switch

103Alex1

Esteemed Pedelecer
Sep 29, 2012
2,228
67
Been reading various threads on ES about this (there seem to be many references dotted all over the place). Now I have a bit better understanding what I'm actually doing. A few points I'm still puzzled by tho'. As a reminder my brakes are Shimano XT hydraulic disc ones with a reservoir attached to the combined brake/gear shifter levers.

1) Where to site the switch

The only photo of these switches actually installed is here :

Endless-sphere.com • View topic - Magura brake pressure switch

These are approx vertical and there's nowhere else other than on the section running from handlebar end to front fork you could get them like that.

I'd not have picked that spot to put them given a choice tbh - the switch is quite heavy and likely to cause the cable to shake there and so I would probably have gone for somewhere it could be secured to the frame with a bit of protection underneath to prevent frame rub. Also means I need to allow an appropriate length of cable when fitting the connector for a longer run to the controller. The installation instructions say this which as above I find ambiguous :

20130207_130538[1].jpg

Another point mentioned on ES is that someone said the switch failed when they installed it too close to handlebars and inserted a 5" extension to take it further away from them involving re-bleeding system etc.

So does this all mean that the fluid should run air to ground through the switch for proper operation rather than left to right (or vv) through a horizontal orientation ? I kind of thought in a sealed system it shouldn't matter but others report so many issues getting this to work right I'd like to get it right first time if I can.

2. Mineral oil

I have got a 50ml bottle of Magura Royal Blood as it is quite clear the switch won't work with DOT4 oil and I'll knobble a £30 piece of kit if I use it.

Don't know what type of hydraulic fluid is in my system at the moment but let's say it could easily be DOT4 (bought the bike off someone else). Question then is - for this type of system with a reservoir do I need to bleed the whole thing dry before installing and won't there still probs be traces of old fluid left ?

Is there any way to flush the system and remove it all without replacing the brake cable itself ? Still leaves the built-in reservoir to think about. If I have to flush several times then I'm going to need more fluid ordering in for when I get back next week ;).

Not that easy to get these switches (most German suppliers are on 14-day stock procurement lead times or you pay your 30-odd Euros to e-bike easy again and wait a week if you mess up) .. and then you have to mod the new one on arrival all over again. Proper planning before attempting install worthwhile on this one methinks !
 
Last edited:
D

Deleted member 4366

Guest
If it were mine, I'd install the switch at the seat tube. For its function, it doesn't matter where you put it, but you want the wire in the most convenient place. Mounting it where the frame is "T" shaped, should help with tying everything down too.

I've had terrible trouble bleeding motorbike brakes before, which are nearly the same. I found the best way was to remove everything from the bike and hold it so that the bubbles go upwards. You need to leave it like that for a bit to give them time to reach the bleeding point, where they can be bled out.

I think that you should drain your old system completely, which means removing the bleed nipple completely with the cover off the reservoir, and hold the line vertical so that the oil drains out.
 

103Alex1

Esteemed Pedelecer
Sep 29, 2012
2,228
67
If it were mine, I'd install the switch at the seat tube. For its function, it doesn't matter where you put it, but you want the wire in the most convenient place. Mounting it where the frame is "T" shaped, should help with tying everything down too.

I've had terrible trouble bleeding motorbike brakes before, which are nearly the same. I found the best way was to remove everything from the bike and hold it so that the bubbles go upwards. You need to leave it like that for a bit to give them time to reach the bleeding point, where they can be bled out.

I think that you should drain your old system completely, which means removing the bleed nipple completely with the cover off the reservoir, and hold the line vertical so that the oil drains out.
That makes sense, d8veh - pretty much exactly where I'd planned to put it until I saw that photo on ES and the instructions saying "position the pressure switch so that the cable faces downwards". But I think that must just mean when you're bleeding the system to stop air bubbles getting trapped at the aperture in the switch.

Going to be a bit of a baptism of fire into brake work this by the looks of it :eek: When you say about holding the line vertical so oil drains out does that mean I detach at the nipple, unclip everything from the frame, stand on a chair and hold it up vertical above the reservoir so oil runs down into that ? Then presumably use a syringe or something to suck it all out of the reservoir and clean it out before refitting and filling with the new oil ? Guess it'll start becoming clear I do the job :).

I got 3 50ml syringes and a load of windscreen washer tubing in anticipation of a b'stard of a job. The hole in that switch is really small so just thinking about it logically any air might easily get trapped there when filling more readily than in a pure line.

Maybe when I've got all the existing fluid out I can hold the line up vertical, attach a syringe to the raised nipple end and suck the new stuff up the line from the reservoir or something till it's filled (air rises, right !) then hold the end whilst it's reconnected at the brake... It's going to be interesting lol. Better put a few hours aside for this one I think ..
 
Last edited:
D

Deleted member 4366

Guest
It seems that you've got a good understanding of what's involved. I've never done a bike one, so I'm just applying what I learn't from motorbikes. Maybe someone that's done a bike one will come along and give some ideas.
 

mutmost

Pedelecer
Jun 24, 2009
62
0
I have one of these switches and it is fitted fairly close to the brake lever , (where everything crosses over) for support. they are wrapped together with that plastic spiral wrap stuff.
It works well but it was a bit of a pig to bleed as if it leaks it is hard to see the fluid on the black pipe (or it was for me).
The other thing i have found is as you adjust for pad wear the lever can vibrate enough to push the fluid to activate the switch or from a standing start when you let go nothing happens as the switch is still "on". Now i am aware i just flick the lever out and all is well again. This was on an old rim which had a split in it so the pads were not as close to the rim as i would have liked as I could adjust out this fine buckle( which was a split in the rim making it wider over a 150 mm length).
i have not worn these pads down with this new backwheel to see if i still have the issue with the pad wear.
With hindsight I would have mounted it nearer the back and contoller to shorten the cable run as suggested.

Hope that helps (it has been on the bike since about March last year without any issue)
 

103Alex1

Esteemed Pedelecer
Sep 29, 2012
2,228
67
I have one of these switches and it is fitted fairly close to the brake lever , (where everything crosses over) for support. they are wrapped together with that plastic spiral wrap stuff.
It works well but it was a bit of a pig to bleed as if it leaks it is hard to see the fluid on the black pipe (or it was for me).
The other thing i have found is as you adjust for pad wear the lever can vibrate enough to push the fluid to activate the switch or from a standing start when you let go nothing happens as the switch is still "on". Now i am aware i just flick the lever out and all is well again. This was on an old rim which had a split in it so the pads were not as close to the rim as i would have liked as I could adjust out this fine buckle( which was a split in the rim making it wider over a 150 mm length).
i have not worn these pads down with this new backwheel to see if i still have the issue with the pad wear.
With hindsight I would have mounted it nearer the back and contoller to shorten the cable run as suggested.

Hope that helps (it has been on the bike since about March last year without any issue)
Yes that's helpful and interesting. I assume you have hydraulic rim brakes ? I'm fitting to a bike with hydraulic disc brakes so hopefully they'll be less sensitive to pad wear but the position of the switch on the line seems as if it might make a difference as to how much the brake lever is depressed for the switch to kick in ?

If it's close to the handlebars then switch might be prone to engaging early whereas if further back / along the cable might be less 'keen' and only kick in when the brakes are actually being applied... ? A guy on ES had to insert a length of cable between handlebars and switch to increase line distance from the brake levers in order to to stop it falsely activating with minute brake lever application. Perhaps the standing start issue you got was for the same reason.

Nonetheless, it's reassuring to hear the switch has been reliable - many thanks :).
 

tillson

Esteemed Pedelecer
May 29, 2008
5,249
3,197
When I bled my Magura brakes, I used a kit purchased for about a fiver off eBay or somewhere. It consisted of a very very very big syringe, a length of tube and some screw in nipples which the tube pushed onto. That Royal Blood is readily available from Halfords at about one tenth of the price. I'm away from home so can't check, but I seem to remember that it is Citroen suspension fluid / mineral oil (not DOT brake fluid). Google will tell you. It's certainly not some mystical creation brewed exclusively for Magura. They just re-sell an existing product at 1000% mark up.

To bleed the brakes, you need to get the calliper higher than the brake lever, unscrew the blank and screw the temporary tube and nipple into the brake lever. Unscrew the bleed port on the calliper and screw in the second temporary tube and nipple. Get a nice big syringe full of your Citreon fluid, push it onto the temporary brake lever tube and squirt it all through, catching what comes out the other end. this should both flush and bleed your system. Remove all temporary pipes. Re-fit blanks.

Just check the fluid bit, I sure that it's Citroen / mineral oil from Halfords and I'm sure I bought my bleed kit off a guy on eBay who was putting them together. Can't check at the mo, I'm on Holiday.
 
Last edited:

103Alex1

Esteemed Pedelecer
Sep 29, 2012
2,228
67
Thanks tillson. Interesting re: the Citroen fluid - usual story on the branding by the looks of it ! Should be OK with just syringe & tubes as the brakes are older style Shimano with a reservoir next to the brake lever, just the switch being Magura needing different oil. So should be all set to have a go when I get back home later this week. I'll follow a similar procedure best I can :).
 

103Alex1

Esteemed Pedelecer
Sep 29, 2012
2,228
67
Right ... another step forward - managed to crimp and solder the brake switch wires to the female coupling connector d8veh kindly sent me tonight, so the switch can now be plugged in to my controller.


Guess that's my cue to have a go at fitting it. Somewhat apprehensive as the brakes work so well right now ... but it's an essential safety measure. An eBike with a throttle and no brake cutoff is a no-go and so it needs to be done. If I get the chance tomorrow I'll have a go.
 

amigafan2003

Esteemed Pedelecer
Jul 12, 2011
1,389
139
Magura fluid is just 10wt mineral oil with a bit of blue dye added. You can use an similar weight non corrosive fluid (i.e. not brake fluid) but bear in mind your warranty would be void.

Something like this would be fine.

People have even had success with vegetable oil when nothing else is available.
 
Last edited:

Scimitar

Esteemed Pedelecer
Jul 31, 2010
1,772
40
Ireland
I fell about laughing/gasping in horror when I saw the price of the specialised brake fluid and also makers' own-branded shock oil.
I knew they were at it, of course, but such profiteering on the backs of the technically-challenged is unjustified and pretty descpicable.
 

103Alex1

Esteemed Pedelecer
Sep 29, 2012
2,228
67
Well, I came as close to throwing the bike across the driveway as I've ever done today. Took the plunge and cut my brake cable, finished off the ends all ready for the switch fitting and feeling good.

Then I opened up the zip-seal bag I'd carefully put all the parts for the switch in and discovered one of the brass nipples that has to fit into the end of the cur cable ends is missing. I've had the whole place upside down looking for it - in every single bag. It's gone.

I can only assume it got lost when I was having to keep clearing up the kitchen for people to use every time I had the bits out to do work. Without this the switch can;t work. So I am another week set back getting the bike on the road, can't ride it in the meantime as I've cut the brake cable now - and likely £30+ for another switch if there are any left in stock in Germany.

I am VERY p!ssed off. Seems like this is taking an eternity to get what are essentially pretty straightforward things achieved. Am trying to stay organized and have now managed to usurp some store space to work in so I don't have to keep getting out and putting every tool and part away on a daily basis. But this sort of thing is unbelievably frustrating.

There is no-one to blame but myself but it feels like I am trying to push a car uphill right now. The idea of having the bike working for March seems like a pipe dream with every new delay... plus I am in massive arrears with some work trying to catch up from being away last week and clients hasstling me daily..

Am holding on to the belief that the end result will make it all worthwhile - but starting from a standpoint of having no basic mechanics' / workshop tools I think it's likely that my final bill (allowing for mistakes and experiments) will be as much as buying a UK bought kit. The specs may be nicer but the set-up costs would only be recoverable if I carried on building bikes and using the tools and know-how.

In many ways it is just as well I can't afford to buy a hi-powered kit. I think if I could have I would've taken the easy way out and drawn a halt.... and that's something I know I would look back on and regret having done. It's quite an emotional journey sometimes when you start from the standpoint of trepidation rather than familiarity. I think it helps if you ease off on self-imposed deadlines and targets when you're doing something that's so new to you.

So now I just need to decide whether to spend the money and take the further delay ordering in another switch just for a tiny brass nipple. The company I bought off never reply to my e-mails and don't answer their phones so frustrating as I can;t even find out whether I can just buy replacement inserts (I doubt it) so guess I am now over a barrel and have no choice. I guess not everything can run smooth.

Anyhow, I'd put the whole day aside to get this job done and learn to bleed brakes etc. .... so I think I will pack everything up and get some work done instead. Will ease the feelings of guilt somewhat at least :).

I hope tomorrow is a better day.
 
Last edited:

103Alex1

Esteemed Pedelecer
Sep 29, 2012
2,228
67
I've found it for you....

It's in the first photo :p


Sent from my iPhone using Tapatalk
I know - I looked on my phone to see whether it had been laid out or whether it had maybe come incomplete. The f*****g thing has gone walkies and is in the hands of the borrowers or binmen probably. I should have just spent the £75 this is going to wind up costing me towards fitting new separate hydraulic eBike brakes and separate shifters. At least the mech would've been upgraded at the same time.:rolleyes:

Trying to control the frustration / despair to be honest. A guaranteed next day delivery order placed on Sunday (non-bike related) turned out not to have even been dispatched yet for something I desperately needed for tonight too - have had to fork out £80 getting stuff from somewhere else for tomorrow instead, another day waiting in for b****y couriers tomorrow and then have to try to cancel the one which is late and get my money back for the original order.

It's one of those days you just want to give up and go back to bed !
 

103Alex1

Esteemed Pedelecer
Sep 29, 2012
2,228
67
Is this the part you've lost?
It looks very similar ... I'll order one and see if it's the same. If it works I'm going to give you a "virtual bear hug", amigafan2003... prospect of another week's delay got me more down than the cost of a switch !!!

Guess I can't be the only one to drop tiny bits of stuff on the workshop floor never to be seen again :rolleyes: :).

Positive thoughts now .... christened the dremel tool and used it like d8veh explained. Perfectly flat finish and the flat sanding part did a great job of cleaning up the edges after I'd trimmed off the ragged bits of cable sheath with a stanley knife.

I also learned that when you squeeze the brake lever with the cut hose dangling, what's inside it sprays nicely onto the floor (thankfully missing my pedals and frame and soaking the newspapers I had cunningly put down "just in case" instead lol).

It seems far less of a big deal when you're doing it than reading about how to do it on a computer screen. :cool:
 

103Alex1

Esteemed Pedelecer
Sep 29, 2012
2,228
67
Consider hug sent !!!! Fingers crossed. Felt like a right banana earlier on today :rolleyes:
 

amigafan2003

Esteemed Pedelecer
Jul 12, 2011
1,389
139
If you're anything like me Alex you'll find the orginal exactly 5 mins after the replacement pops through the letterbox!

Oh and re dopping stuff in the workshop - the strongest known force in the universe (stronger than the suns gravity, stronger than a black hole) is that 1cm gap under your workbench - drop something on the floor and woosh - straight under that gap - even if the item you dropped was on the other side of the room! It's exactly the same when in the kitchen - drop a carrot - whoosh - straight under the fridge!

Dyson should start making thier vacumn cleaners from the bottom of fridges!
 

103Alex1

Esteemed Pedelecer
Sep 29, 2012
2,228
67
If you're anything like me Alex you'll find the orginal exactly 5 mins after the replacement pops through the letterbox!

Oh and re dopping stuff in the workshop - the strongest known force in the universe (stronger than the suns gravity, stronger than a black hole) is that 1cm gap under your workbench - drop something on the floor and woosh - straight under that gap - even if the item you dropped was on the other side of the room! It's exactly the same when in the kitchen - drop a carrot - whoosh - straight under the fridge!

Dyson should start making thier vacumn cleaners from the bottom of fridges!
That is SO true.... I try to put newspaper sheets down now as they seem to be better than many things at catching stuff which you drop when you're fitting stuff.

Back in October when I got my ready-built bike (and basically didn't know a gear shifter from a brake lever, near as) I made the fatal mistake of trying to fit phone holders and clamps on with the bike on a mildly cambered tarmac driveway (so much nicer working outside if it's not freezing). But soon learned that any nut or bolt dropped on a driveway is almost certain never to be seen again... and any shop-bought accessory is guaranteed to come with washers and nuts that make a bid for freedom every time they are brought within half an inch of a screw :eek: