Bms battery 36v front wheel with bottle battery installation and review

Julien

Finding my (electric) wheels
Dec 8, 2013
20
2
Hi everyone !
I am starting a new thread to share my thought on the 36v front wheel with bottle battery with s06p controller included.

As this was my first conversion I went for this kit that has everything to get going :
http://www.bmsbattery.com/ebike-kits/576-250w350w-q-85100sx-motor-e-bike-kit.html

As expected shipping cost were pretty much equals to the actual price kit but still significantly lower than what I could find here in Switzerland.

So let's start by a few unboxing shots :

Below is the bottle battery with charger. Quite huge but overall built was convincing. It's a li-ion 10.4ah with a s06p controller included. There is also an USB output. The is probably the weakest part as it is rated 10 amp continuous discharge rate ... Might miss some torque ...


Then the brakes, speed sensor, pas and LCD meter :


Throttles (i added a few additional ones to have some flexibility )


Motor cable, torque arms, and some other random parts :


The motor laced on 26" wheel :


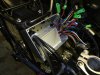
Ku63 and ku93 controller and case. To be ready to move to lipo on my 20" folding cyclamatic and on this bike if i 'm not satisfied with torque :)

Finally a shot of the bike itself :


Next time : installation

Feel free to comment :)

Julien
 
Last edited:

Alan Quay

Esteemed Pedelecer
Dec 4, 2012
2,351
1,076
Devon
Looking good, but do yourself a favour and destroy those plastic brake levers before they kill someone :)
 

trex

Esteemed Pedelecer
May 15, 2011
7,703
2,671
brake levers (Wuxing) are painted black aluminium not plastic.
I think 10A continuous does not give good enough torque on a 700C wheel.
 

Alan Quay

Esteemed Pedelecer
Dec 4, 2012
2,351
1,076
Devon
brake levers (Wuxing) are painted black aluminium not plastic.
I think 10A continuous does not give good enough torque on a 700C wheel.

Assuming they are, then that's cool. If not, then really, get rid of them.
 
D

Deleted member 4366

Guest
Those controller boxes would be great if only you could get the connectors in. You can save a bit of space by soldering the halls and phase wires directly after cutting off the connectors. You don't need connectors at the controller anyway because there's one near the motor.

If you use those KU63 and KU93 controllers, don't forget that the thin red ignition wire with the thick red battery one needs to be connected.
 

patpatbut

Esteemed Pedelecer
Apr 25, 2012
859
79
I noticed you bought 328rpm motor with 28 wheel. I do not think the torque will be enough.

Also, your bike looks like 26 inch...how you gonna fit?

Patt
 

Julien

Finding my (electric) wheels
Dec 8, 2013
20
2
Hi everyone !
Post edited, it is indeed a 26" bike and matching 26" wheel, my mistake ...

I'm actually almost done with installation and I will update with details later one. The wheel run but lot of frustration involved with installation... Mostly due to lack of instructions and cable management ...
Hope to commute with it tomorrow and record perf to share with you guys
 

Geebee

Esteemed Pedelecer
Mar 26, 2010
1,256
227
Australia
Julien, I would suggest a local ride and recharge before attempting the commute unless short, the first cycle of the battery pack will most likely be a lot shorter than normal, it usually take a few charges to settle down but the first charge can be very short.
 

patpatbut

Esteemed Pedelecer
Apr 25, 2012
859
79
Test it out locally first before going to a long distance.

You need to be carefully going uphill with full throttle. Make sure you pedal hard as well

Pat
 

Julien

Finding my (electric) wheels
Dec 8, 2013
20
2
Thanks for your replies, I am also worried about the output of the battery .... But I did not want to go straight to high output batteries as the price tag is significantly higher and I do want to involve some pedaling as I also need to lose some weight, the basic idea is that my commuting is mostly downhill on the way forth and uphill and the way back, I am hoping to get to work quickly without much sweating involved and change to sportswear and burn some fat on the way back :)
Yet choosing the 328rpm motor might have been a little top much, slow winded motor might have been more fitting. Hopefully I will be able to update this post with installation details this weekend :)
 

Julien

Finding my (electric) wheels
Dec 8, 2013
20
2
All right !

So to installation ...

First I mounted the motorized wheel to the front.
Nothing to difficult apart from the C washer provided that did not fit between the fork.
Would have needed to bend the fork to fit them so I installed them outside of the fork.
As the output of the controller will be below 16 amp at best and torque will be limited, I didn't fit the torque arm. We will see how that work out.
Few pics :


Then I tried to arrange the new brakes and throttle. Men that was a pain in the ass ...
Good thing I bought different kind of throttles. In the end with the gears level on both end I went for the thumb throttle to accommodate with this setup.
In the end I think it will do the trick nicely. It would have been great to have a twist throttle but with these gears lever it is just not possible to have decent accessibility ....

Here is a look at the final setup :


On to controller wiring, diagram was useful but I ran in an unexpected issue ... The connector of the thumb throttle wouldn't fit on the controller. There were some additional connectors in the package so I dug out my soldering iron and try to solder the connector but I failed miserably ... I did not solder anything for 15 years and probably reduced my lifespan with the stress induced ;-) well I missed cramping tool so it was not that much of a surprise ....
Luckily I found an another throttle that has the right connector and cut it and soldered it to my thumb throttle. Crisis averted :)

I went for sensorless operation. No pas to install, l got a little lazy/frustrated. Tried to find the shunt without success, everything was kind of covered in bakelite or something.
Here is a pic :


With the battery holder :


And the most frustrating part, cable management ...
First the bike set up itself was challenging as the brake cables run along the frame and reduced the "bus" wire routing significantly.
I choose to go along the upper part of the frame, not very stealth but I could not think of any better idea ...
The bottle holder barely fit on my bike and the controller output was very close to the frame and did not allow for much room.
I made a mistake while building the wire bus, I thought that it would have been neat to hide the cable excess inside the controller housing ... Yeah you are allowed to laugh that was a dumb idea. There is just no room in that controller ...
Another issue was the motor cable length that was short as hell and made me go apeshit


In the end I made a nasty cable node and finally got to fit this thingy. If I ever find the courage to redo it (or most likely if I run into a failure) I will reduce length and make a soldering job to make it more neat.
Here is the result :


So here we are ready for a test run :


But Murphy is always here to annoy you ... Flat tire on the front wheel. Must have ****** up when switching wheels ....

But hey it would have been depressing to stop there so here is a link of the bike running :

Let me hear your comments :)

Julien
 
D

Deleted member 4366

Guest
All's well that ends well. It's never as easy as you think. Mind you, it's much more satisfying to get it running when you've had loads of difficult problems to overcome.

Just a couple of comments:

1. You've installed the motor axle the wrong way up. We haven't had that for over a year, and now we got three in one day! The wire has to exit downwards.

2. You mentioned running it sensorless. None of mine have run properly like that. Please let us know what happens when you ride it.
 

Julien

Finding my (electric) wheels
Dec 8, 2013
20
2
Hi d8veh !
Thanks for your feedback, it is indeed more time consuming than I expected but you are right it is very satisfying when you get to a point when the wheel spins :) I will let you know how sensorless works out for me. Concerning the axle, is it cosmetics or mandatory ? Because I don't have any motor cable length to spare ....
 

trex

Esteemed Pedelecer
May 15, 2011
7,703
2,671
I would put a bit of silicon glue to waterproof the point where the motor cable enters the axle. Other than that, the motor is very quiet, well done.
Can you find a good hill to give the bike a climbing test?
 
D

Deleted member 4366

Guest
The cable has to exit downwards to stop the water going in. If you ride in the wet, all the water that falls on the cable runs down it and gets funneled in to the motor. If you don't ride it when it's wet, it won't be a problem, otherwise you have to find another way to stop the water going in. Whatever you do, it has to be totally sealed. Maybe you could make a shroud out of old inner-tube. Cut a disc, poke a hole in the middle, thread it down the wire and cable-tie it just above the motor.
 

Julien

Finding my (electric) wheels
Dec 8, 2013
20
2
Thanks I understand better the issue. I will try Silicon or maybe I can fit a heatshrink tube. I don't think I can the necessary cable length to change the orientation ...
 

trex

Esteemed Pedelecer
May 15, 2011
7,703
2,671
you can use 10mm-13mm heat shrink sleeve over the cable to keep water away but should still put some silicon inside the sleeve before shrinking it, otherwise water can get through the joint
 

Julien

Finding my (electric) wheels
Dec 8, 2013
20
2
Thanks for the tip, I will try do to something about it when I will fix the flat tire. For now I have two "child security gate" ( don't really know how that translate to English ) to install and some modding to do to allow the cat to go through ... Damn cat
 

eHomer

Esteemed Pedelecer
Aug 20, 2012
635
164
Neat and tidy wiring is easy to miss out on when doing a DIY ebike conversion, even with a kit.

As you found, the connectors are sometimes mismatched, cable lengths are either too long or too short, and controller housings are way too small to hold any excess wire and connections.

In all my builds, I use a Maplin weatherproof die cast aluminium box to house the controller and connections and excess lead lengths. I bolt the controller firmly inside, so that the whole box becomes a heat sink, greatly increasing the size.

After asking questions on here, I also bought spare multi connector holders and crimp male and female terminals, they're ridiculously cheap in quantity, so I now have a neat little compartmented box with a dozen or more of each as spares. I'd never try soldering the tiny crimp connectors myself. I always use a very small pair of pliers and fold the flaps over carefully after stripping the wire insulation. With a little practice, you can achieve a very satisfactory crimp. Heat shrink sleeving in various sizes then tidies thing up very professionally, as well as making the wiring much more weatherproof and "wear" resilient.

maplin ally box.jpg